The Ultimate Guide to Configure and Optimize Maskfog Proxy

Many platforms flag activity when you manage multiple accounts for social media, e-commerce, ads, and similar use cases. This often leads to restrictions or even a permanent ban. Anti-detect browsers help users create separate browser profiles. This helps your accounts stay isolated.
But these profiles don’t provide enough protection on their own. Therefore, you need reliable proxies to avoid detection and grow safely. This guide focuses on Maskfog, an anti-detect browser. Learn how to configure and optimize a proxy with Maskfog to ensure your setup always runs smoothly and privately.
Why Use Proxies with Maskfog?
Maskfog features like multi-account management, geo-targeted browsing, and scaling operations require proxies. They connect each online profile to a separate IP address. So, Maskfog works best when paired with reliable, trusted proxies. This helps keep your identity secure.
You keep your accounts from being linked or flagged by making each one look unique online. Almost every platform can notice it if you use the same IP address for every profile. This is where proxies can help. They allow you to surf the internet or use your required platforms anonymously.
Here’s how proxies support the features that matter most:
- Multi-Account Management: This feature ensures each Maskfog profile has a unique digital fingerprint. All proxies ensure every profile uses a different IP address, which prevents platforms from linking multiple accounts to one IP.
- Geo-Targeted Browsing: A proxy enables geo-targeting by routing traffic through IP addresses located in specific cities or countries. This makes each profile appear as if it is accessing the internet from the selected location. Thus, users can maintain consistency across platforms by aligning proxy IP with the browser’s configured location.
- Scalable Account Operations: Proxies enable safe management of a large number of accounts. They support unique or rotating IPs for traffic distribution to minimize the risk of mass bans, especially when scaling operations.
- Cloud Phone: Proxies assign a unique IP address to each virtual mobile environment. This ensures every profile operates from a separate, isolated connection. The feature pairs cloud-based mobile instances with dedicated proxies. So, users can safely manage multiple accounts on mobile platforms without triggering platform security systems.
Step-by-Step Guide to Setting Up Proxies in Maskfog
Setting up proxies in Maskfog takes just a few steps. First, download and install the Maskfog browser. Then, follow these simple directions:
1. Create a new profile by clicking on lick on the New profile to get started. Next, click on Custom under Proxy. Now enter the key details such as Name, Group, Browser, and User Agent.
Note: You can use the randomly generated User Agent. Otherwise, click the Change button next to get a new one. You can also type in a custom user agent if you want.
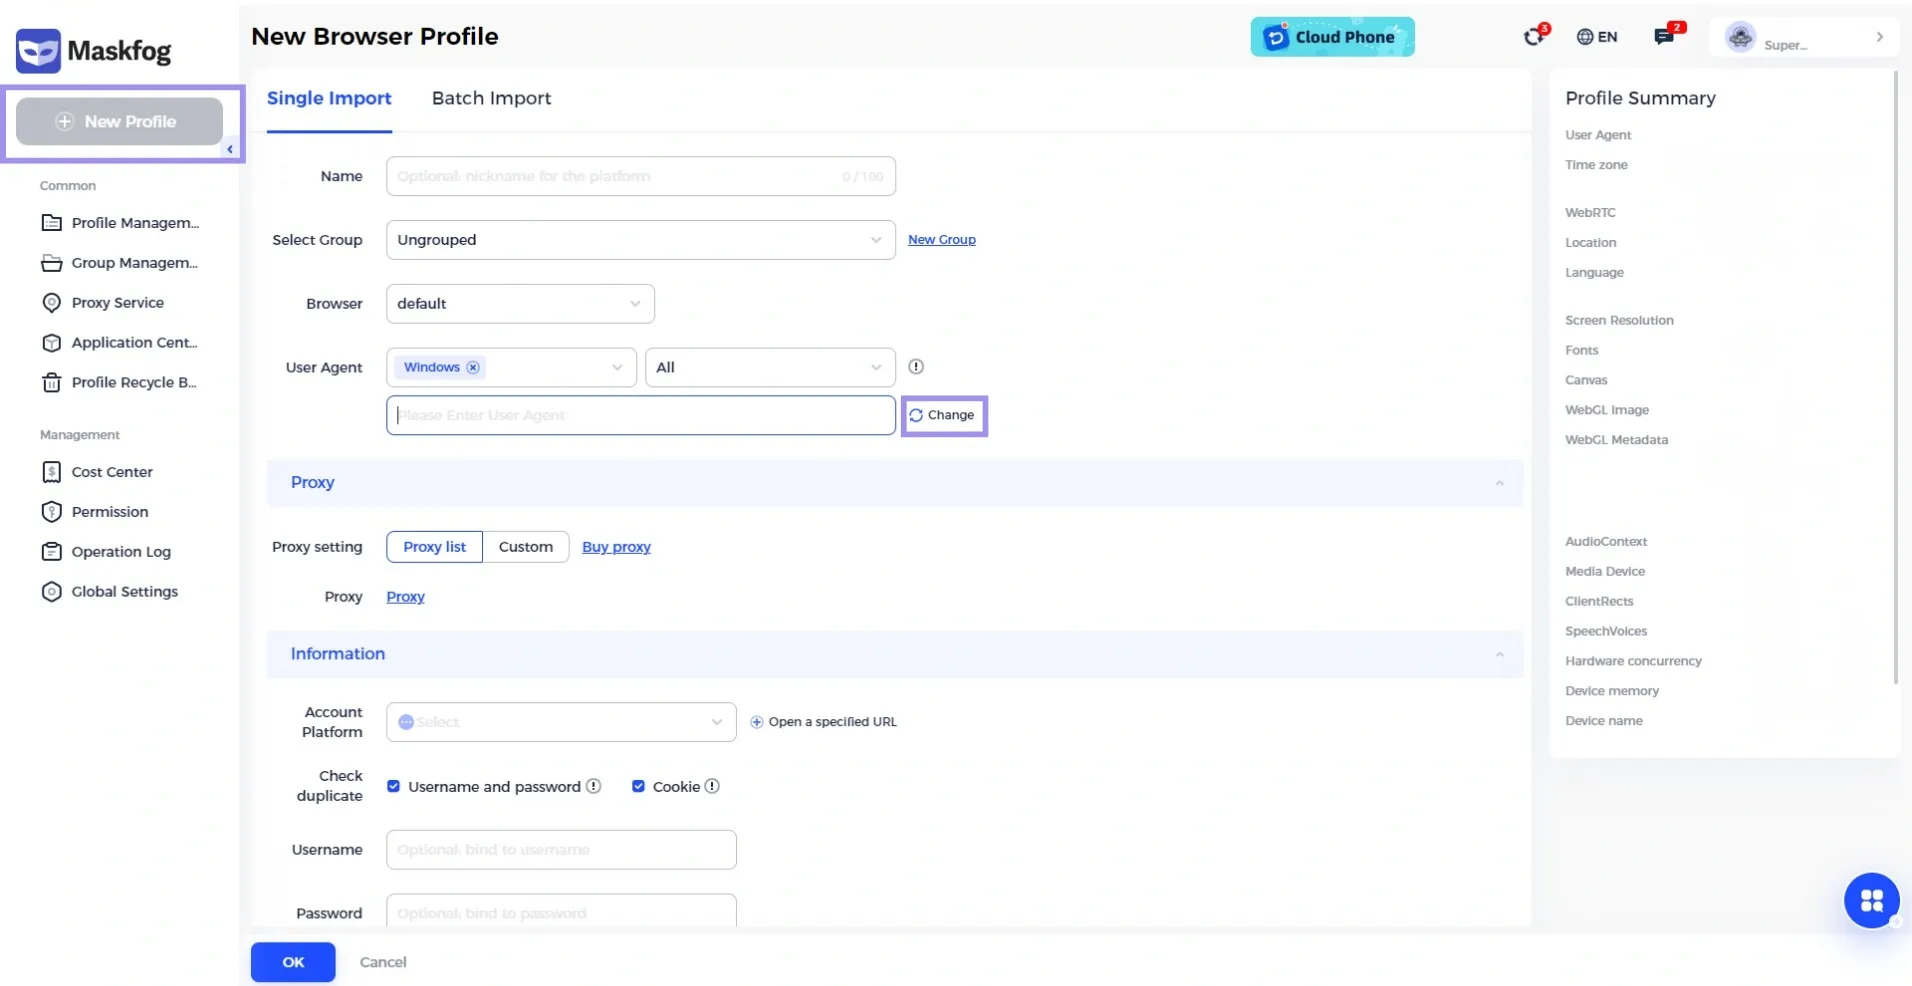
2. Navigate to the Proxy section and click on Proxy.
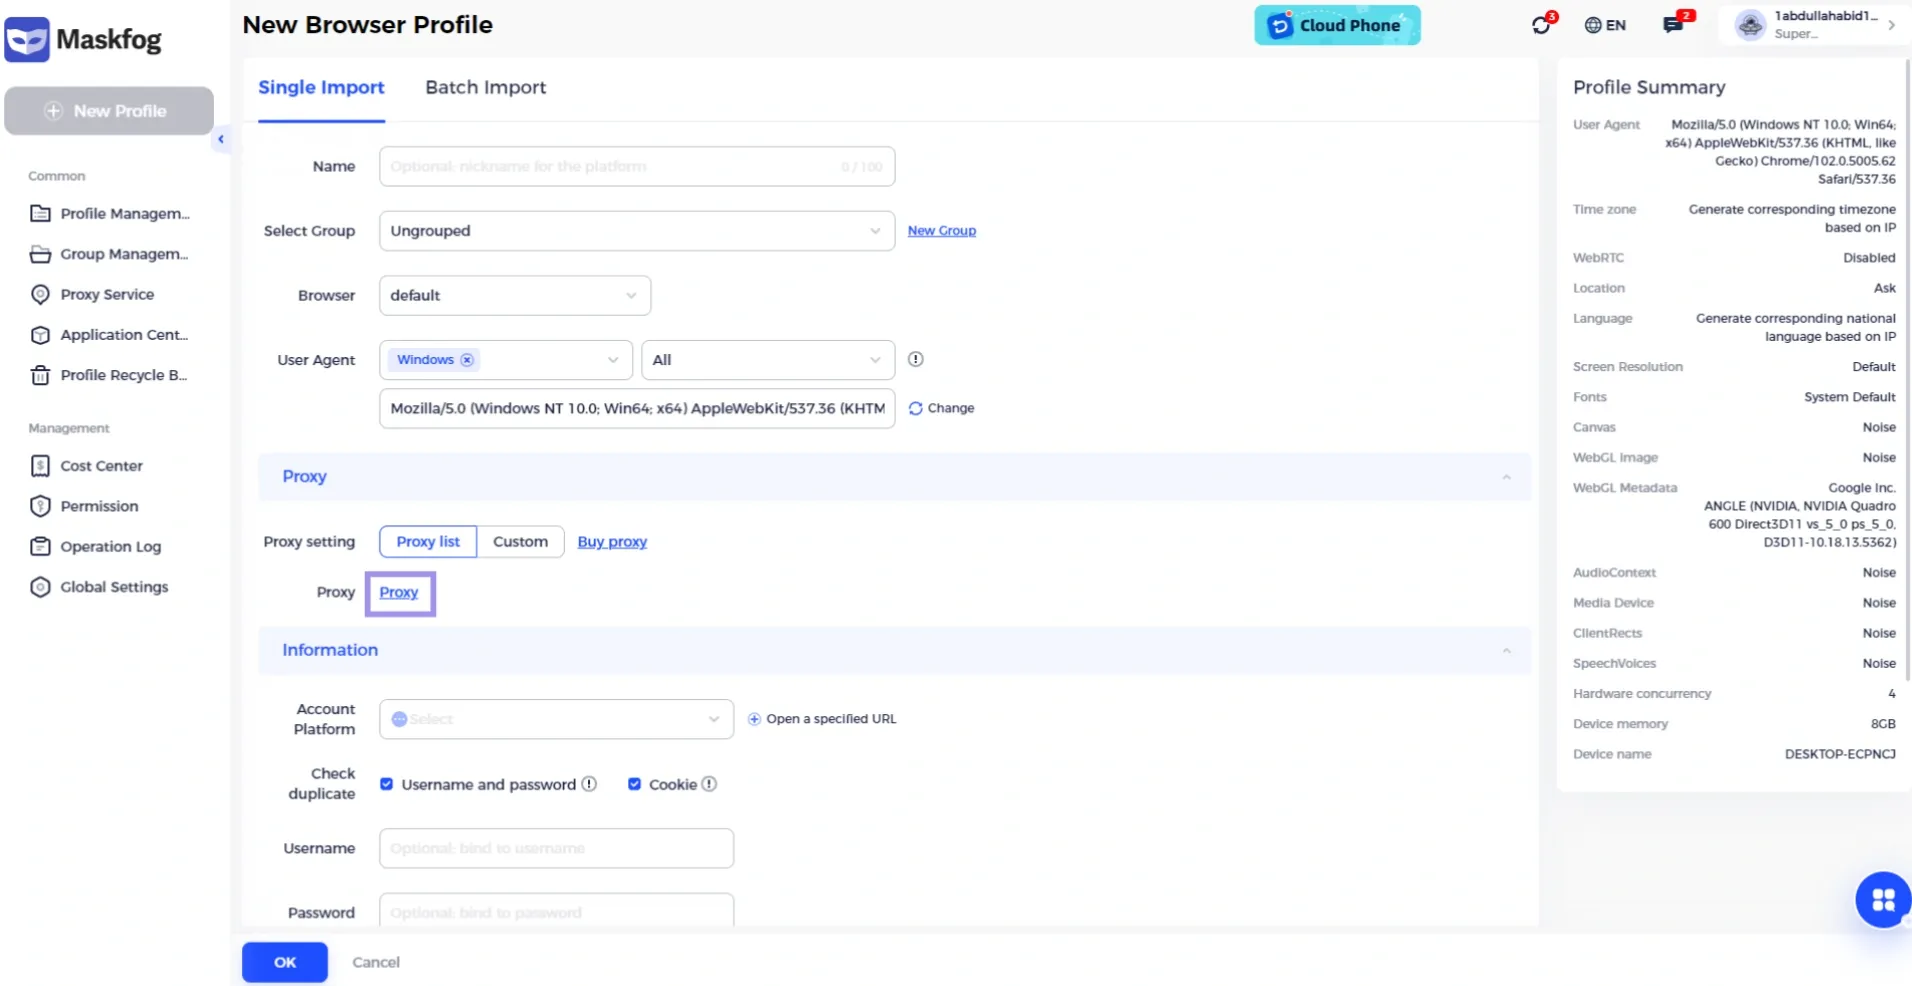
3. Now, select any profile that you want to configure from the list.
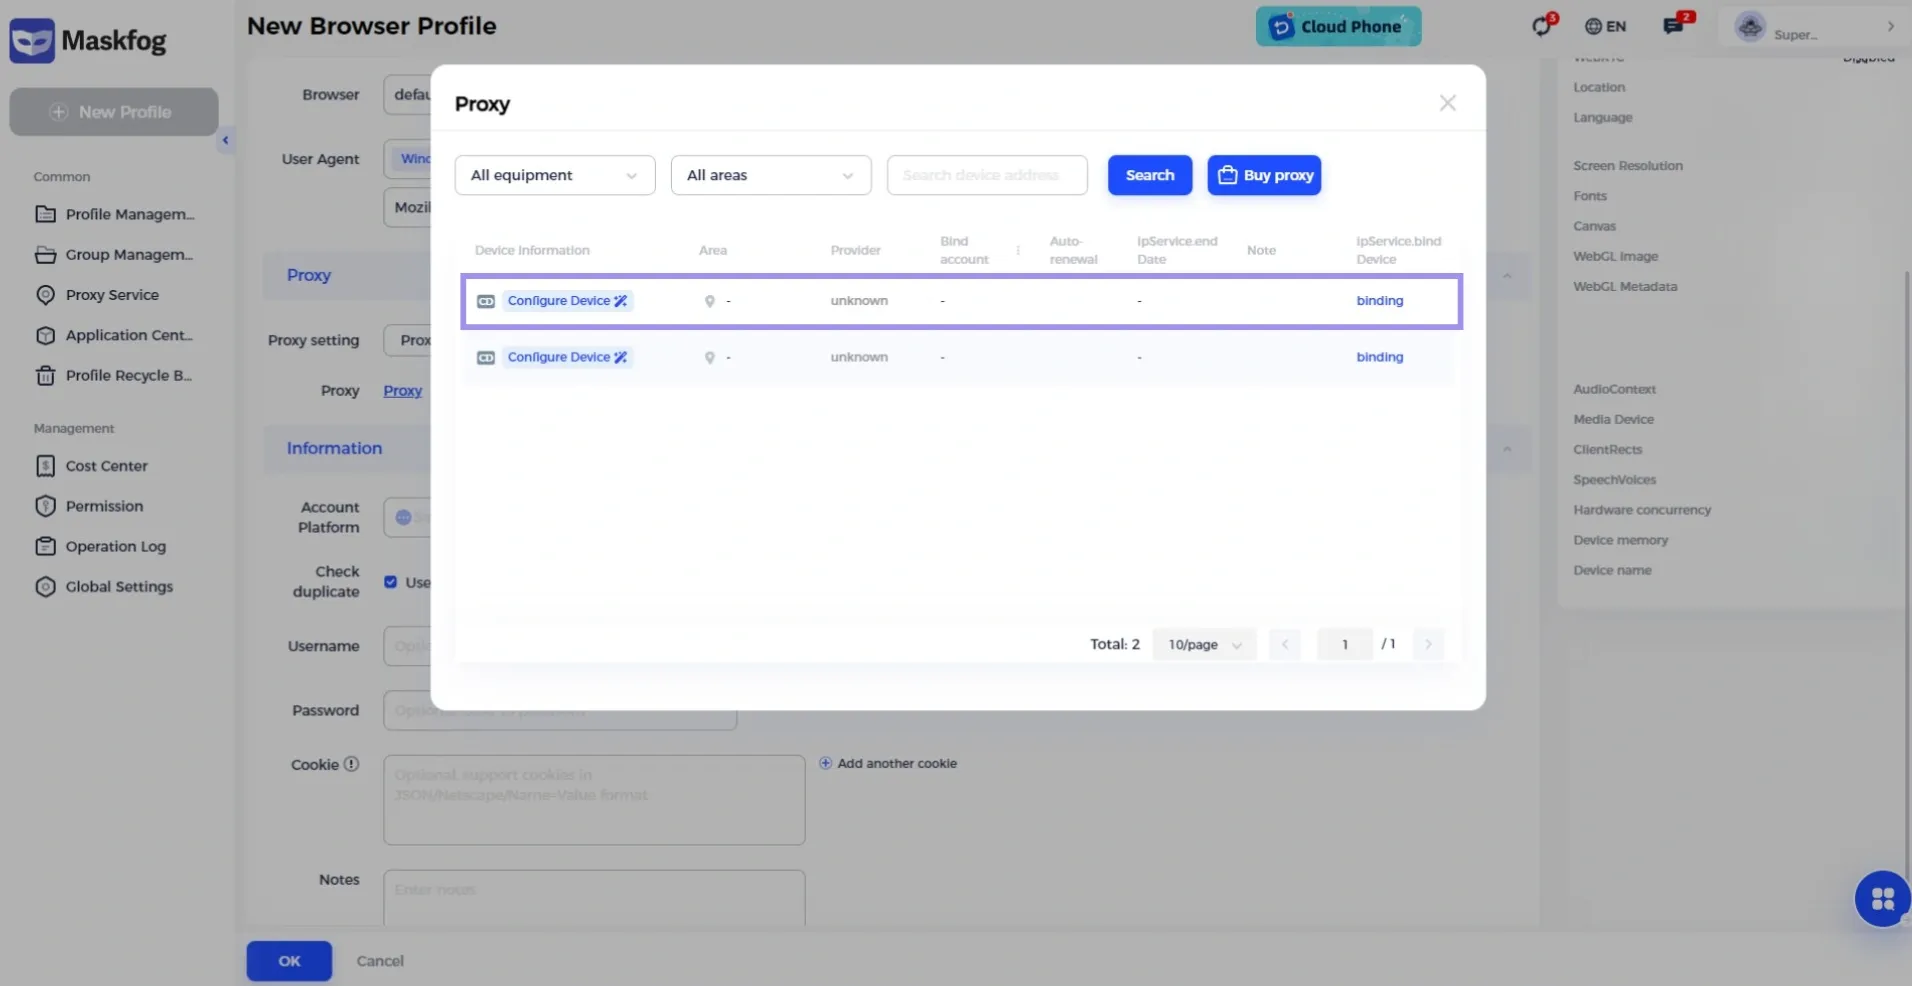
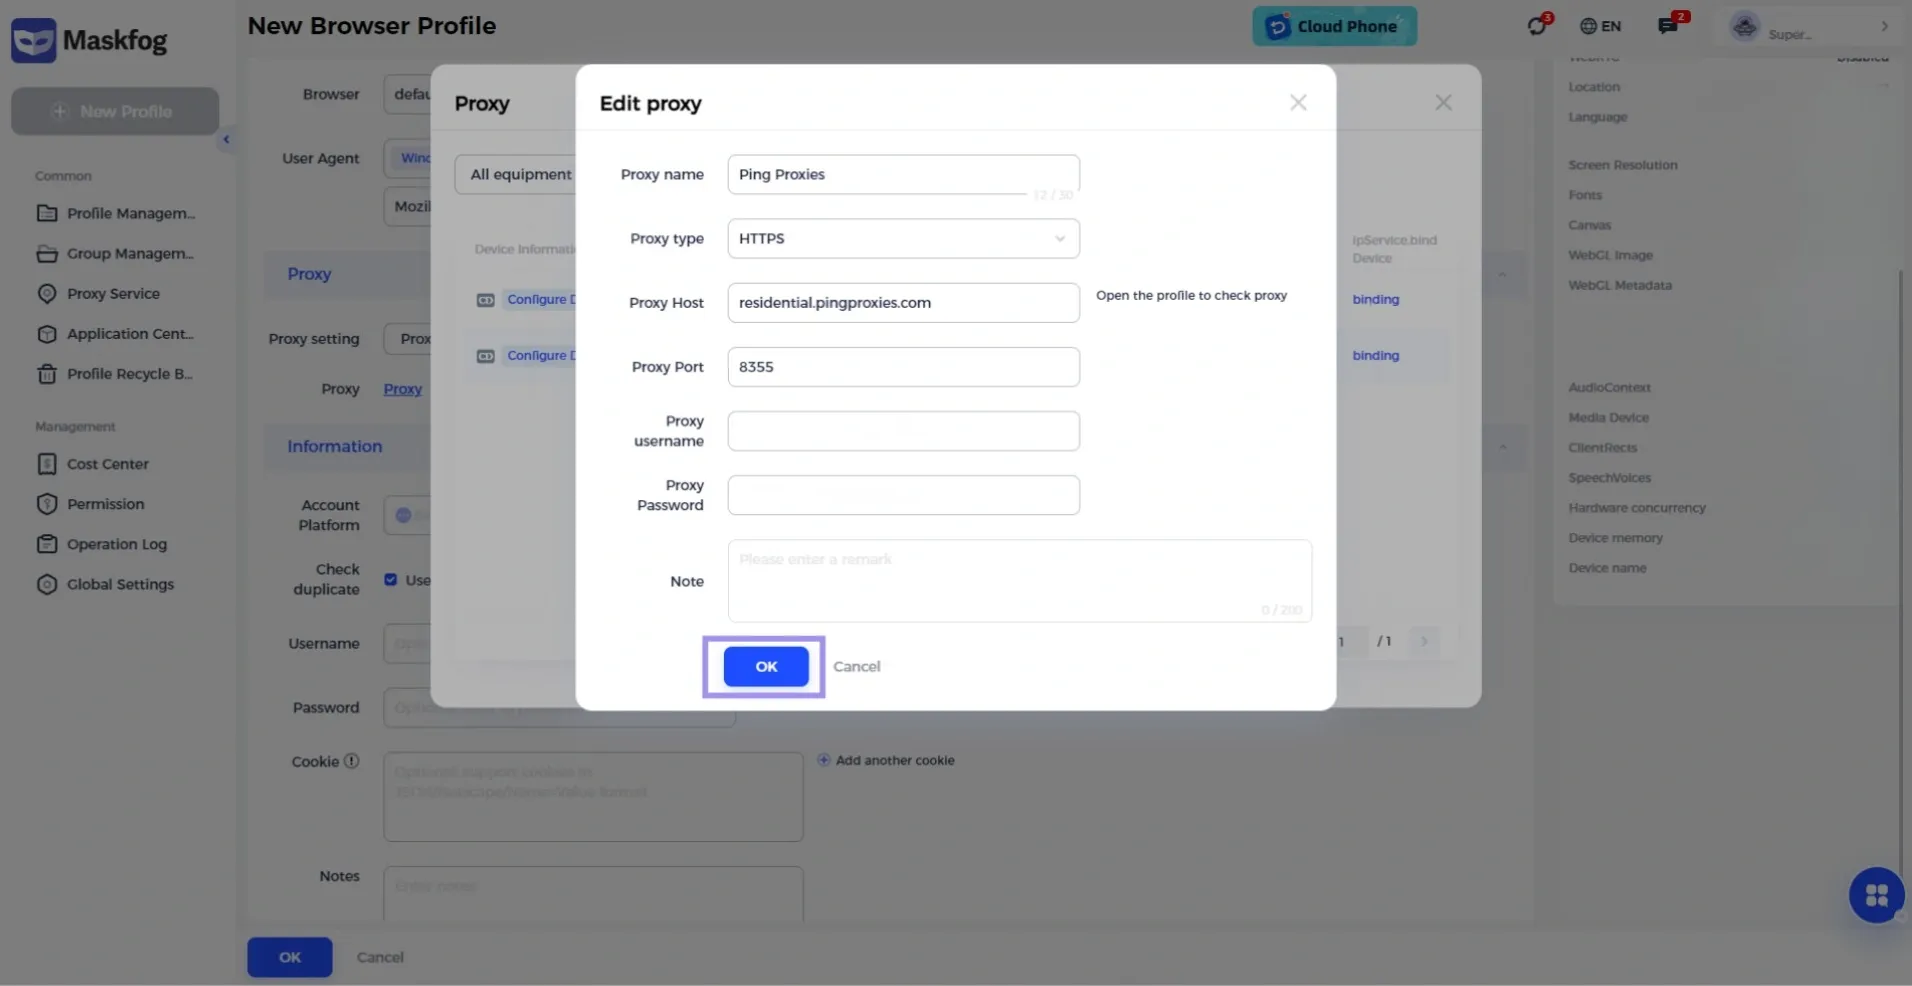
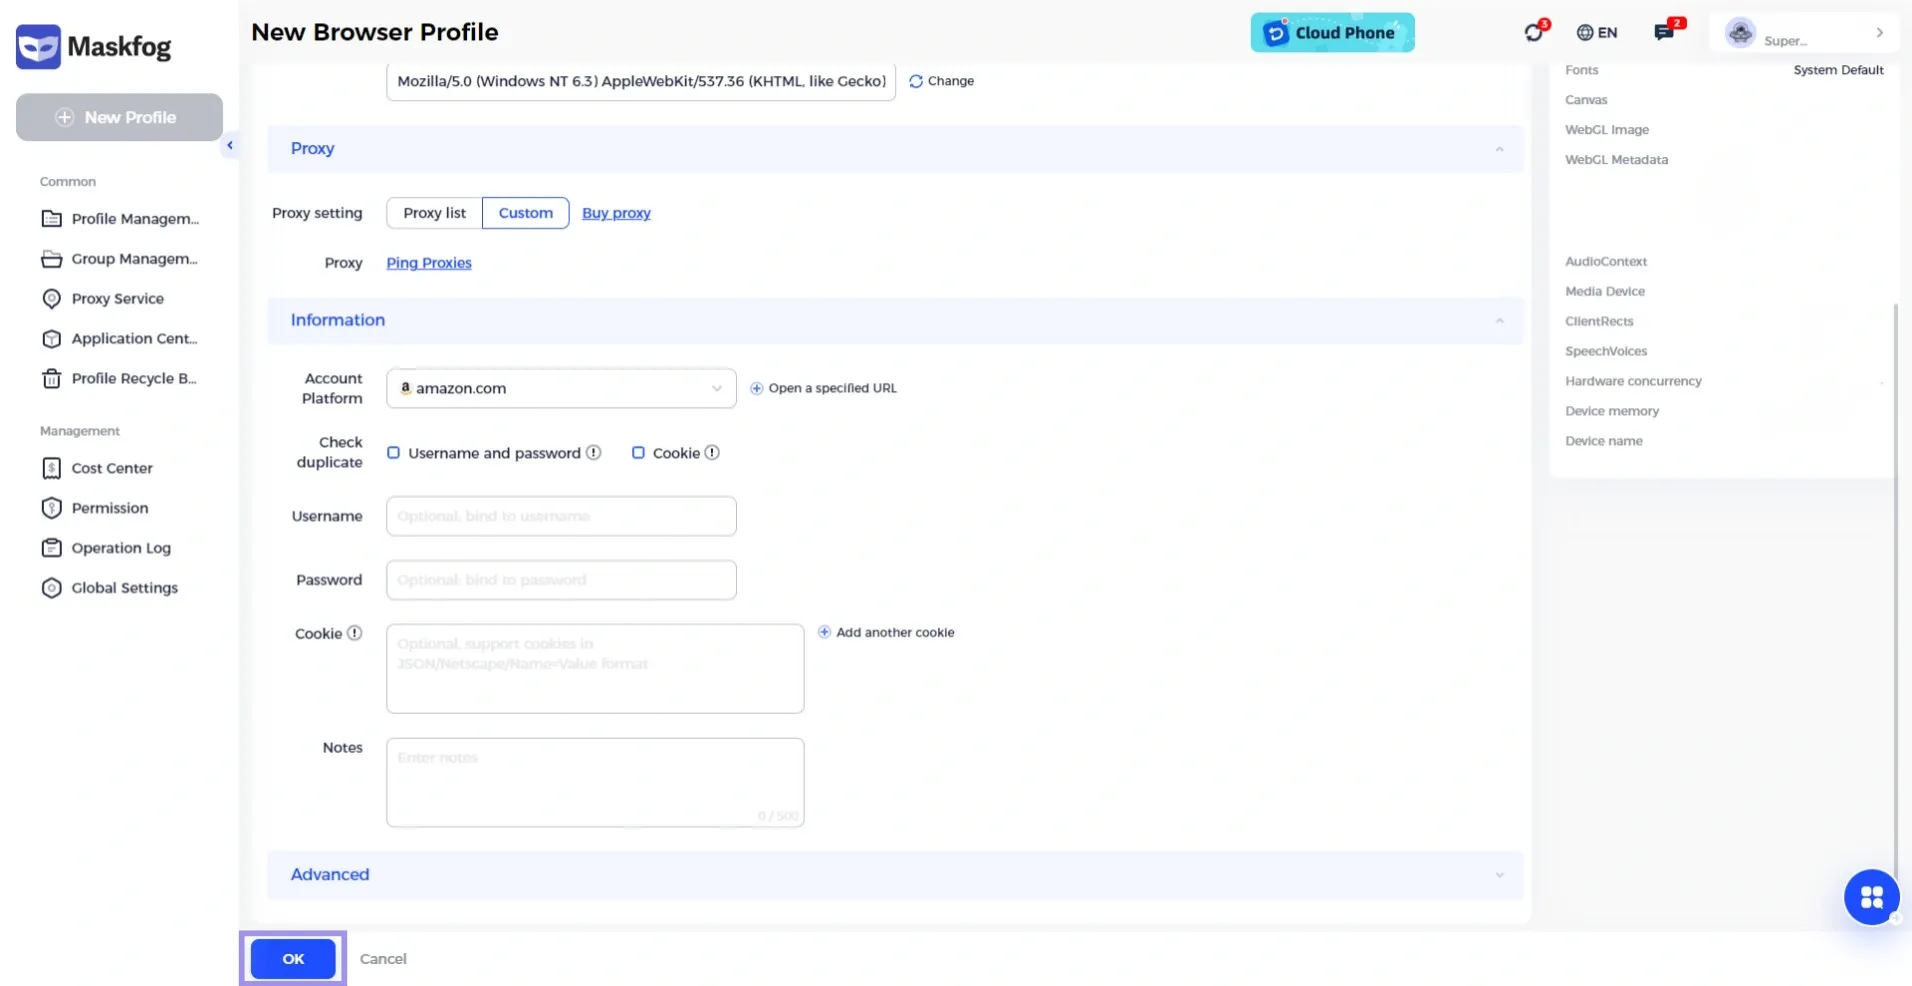
4. Maskfog supports 4 primary types of proxies: HTTPS, HTTP, SOCKS5, and SSH. But it is also compatible with third-party providers and its official options. If you already have access to proxies, you can fill in the information. Enter the details of your proxy, including the username, port, password, host, and type. Once added, click OK to proceed.
5. Once the proxy details are entered, fill in the other fields, such as the Account Platform, Username, and Password. Click the OK button at the end to finalize the process.
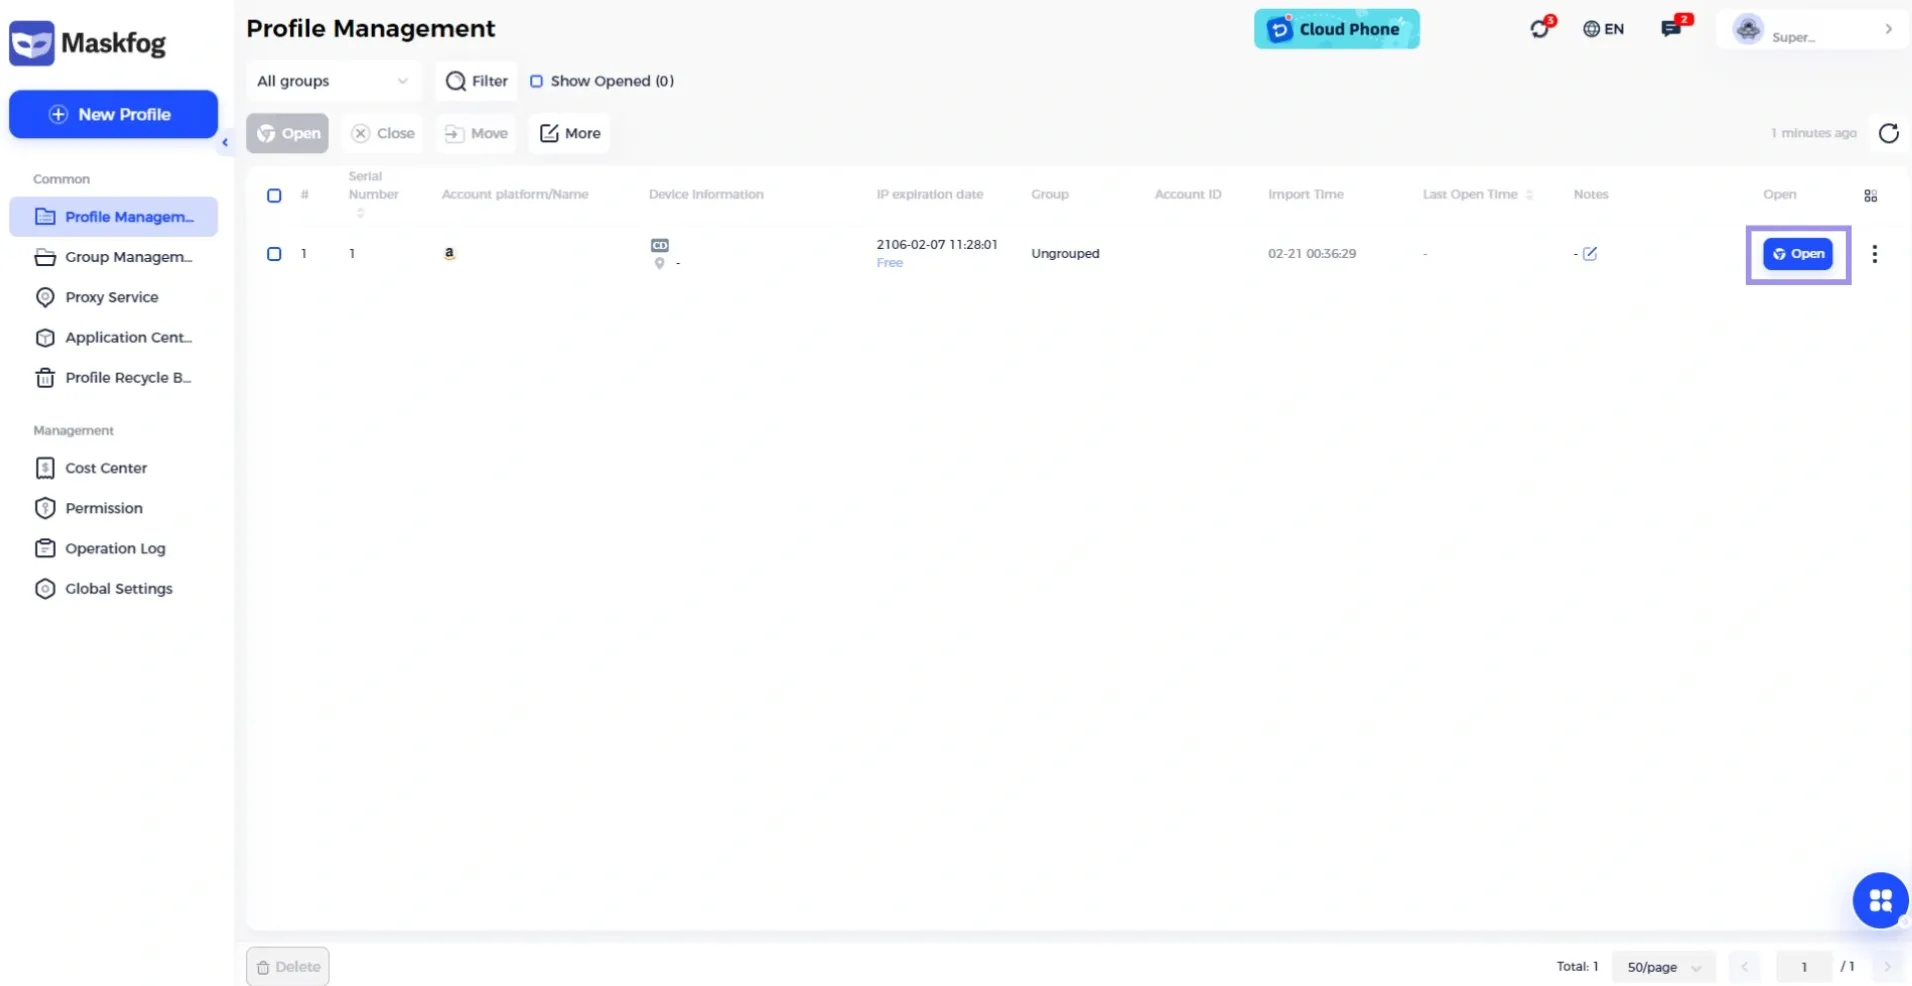
6. You will now be redirected to a new page where the new profile will be visible. Click Open to start using the new proxy.
How to Generate Proxies?
The steps below might vary depending on the proxy provider. Hence, our goal is to guide you through the process and demonstrate it using Ping Proxies, so you get a general idea of how to proceed, regardless of the proxy provider you choose.
You can easily and quickly generate proxies with us. We offer ISP, datacenter, and residential proxies. And there’s no need for complex manual processes.
Simply sign in and follow these steps to generate your required proxies in no time:
How to Generate Static Proxies (ISP & Datacenter)
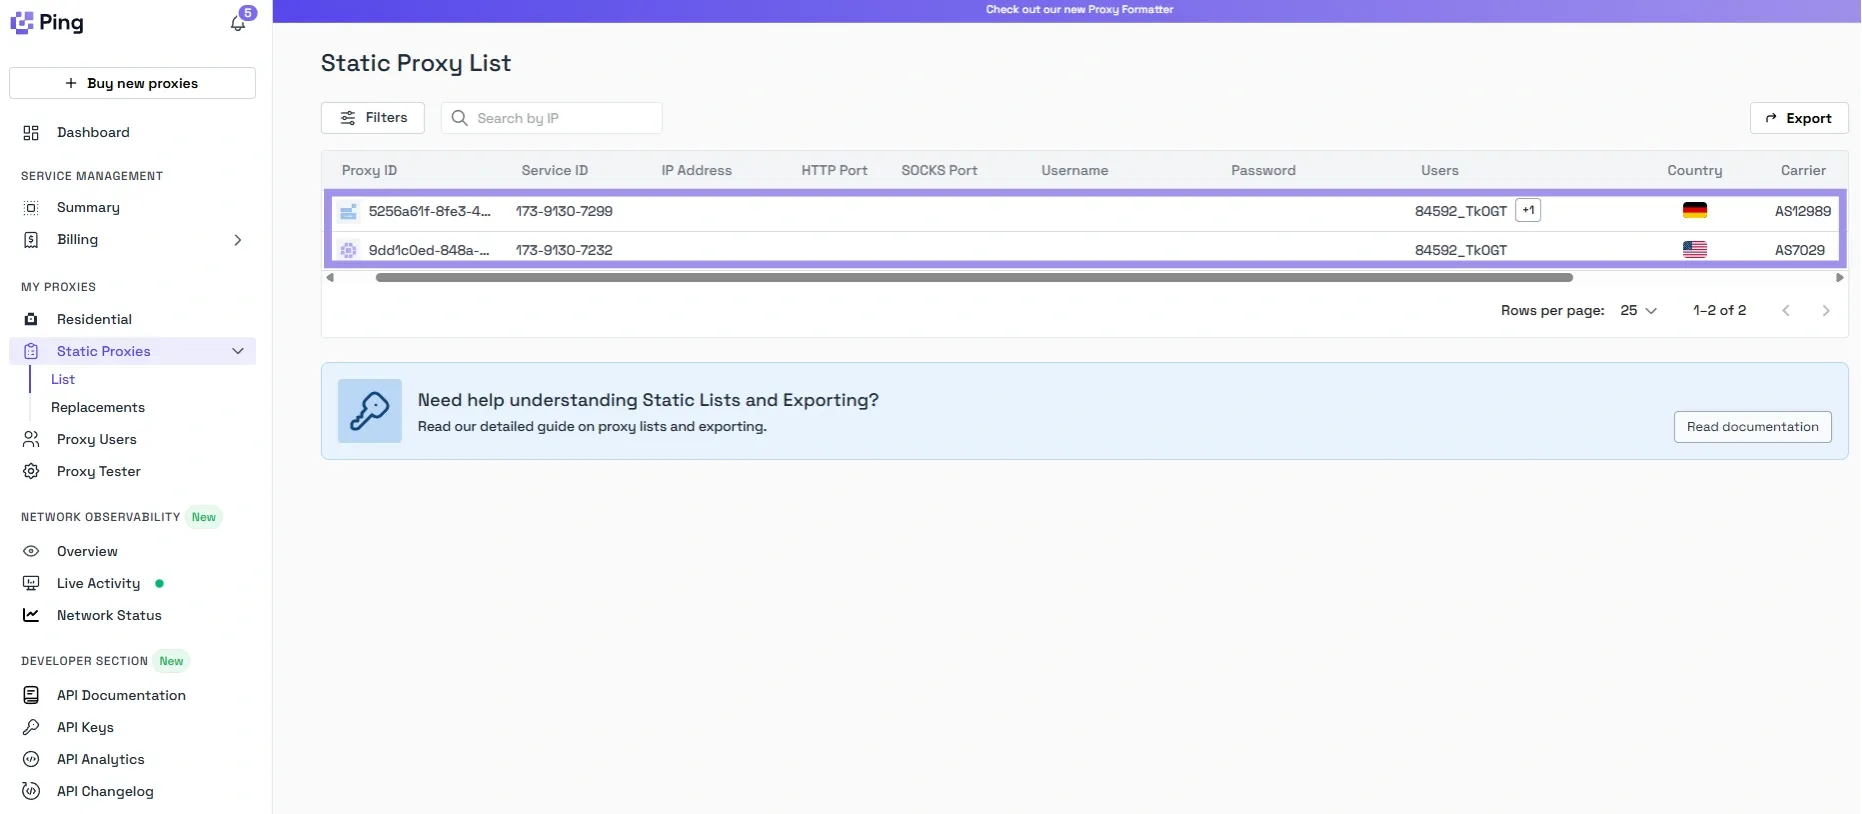
If you have purchased static proxies from us, navigate to the “My Proxies” tab.
1. Select Static Proxies from the left panel of the dashboard.

2. Here, you will see all the proxy details under the Static Proxy List. You can copy the credentials whenever you need, no generating needed.
How to Generate Residential Proxies
Residential proxies, unlike static ones, involve a few more steps. You have to select the correct options to generate proxies that meet your needs. That said, here’s how our residential configurator makes it easier for you.
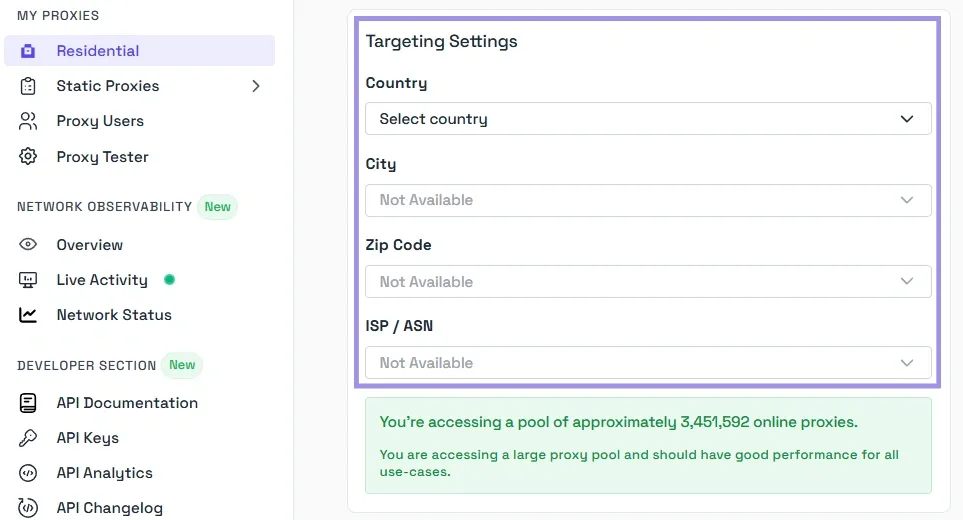
1. Click Residential from the dashboards’ left panel.

2. Now, you will be asked to configure the format settings. You can also choose a rotating or sticky proxy type for your residential proxies. We offer the flexibility to completely customize the targeting settings. So, select a country, city, zip code, and ISP/ASN that fit your needs.
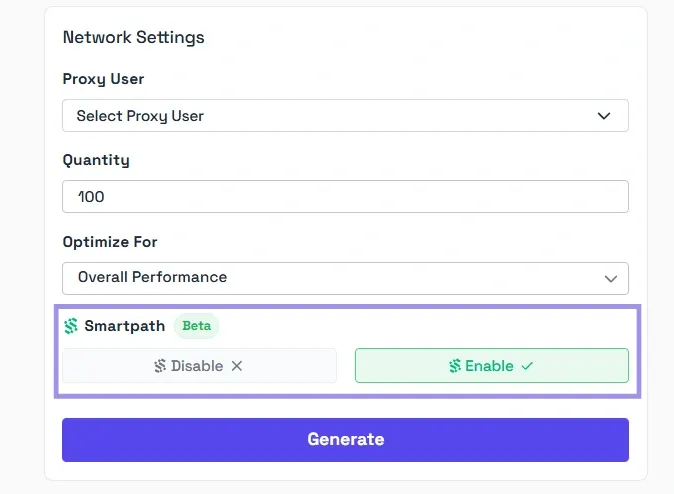
3. After the settings, select the Proxy User and Quantity. We also allow users to adjust the proxy’s optimization before generating it. You can set it under the “Optimize for” field. Click Generate once everything is in place.
If you’re wondering what Smartpath is, it is a free in-house AI routing system that sends non-essential traffic via datacenter IPs. Enable it to reduce residential bandwidth and costs.
Now, your proxy should be ready to use. You can easily integrate them into your Maskfog workflow. It is also a good idea to monitor performance during initial use. Because proper setup and testing ensure consistent performance, improved security, and fewer disruptions.
Are There Other Ways to Add Proxies to Maskfog?
Yes, Maskfog supports bulk operations. This feature is especially useful when you have many profiles. With bulk proxy import, skip the slow one-by-one setup.
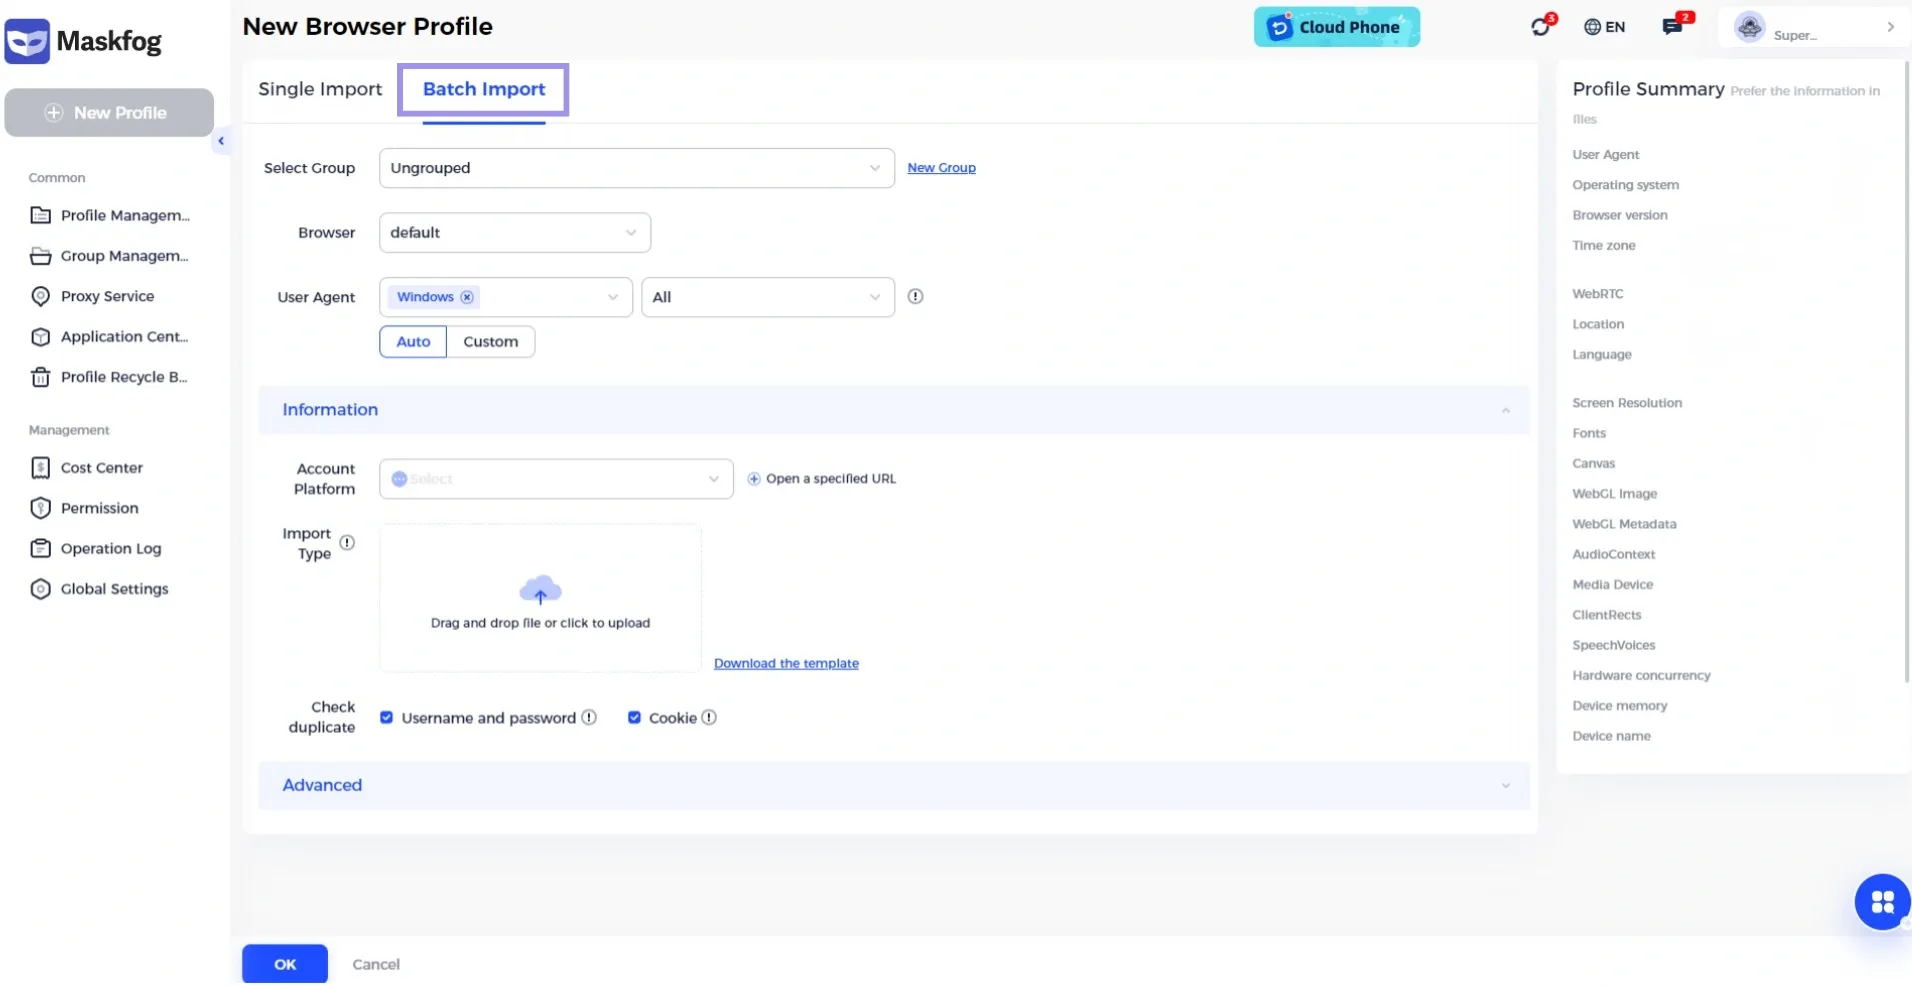
This setup puts each proxy in the right spot after upload. Moreover, it saves time and effort as compared to assigning proxies to a profile individually.
You can organize your account details in an XLSX file. Fill in these details in your file:
- Name
- Username
- Password
- Cookie
- Proxy type
- Proxy
- UA
- Resolution
- Remark (Optional)
You can also download the XLSX template to see which fields contain what data. It is important to make sure that your file follows the field descriptions provided by Maskfog.
Then, Maskfog automatically assigns each proxy to the correct profile after you upload the file. This makes it much easier to set up multiple accounts at once.
Testing Maskfog Proxies
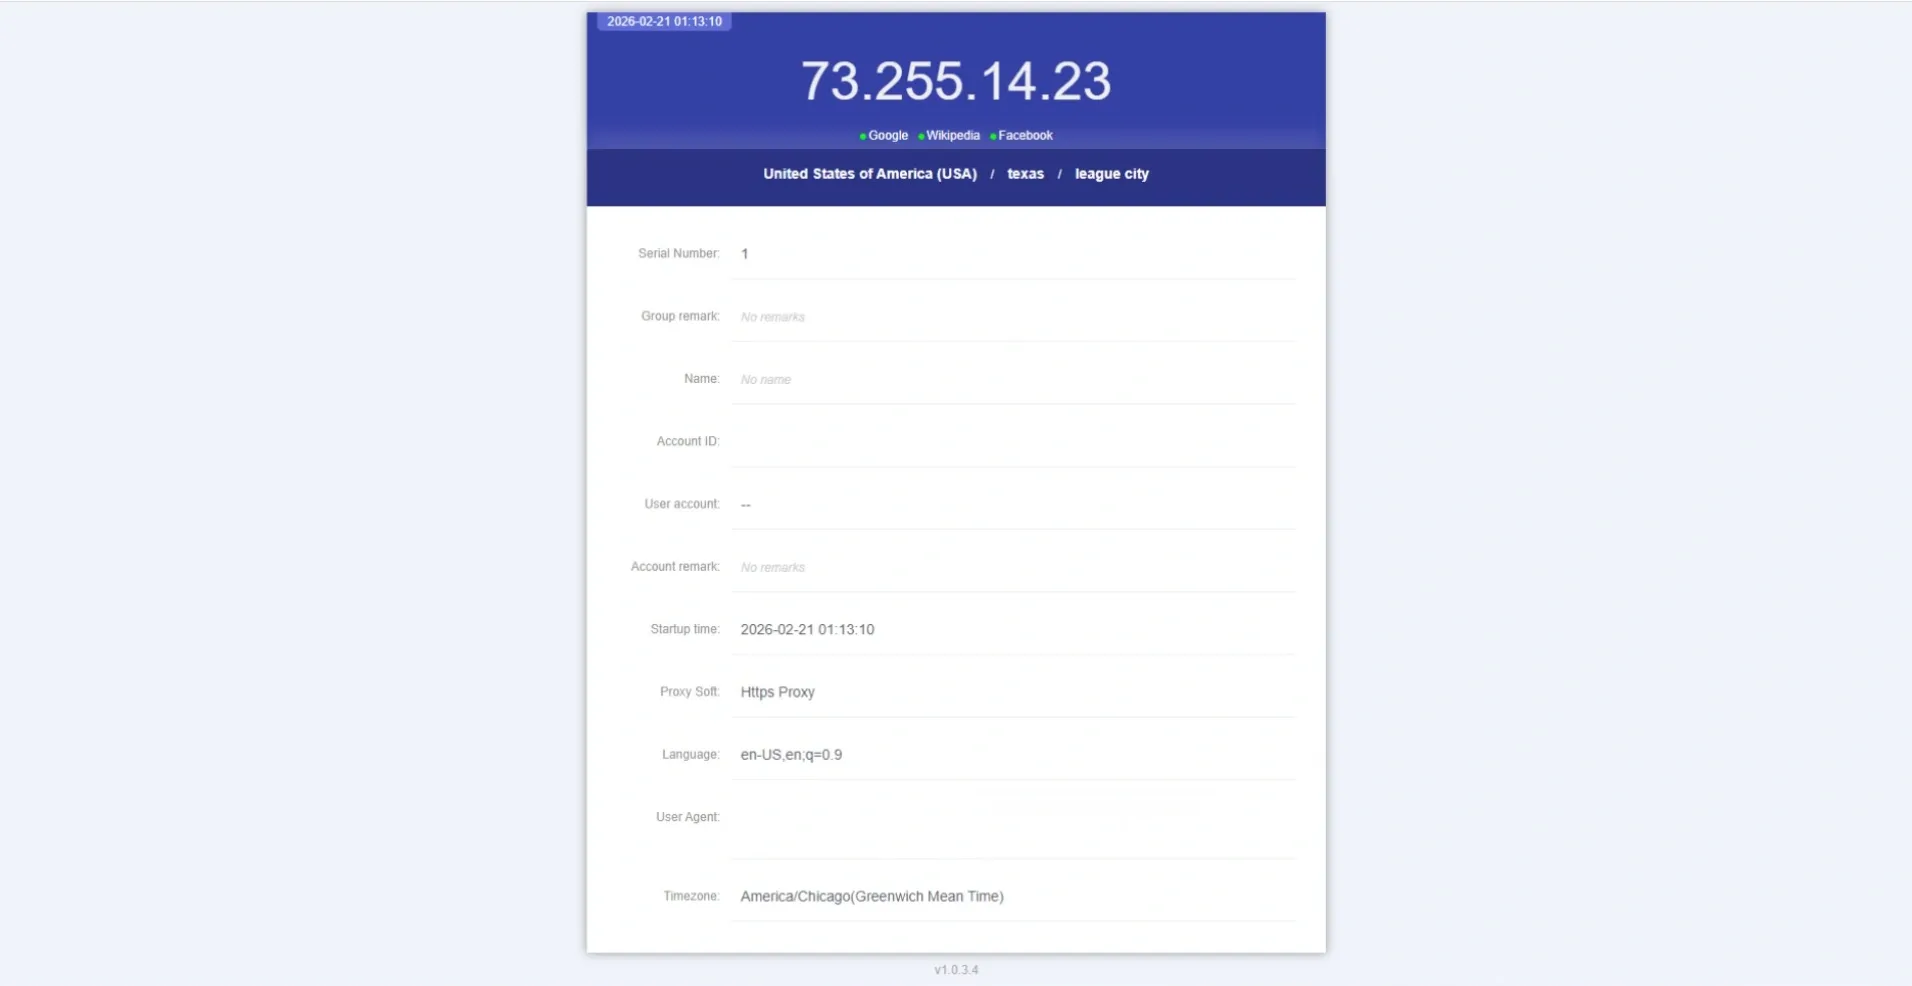
Test the Maskfog proxy right after you set it for your profile. This way, you know your IP address stays hidden. A bad setup can leak your real IP address, which defeats the point of using an anti-detect browser.
Now, the Maskfog proxy tester has some limitations. For instance, it can not test bulk proxies simultaneously.
You can use our Proxy Tester to overcome it. This helps you double-check the proxy’s IP address, location, and working status. It helps validate whether a proxy setup can reach a target and identify issues, backed by clear, actionable explanations.
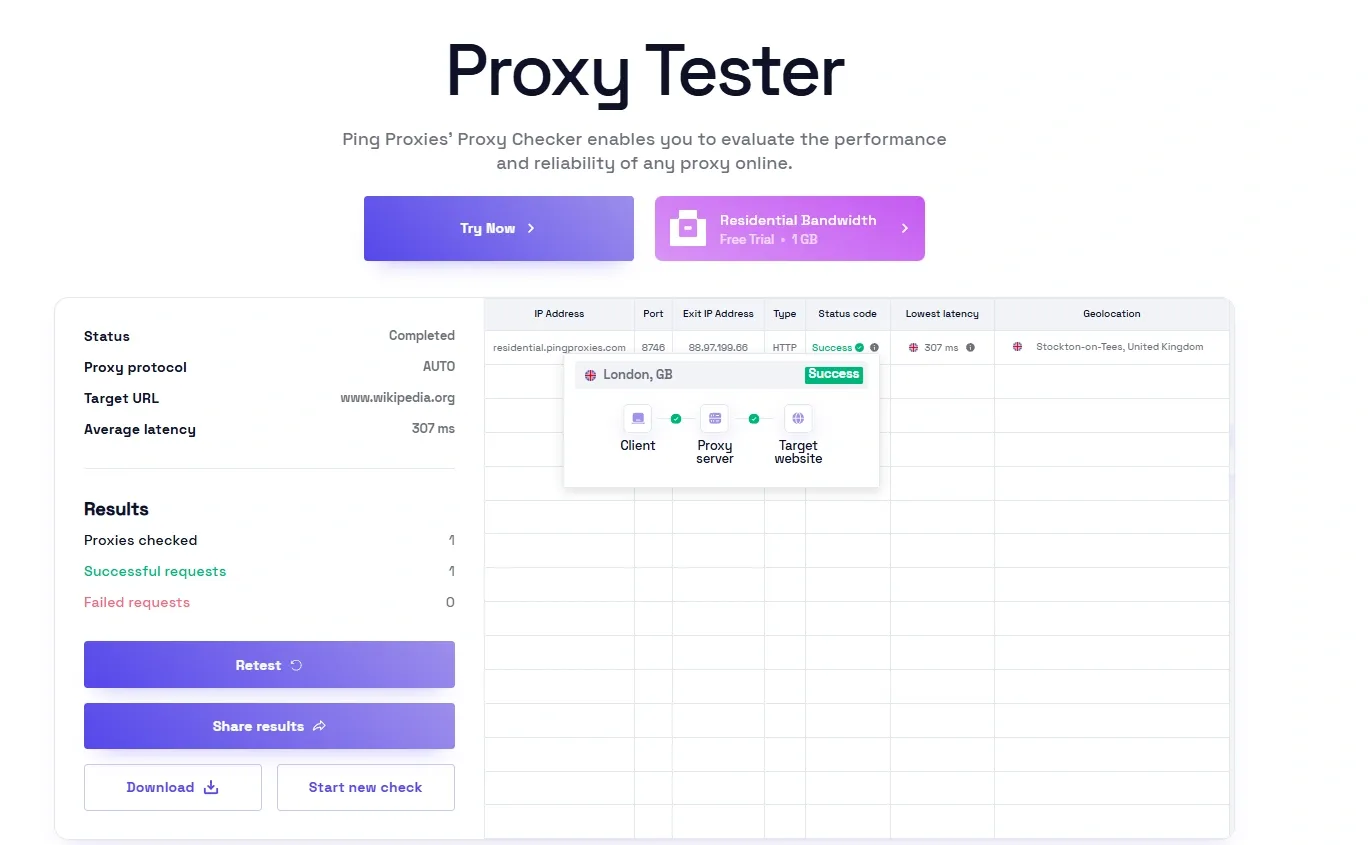
This simple check beforehand can help catch setup mistakes. It also ensures your proxies are performing as expected.
How to Choose the Best Proxy for Maskfog
Choosing your proxy sets your success rate. Each type works best with a certain budget, account needs, and platform limits. Here are the three main types of proxies to consider.
Residential Proxies
Residential proxies use IP addresses assigned by Internet service providers to real homeowners. They come from real residential connections. So, websites trust these IPs and rarely spot them as proxies.
They are especially effective for operating accounts on platforms with strict security protocols. That might include e-commerce marketplaces, advertising platforms, and social media networks. Moreover, their authenticity reduces the risks of account flags, CAPTCHA challenges, or access restrictions.
ISP Proxies
ISP proxies combine elements of both residential and datacenter infrastructure. Commonly known as static residential proxies, they are hosted on datacenter servers. This hybrid functionality provides the stability, speed, and reliability of datacenter proxies.
At the same time, these proxies maintain credibility associated with ISP-assigned IP addresses. They are well-suited for tasks that require consistent perpformance such as multi-account management on e-commerce platforms. In short, they offer a balanced solution for users who need reduced detection risk and higher operational efficiency.
Datacenter Proxies
Datacenter proxies originate from large-scale servers rather than residential ISPs. They are widely known for their high-speed connections combined with cost-effectiveness. However, websites can commonly identify and flag them. That’s because they generate IP addresses from server environments.
Datacenter proxies work best for lower-risk activities like large-scale data collection or website access with minimal security restrictions. They might carry a higher risk of limitations or even bans for high-value account management.
Wrapping Up
Here are some useful tips and common errors with their solutions that you should know. They can ensure a smooth and secure experience with Maskfog.
Common Maskfog Proxy Errors and Their Solutions
Sometimes, small errors can affect how Maskfog proxy operates. Here are the frequent issues and their solutions:
- Connection Failed: This is the most common type of error. Usually, a typing mistake in the proxy host password or username causes this error. Double check your credentials and IP address to fix this issue.
- High Latency/Slow Speeds: This issue occurs when the proxy server is physically far from the current location. Choose a location that is relatively closer to where you are or to the servers of the target website.
- Authentication Error: This shows that the proxy server did not accept your username and password. The quick fix for this issue is to check your credentials. Also, check if your subscription is working or expired. It might occur if you have reached your traffic limit.
Tips for Optimizing Proxy Performance in Maskfog
Proper configuration and monitoring are key to proxy efficiency. The following tips will help you fine-tune and strengthen Maskfog proxy performance for optimal output.
- Match Proxy to Profile: Consistency is important when handling proxies to avoid detection. You should align the geographical location of the proxy with your Maskfog profile language and timezone settings.
- Rotate IPs for Scraping: Rotating residential proxies is a good way to avoid being blocked or rate-limited. This is something to consider if you are performing tasks such as data scraping.
- Use Sticky Sessions: Some accounts require you to stay logged in. Consider using sticky residential or ISP proxies in this case. These types ensure you maintain the same IP address for the duration of your session.
How to Maintain Maskfog Proxy Anonymity and Security
Maskfog proxy protects your identity during browsing. Here’s how to ensure security and anonymity:
- Never Use Free Proxies: Free proxies sound good, but are almost always unreliable. They are also slow and dangerous, often logging your data or injecting ads. These proxies can also steal your sensitive login credentials. So, always buy a trusted, reputable premium proxy service.
- One Profile, One Proxy: For maximum security, dedicate a single, unique proxy to each of your most valuable accounts. Sharing proxies between accounts increases the risk that if one account is flagged, the others will be too.
- Regularly Test Your Connection: Always use Maskfog's built-in tool to test the proxy connection and verify that your IP is correctly masked.