Using Proxies with Shadowrocket on iOS: What About Android?
If you’ve tried using a proxy on your mobile, you might have noticed the complicated setup. While both Android and iOS allow proxy configuration through settings, the downside is the lack of control and flexibility.
To fully use proxies, you need a tool that gets you both, and Shadowrocket is arguably one of the ideal picks. This guide helps you configure proxies with Shadowrocket on Android and iOS and includes best practices that help you stay connected.
What Is Shadowrocket?
Shadowrocket routes internet traffic through the proxy. Instead of sending all your data directly to websites or apps, it lets you pass that traffic through a server of your choice. This might raise a question: Doesn’t adding proxies through the settings do the same?
The need for Shadowrocket becomes apparent when you want to route only certain domains or services through a proxy. It works by capturing network requests from other apps and redirecting them based on user-defined rules.
Before we start: Note that the Shadowrocket for iOS and Android isn’t from the same developer. While the app icons and functionality are similar, the offerings vary. So, if you’re using the Android version, pay attention and use it with caution.
How to Configure Proxies with Shadowrocket?
The first step in using Shadowrocket is generating proxies. If you have already generated proxies, you can proceed with configuration on the desired platform.
Struggling with generating proxies or using a proxy for the first time? With Ping Proxies, generating proxies is just a matter of a few steps. You don’t have to use the CLI or worry about confusing inputs. Just log in, choose your options, generate, and start using the proxy.
Here’s how easy it is to generate proxies with Ping Proxies:
Generate Static Proxies
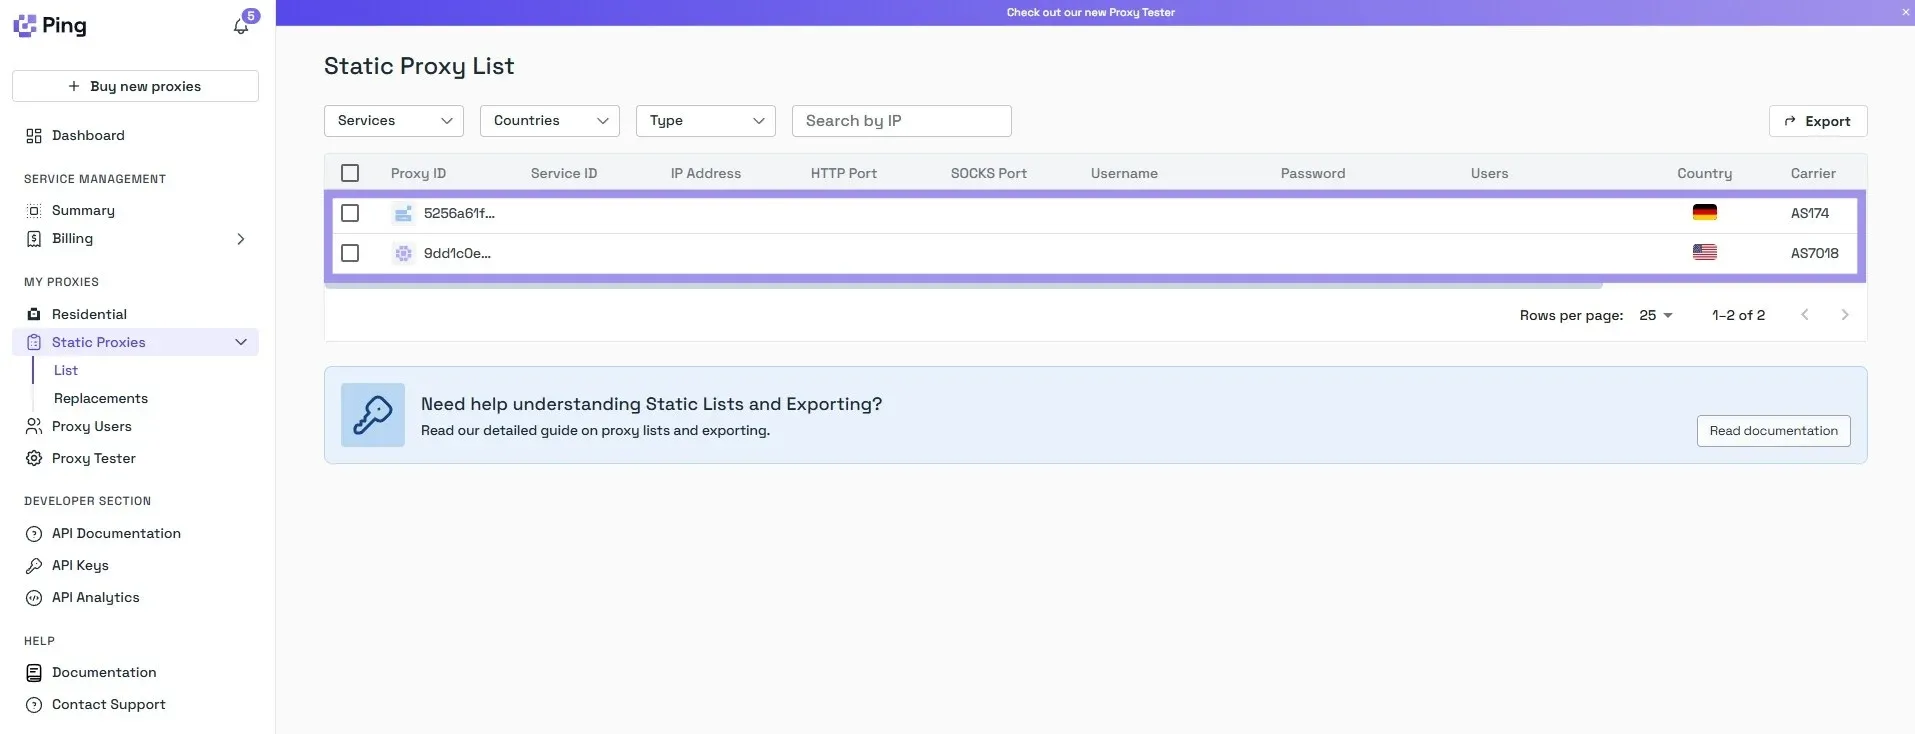
If you’ve purchased static proxies from us, click on the “Static Proxies” option under the “My Proxies” section on the left in the dashboard.
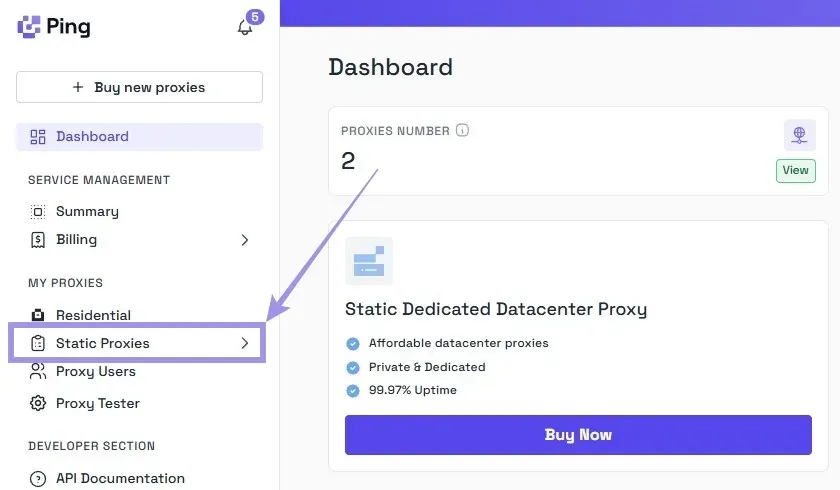
Your proxy list will be displayed with the IP address (hostname), port, username, and password. No generation is needed, just copy the credentials, and you’re ready.
Generate Residential Proxies
Generating residential proxies involves a few additional steps, as you need to select options. However, our flexible residential proxy generator makes it easier with the format and advanced targeting settings. Everything’s transparent about availability, so there are no more second guesses.
Here are the steps for it.
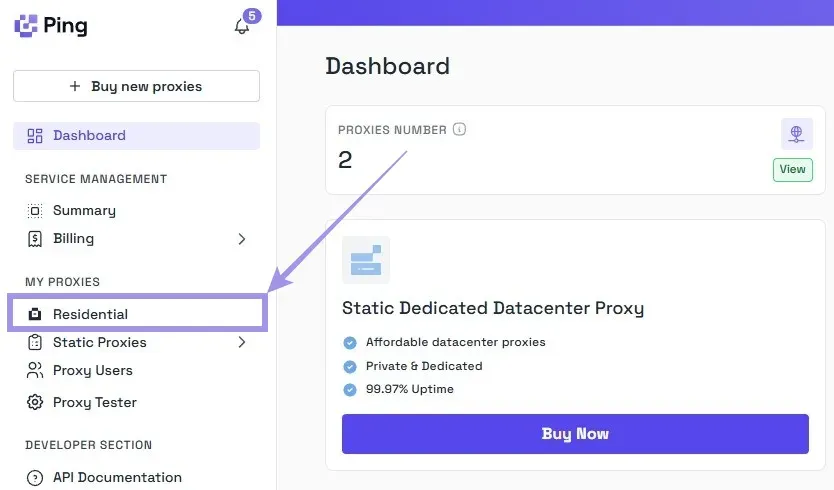
1. On the dashboard, navigate to the “My Proxies” section on the left and select the “Residential” option.
2. Choose between rotating or sticky proxies, select the protocol you want (HTTP or SOCKS5), and the format auto-selects.
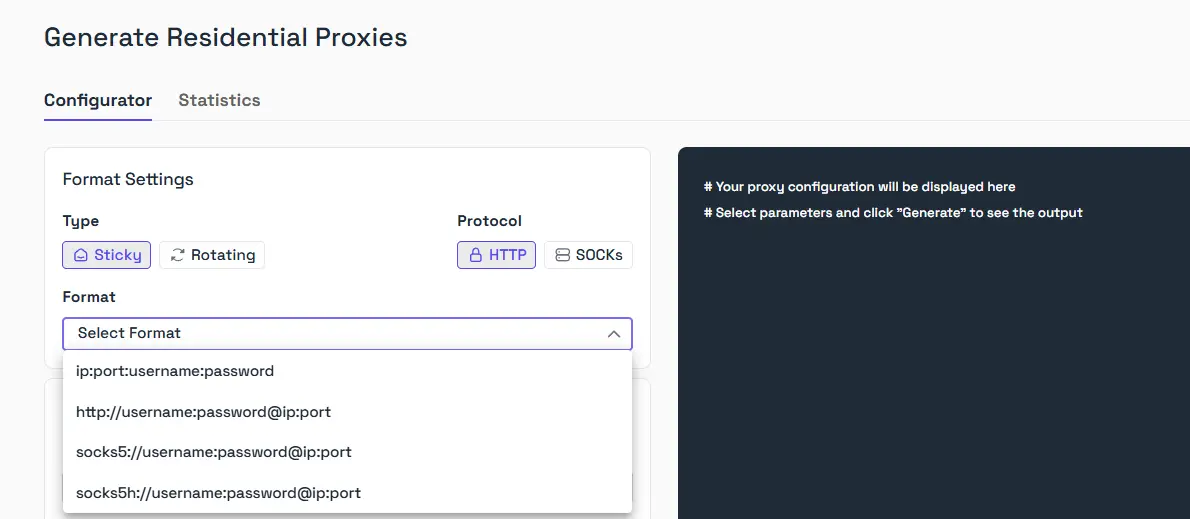
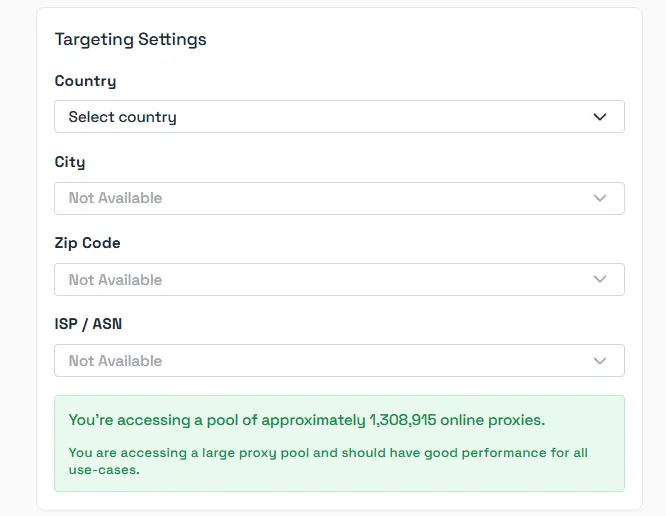
3. Set the location. You can choose the country, city, Zip code, and ISP/ASN if needed, but broader targeting gives you a larger proxy pool.
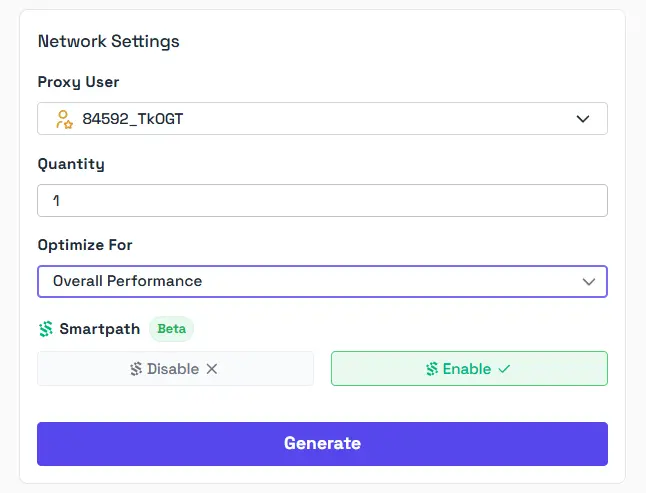
Note: Always add the location to the username for the sticky proxies. Failing to do so routes you to the incorrect location. 4. Once you have selected all options, choose the Quantity and click on “Generate.” Your proxy list will appear in the format you selected.
What’s Smartpath? If you want to cut residential bandwidth costs, you might want to enable it. It’s an AI tool that spots unnecessary requests and routes them through datacenter IPs instead.
Configuring Proxy on Shadowrocket for iOS
With the proxies generated, you’re all set to start using proxies with Shadowrocket on iOS. Unlike the Android alternative, it is paid and costs $2.99. Here’s how to set it up, along with a look at what it offers.
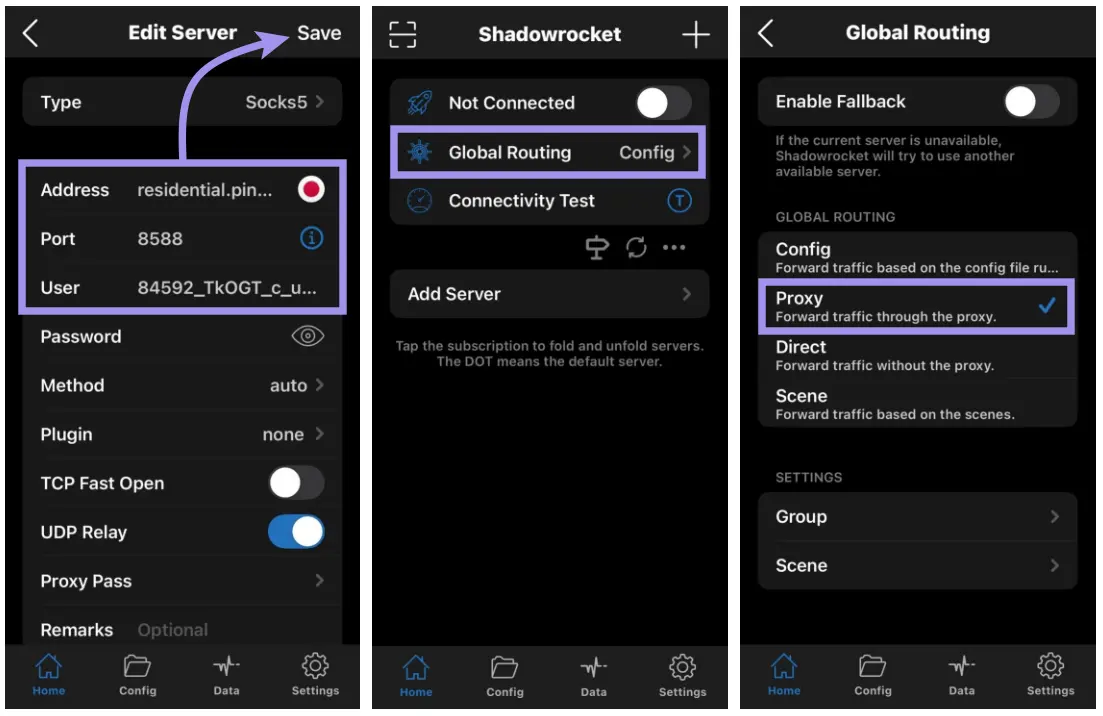
1. Open the Shadowrocket app and tap on + (Plus button). Next, tap on Type and choose your desired proxy protocol. It supports HTTP / HTTPS, SOCKS5, Shadowsocks / ShadowsocksR. VMess (V2Ray), and Trojan.
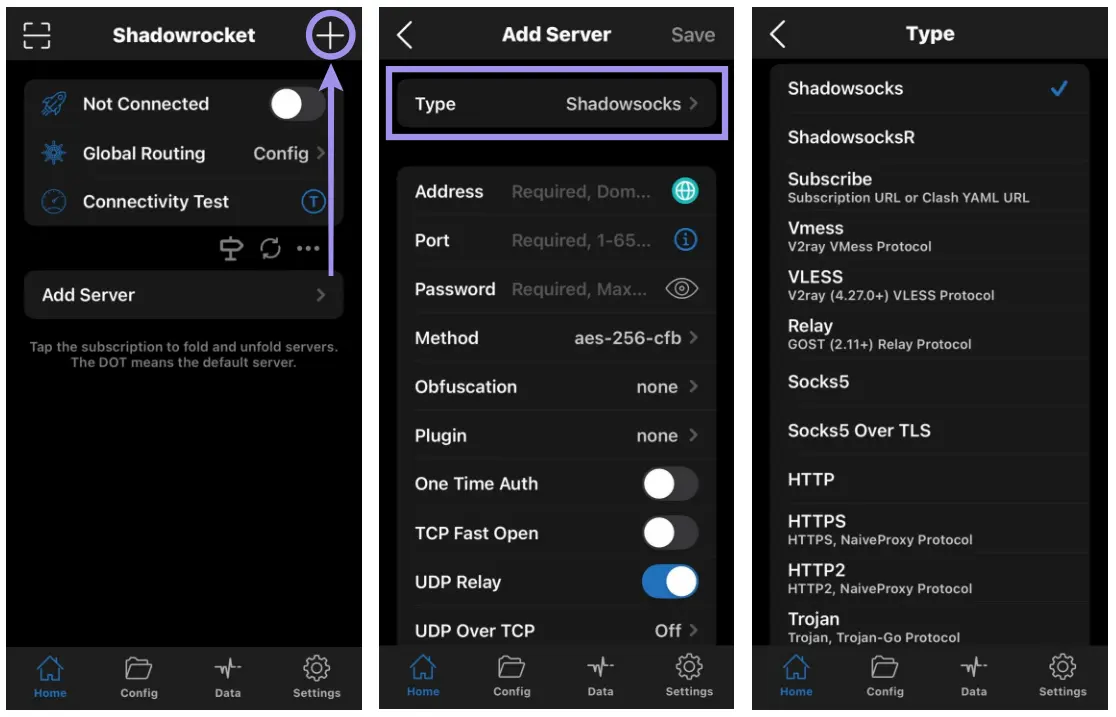
2. After selecting the proxy, fill in the Address, Port, Username, and Password. Once done, tap on Save.
Note: Before you proceed with using the proxy, choose the Global routing (Proxy, Direct, Config, and Scene). If you haven’t modified the config file, you can leave it as Config or set it to Proxy, if you’re unsure.
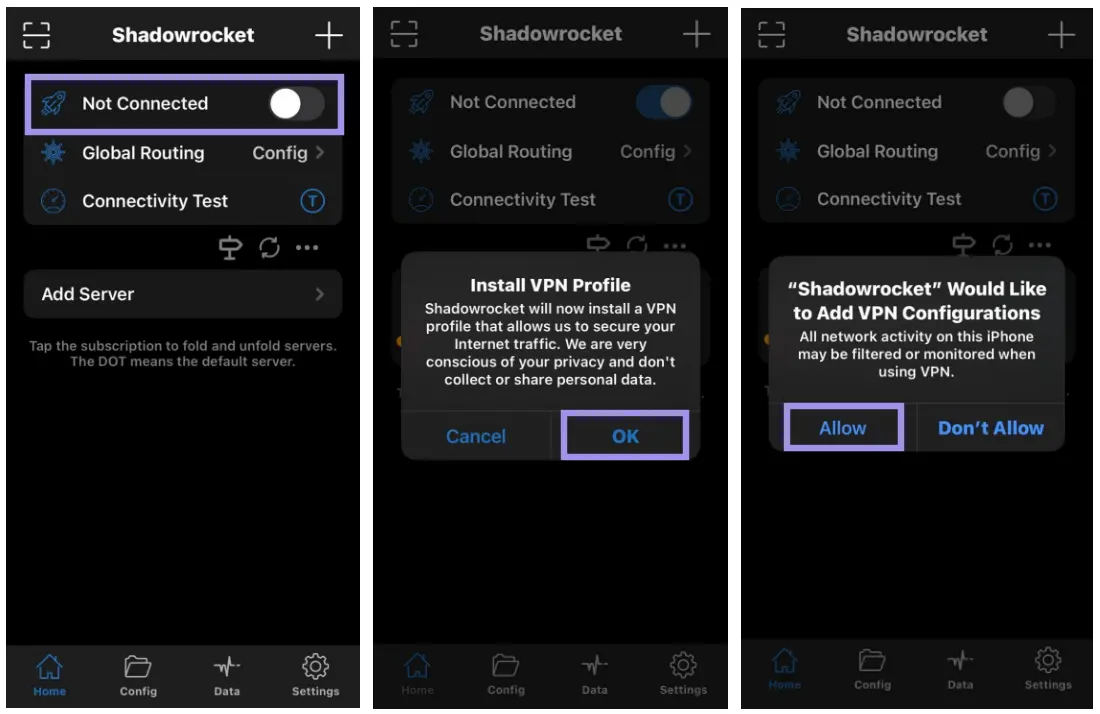
3. Enable the toggle to establish the proxy connection. If you’re setting up Shadowrocket for the first time, you’ll be asked for permissions. Now, tap on OK, followed by Allow, to establish the connection.
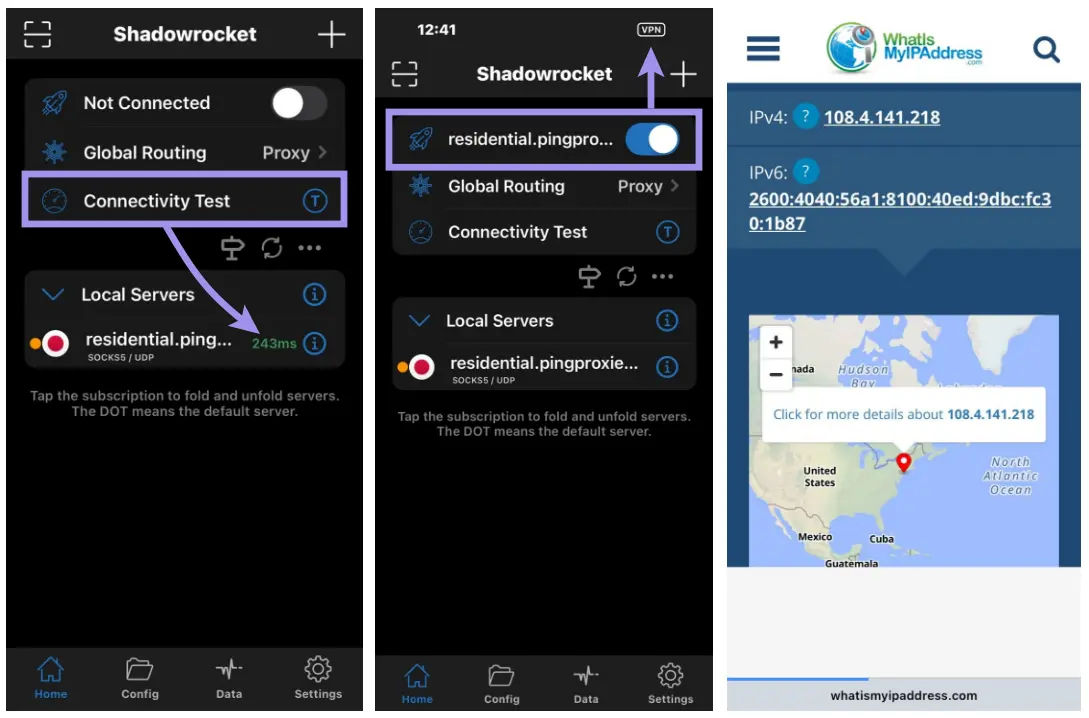
4. Shadowrocket offers a built-in connectivity test to check the connection before enabling the toggle, which can help you avoid network connectivity issues. To test the proxy configuration, we verified the IP using whatismyipaddress, and it successfully updated to the proxy selected.
If you're trying to upload proxies in bulk, Shadowrocket offers several flexible options. You can enter them manually, scan a QR code, or import them using a subscription URL in JSON format.
The app also supports Proxy Pass for multihop setups and rule-based routing with filters like domain match, suffix, keyword, GeoIP lookup, CIDR ranges, and even regular expressions. You also get advanced features like real-time traffic usage, built-in ad-blocking, script filter support, plugin integration, and more.
Configuring Proxy on Shadowrocket for Android
Considering Shadowrocket for Android isn’t official, we focused only on adding proxies and establishing a connection. The best part of the app is that you get a few free servers to use, but they are often down, so use it only for basic tasks.
Here are the steps for it:
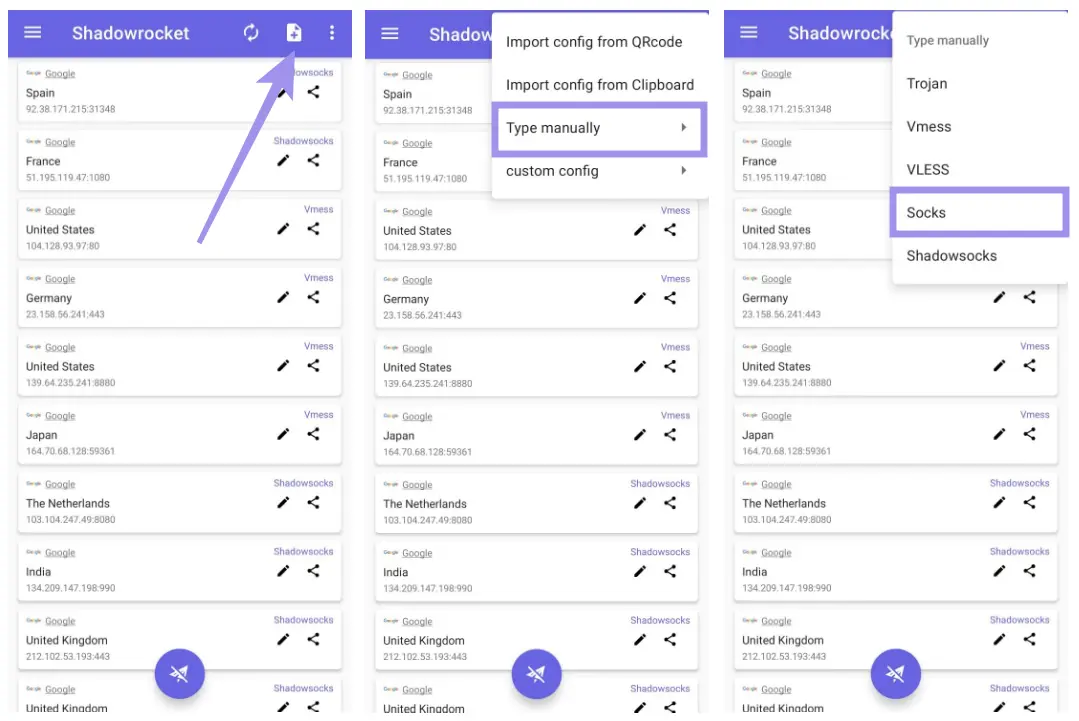
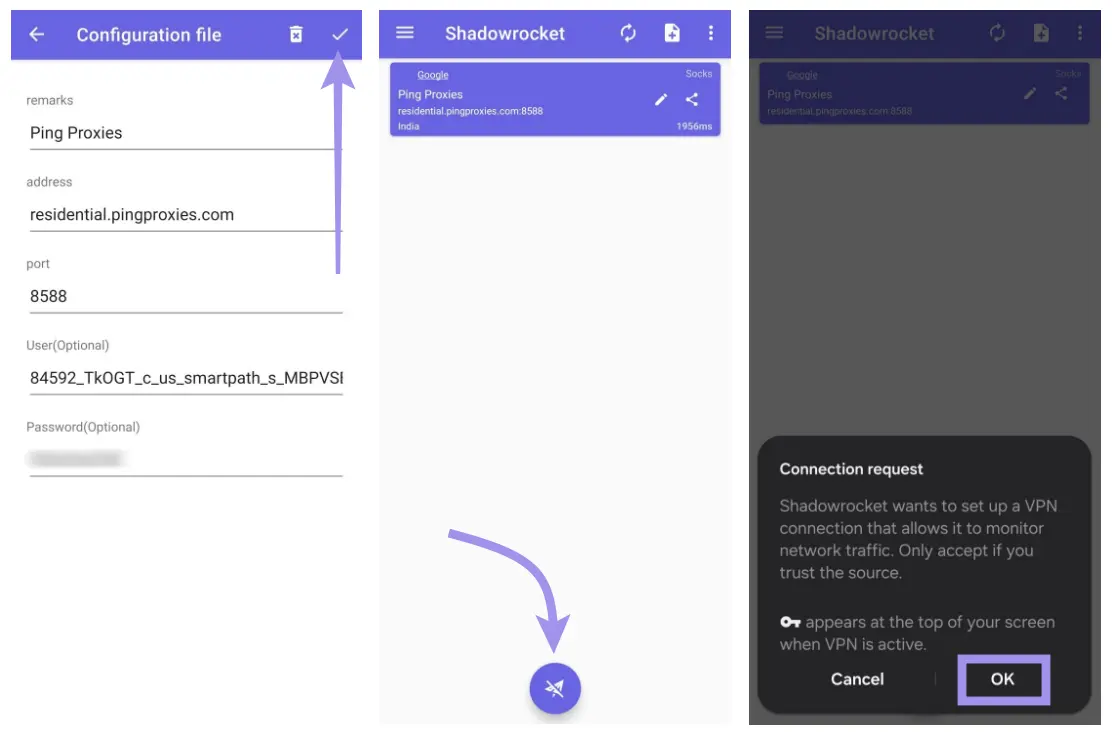
1. Open Shadowrocket and tap on the Add page icon present in the top right corner. Next, tap on Type manually and then choose the proxy protocol.
Note: Shadowrocket for Android doesn’t support HTTP and HTTPS protocols. Instead, you can choose Shadowsocks, Vmess, VLESS, Trojan, or SOCKS.
2. Now fill in the Address, Port, Username, and Password details. Once done, tap the checkmark icon at the top right. Next, tap on the Paper plane button, and upon permission request, tap on OK.
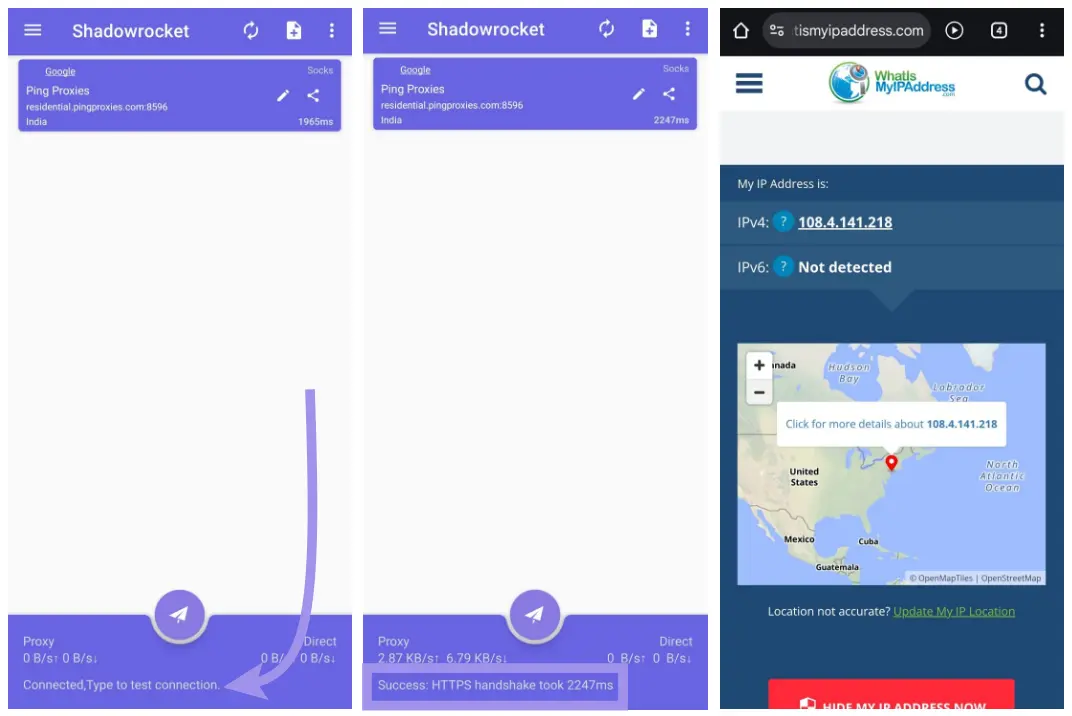
3. You can test your proxy connection by tapping on the text. If properly configured, the text will update to Success. To test the proxy configuration, we verified the IP, and it successfully updated to the proxy selected.
While there are advanced features on offer, you miss out on plugin support, HTTPS decryption, advanced rule configuration, and scripting.
Best Practices for Using Shadowrocket with Proxies
Now that you’ve successfully configured proxies on Shadowrocket for both Android and iOS, the next step is making sure your setup stays reliable. Here are some best practices that can help you avoid common issues, get better performance, and use proxies more responsibly.
- Always double-check your proxy details like IP, port, username, and password before saving the configuration.
- Choose the right proxy type for the task: residential, ISP, or datacenter. Decide whether you need rotating or sticky sessions.
- To avoid conflicts or misrouted traffic, stick to using one proxy tool at a time. The same applies to VPNs. Don’t use both at once.
- Avoid using proxies for restricted activities and choose providers that offer ethically sourced IPs.
- Keep track of session limits and expiry. Many proxies are time-bound or rotate after a set duration, which can affect long-running tasks.
- Start with basic routing rules, then expand to more specific domain or app-based filters as you gain experience.
- Test your proxies regularly for speed, reliability, and region accuracy using tools like latency checkers or IP detection sites. Our Proxy Tester helps you check if a proxy is working before using it for any task, preventing potential connectivity issues.
With the proxies successfully set up and running on Shadowrocket, let’s go over a few common questions we often get.