Set Up Proxies with Proxifier in 2025: Full Integration Guide

Using proxies across different applications has always been a hassle. While a few offer built-in proxy support, most don’t. Let’s say you’re working with multiple apps and trying to control how each one connects to the internet—it's possible only when you modify each one manually.
What’s the way around, where you get a reliable proxy control? The answer is Proxifier. It is one of the prominent proxy clients that helps you redirect network traffic from almost any desired application through a proxy, even if the app doesn’t support proxy settings.
In this guide, we will help you generate proxies and integrate them with Proxifier. Plus, we covered the crucial proxy chaining and proxification rules in detail, so you can use Proxifier to the fullest extent.
Why Use Proxifier?
Now that you’re aware of Proxifier, it is important to understand why you should use it. This helps you decide whether Proxifier actually fits your workflow or proxy setup.
Proxifier gives you the ability to:
- Force proxy routing even when the application doesn’t support it
- Assign different proxies to specific tools or targets
- Handle DNS resolution through proxies to avoid leaks
- Set fallback proxies or rotate between them when needed
These abilities make Proxifier ideal for various tasks. You can use it for web scraping with proxy rotation, running bots, accessing region-locked content, managing multiple logins on gaming or social media accounts, automation tools, testing apps, and more.
Setting Up Proxies in Proxifier
Getting started with Proxifier isn’t complex. If you have proxies ready, integrating them is a few steps away—there is no need to write complex scripts. Follow the steps below to configure your proxies and get them ready to use with Proxifier.
Step 1: Generate Proxies (Ping Proxies)
The steps associated with this section vary depending on your proxy provider. For easy understanding, we’ve included steps for datacenter and residential (sticky/rotating/static) proxies with Ping Proxies.
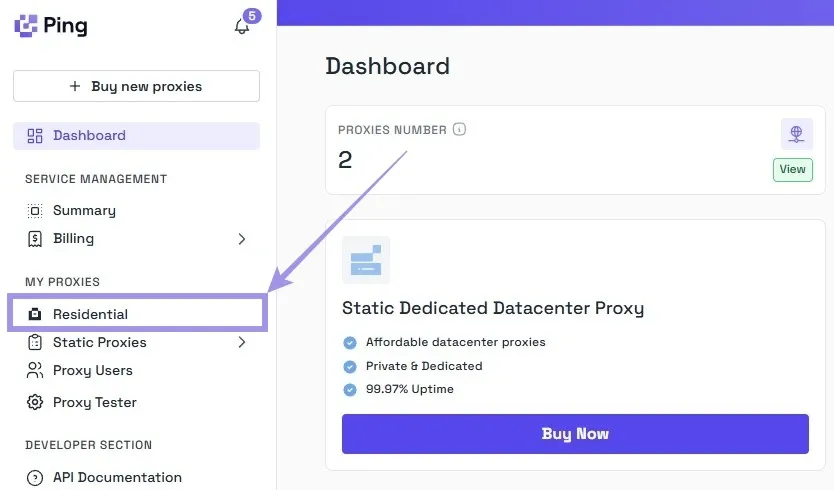
1. Sign in with your credentials to get started. Once you’re on the dashboard, look for the “My Proxies” section on the left and click on the ”Residential” option associated with it.
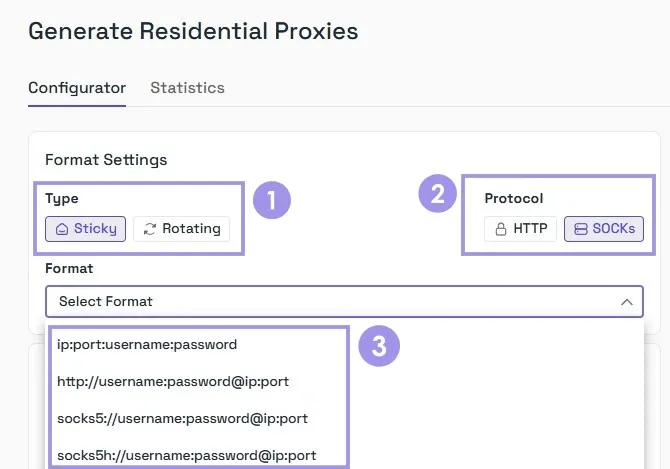
2. Doing so loads the configurator. Start with the Format Settings, begin by selecting between rotating and sticky type, followed by the protocol. To make things easier for you, we offer multiple formats—choose the right one.
3. Next, set the Targeting and Network settings. Select the country, city, and ISP/ASN. Once you have set your desired quantity and options, click on the “Generate” button.
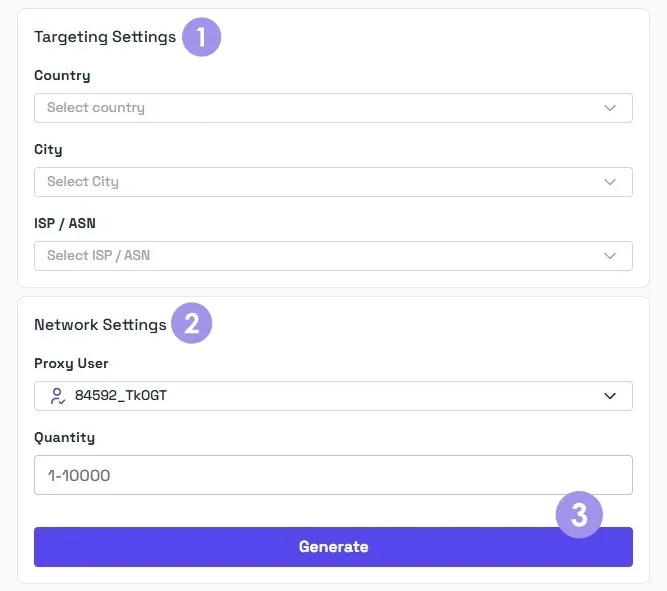
Note: You can skip the city and ISP/ASN if you don’t need specific targeting. This is generally recommended as the fewer you target, the larger your available proxy pool will be.
4. Upon clicking on Generate, the proxies are listed on the right based on the proxy format selected. If you’re working with proxies for the first time, it can get confusing. Hence, here is a quick breakdown with an example to help you figure it out.
Example: socks5://user123_s_TMEK5I970J0IC4QJ:abc123@residential.pingproxies.com:8864
All proxies generated follow the structure - (username_location:password@hostname:port number)
Not clear yet? Let us make it even easier for you.
- Hostname/Address: residential.pingproxies.com
- Port number: 8864
- Username & Location: user123_s_TMEK5I970J0IC4QJ
- Password: abc123
Note: For sticky proxies, remember to add the location to the username. Failing to do so routes you to the incorrect location.
Generate Static Proxies with Ping Proxies
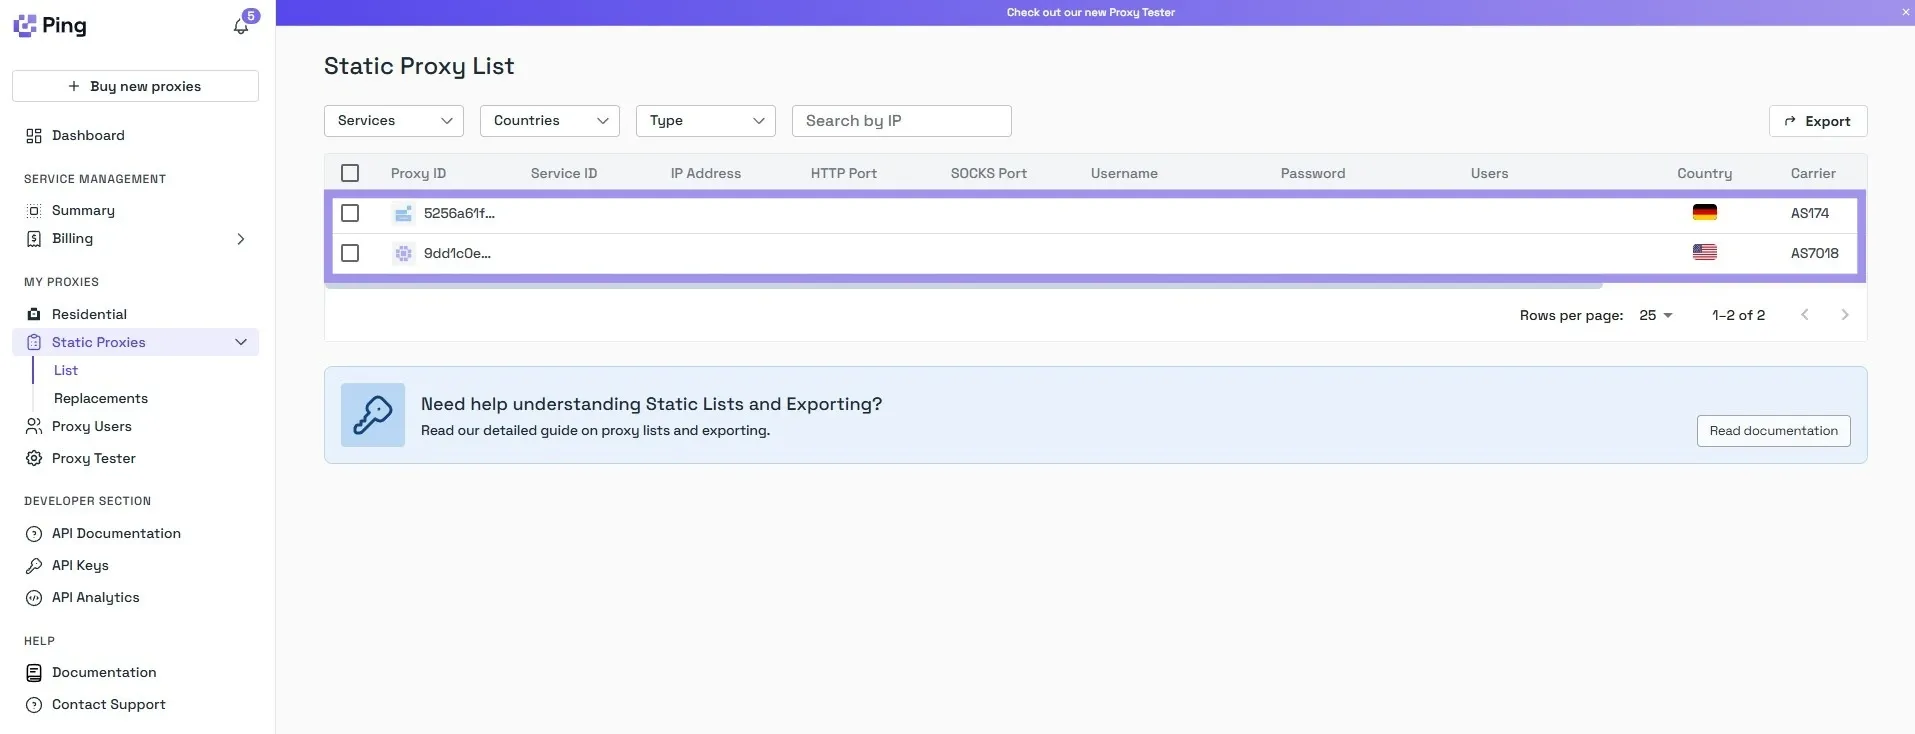
Unlike residential proxies, static proxies don’t need generation, making them comparatively easier to work with. From the dashboard, click the “Static Proxies” option. If you have purchased any static proxy, the list is updated, and you’re displayed with your username, password, IP Address (hostname), and port.
Are you unsure which proxy to choose? Here is a detailed comparison between datacenter and residential proxies. Find what best fits your needs.
Step 2: Add Proxies in Proxifier
Now that the proxies are generated successfully, follow the simple steps below to add them to the Proxifier.
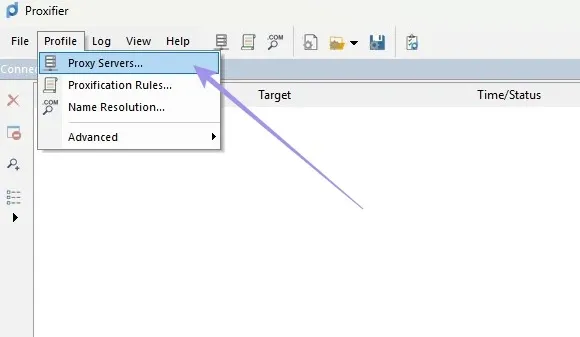
1. Open Proxifier, navigate to the menu bar, and click on Profile. From the available options, click on Proxy Servers.
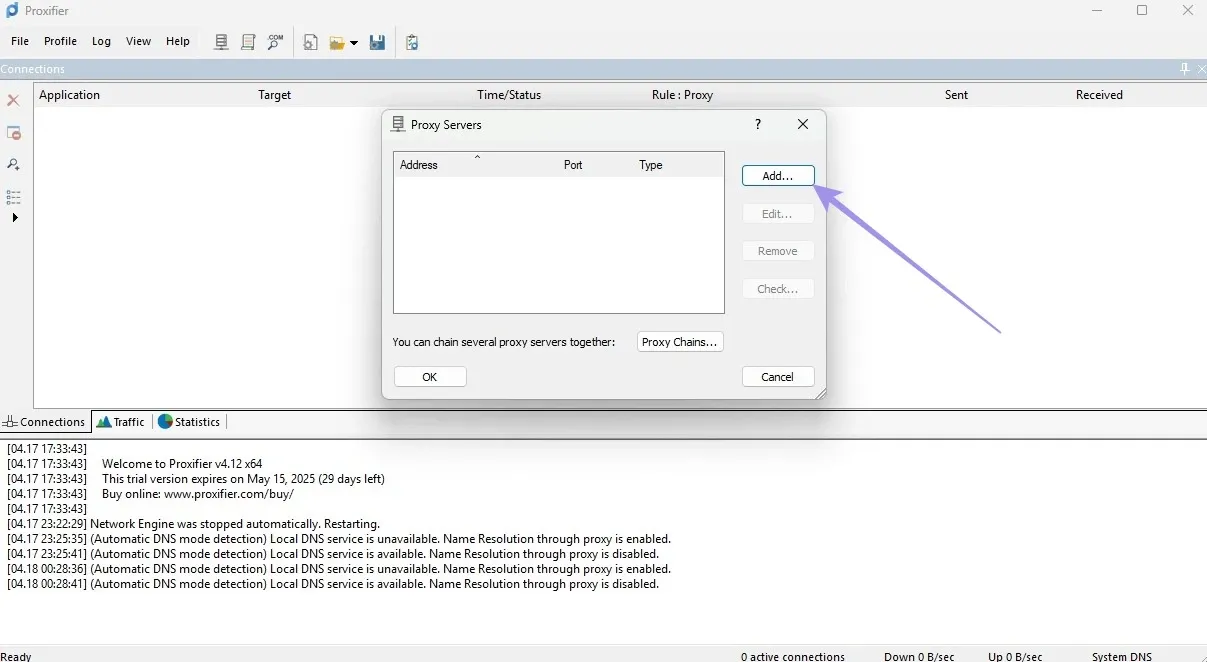
2. Doing so opens the Proxy Servers window. Look for the Add button and click on it.
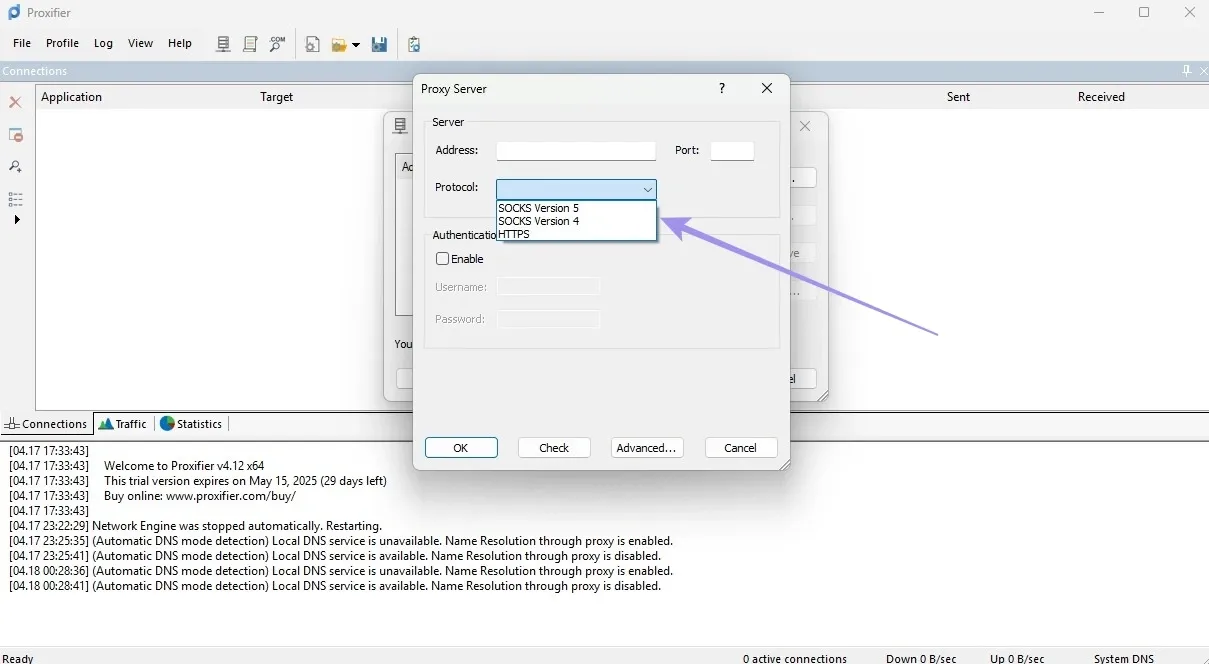
3. Fill in the proxy details. Make sure to select the right Protocol—it should be the same protocol that was selected when generating the proxy.
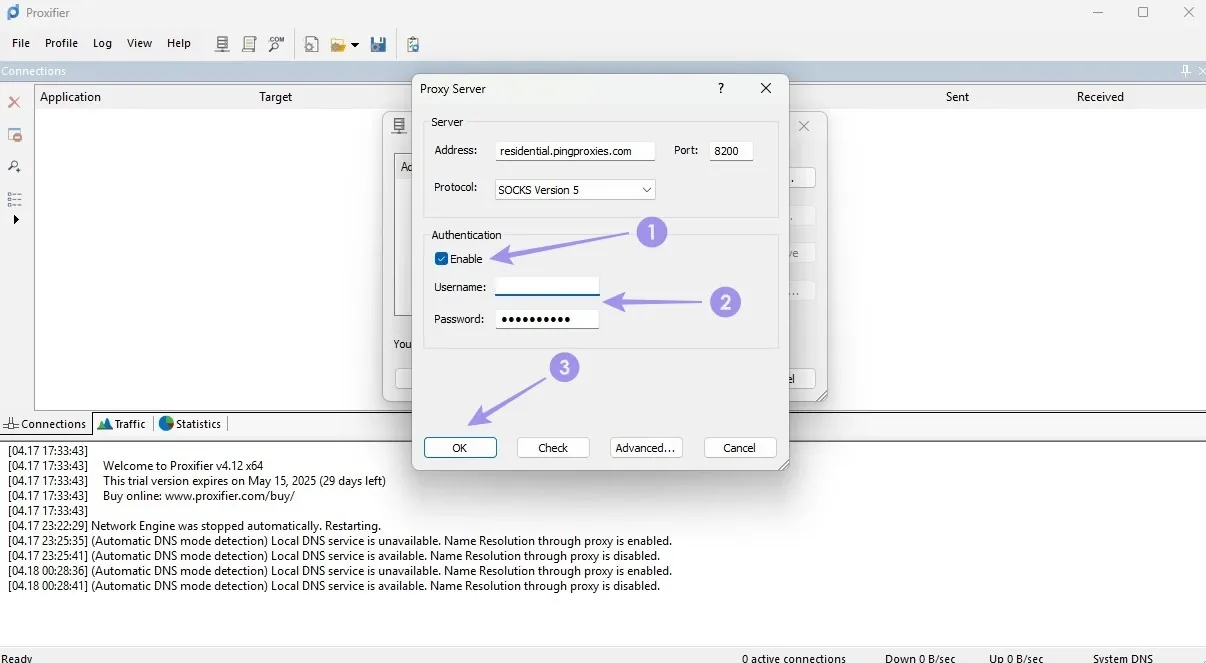
4. It isn’t complete yet, as the proxy details aren’t complete without a username and password. To enter them, check the Enable option under Authentication and click on OK once done.
Step 3: Verifying and Testing Proxy Setup
The proxy has been successfully added to Proxifier. But how do you verify that it is configured correctly? Proxifier offers an in-built tool for this. Here’s how to use it.
1. With the proxy added, the Proxy Server window updates the list. Select it and then click on the Check option.
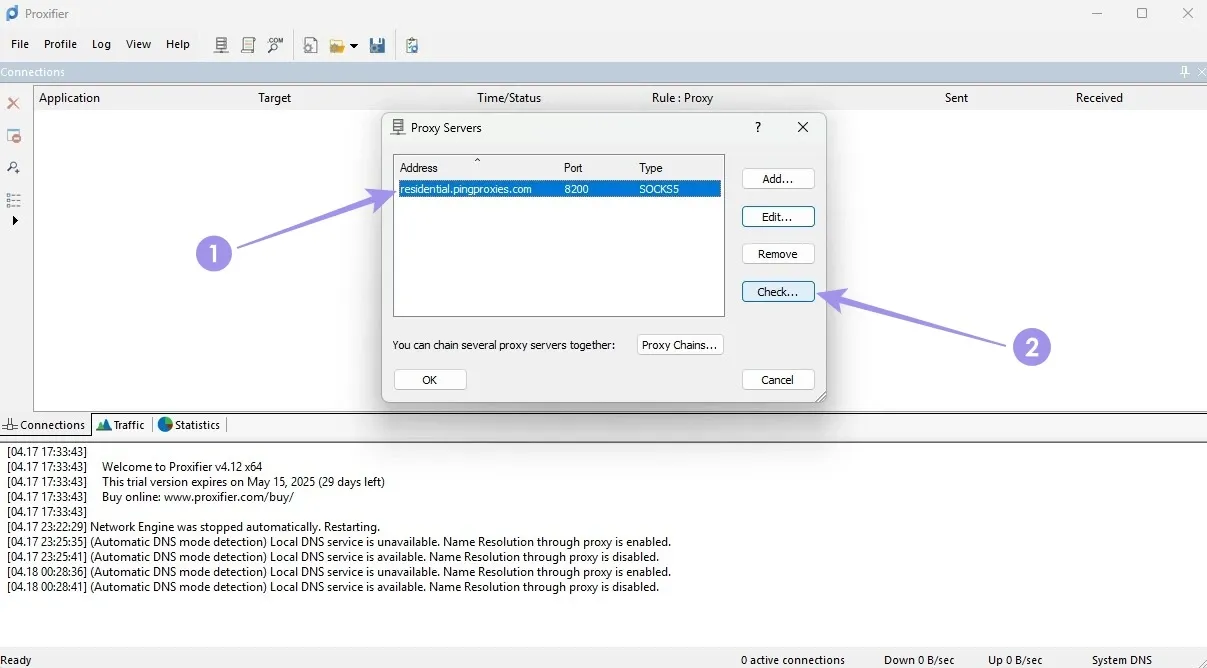
2. Now, the built-in tool gets into action by verifying and testing the proxy. If you find the message “Proxy is ready to work with Proxifier!”, the proxy is successfully integrated with Proxifier.
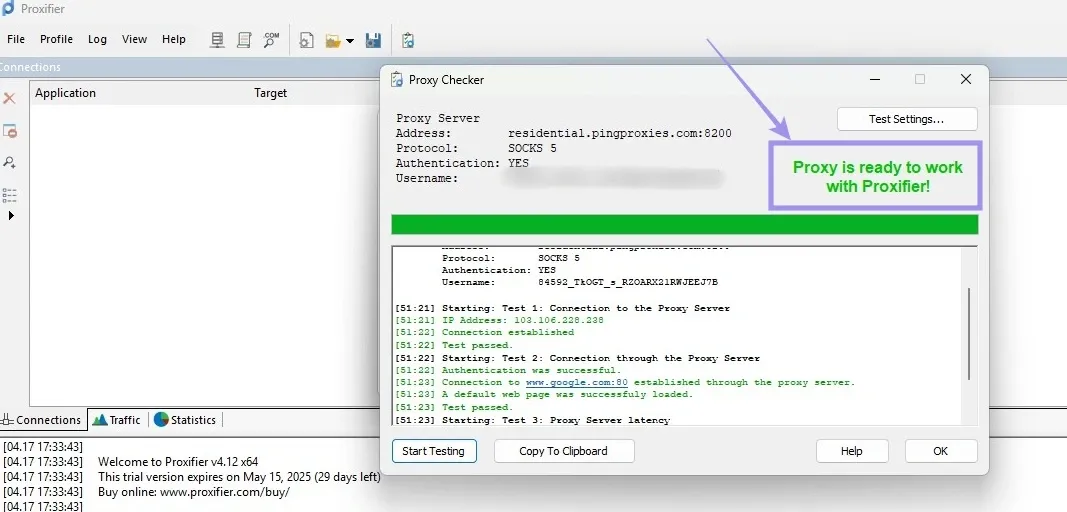
3. If the text is red and errors appear, verify that the proxy details are entered correctly. If that doesn’t fix it, check if there are any issues with proxy generation.
Note: While Proxifier’s built-in tool is a great addition, you can test the proxy without adding it. This is possible with the Ping Proxies proxy tester. You can test any proxy against real target URLs and check for success, latency, and location accuracy. Also, you get to bulk-test your proxy pool, view results by region, and share shareable results.
Enable Proxy Chain on Proxifier
A proxy chain lets you route your internet traffic through multiple proxy servers in sequence. Fortunately, Proxifier offers it, where each proxy in the chain passes your connection to the next. This way, you can achieve extra layers of masking, resulting in stronger anonymity.
To set up a proxy chain in Proxifier, follow the steps below:
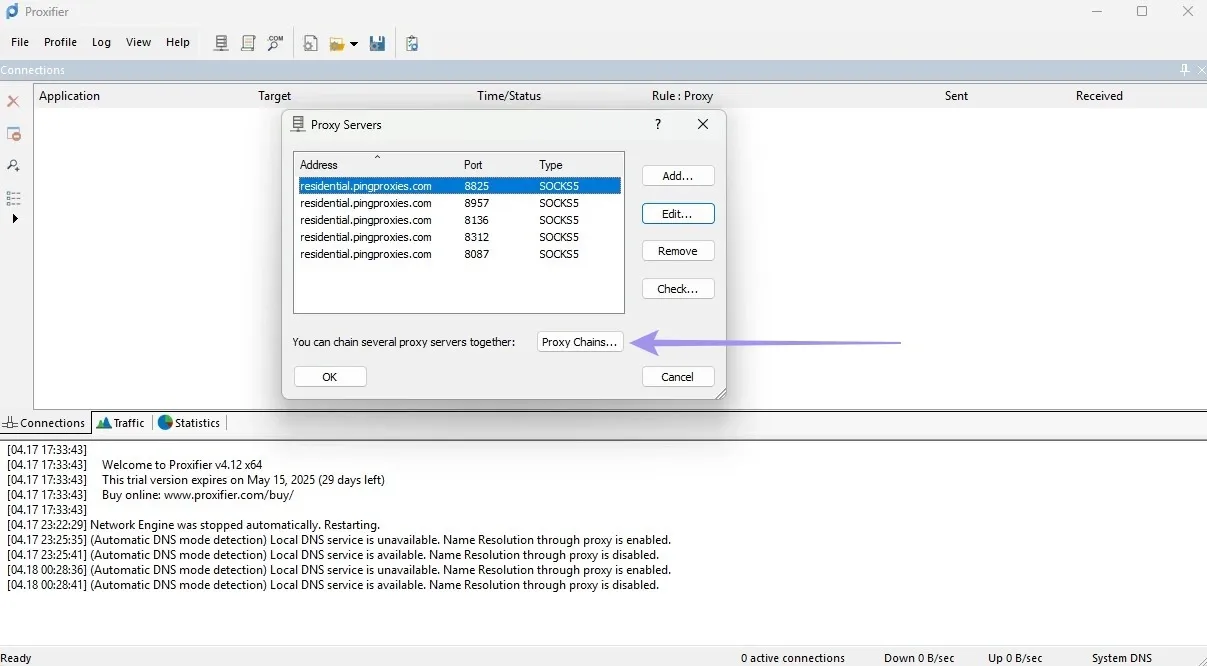
1. Continue adding proxies in the Proxy Server as explained above. Once you have successfully added multiple proxies, click on Proxy Chains.
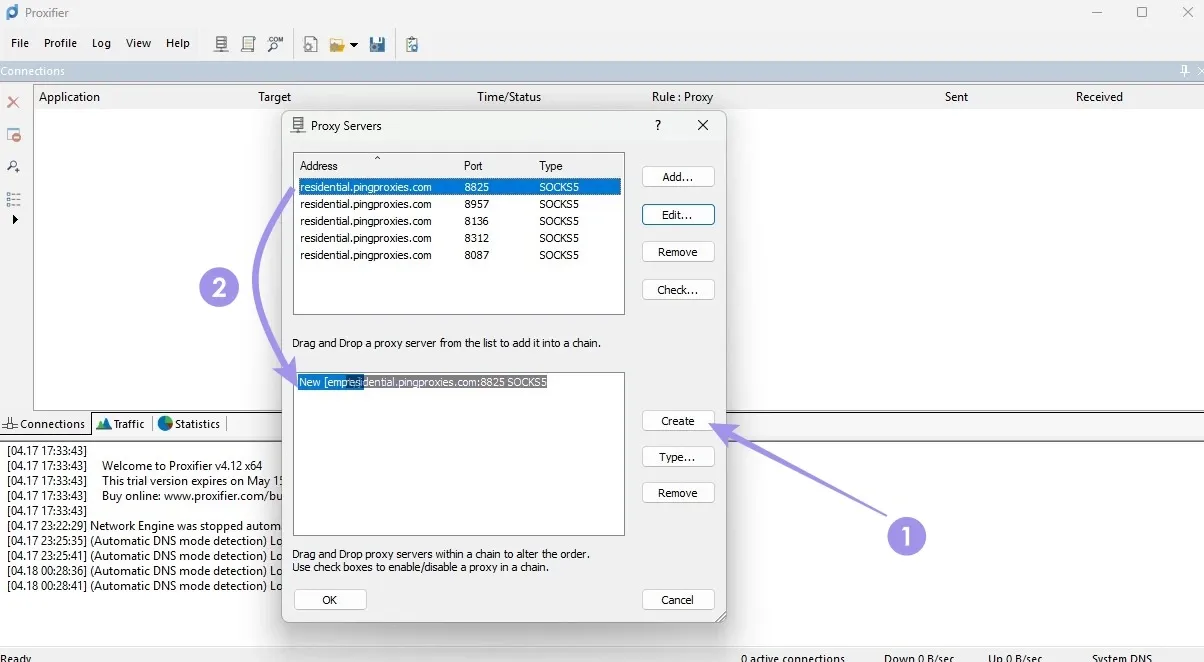
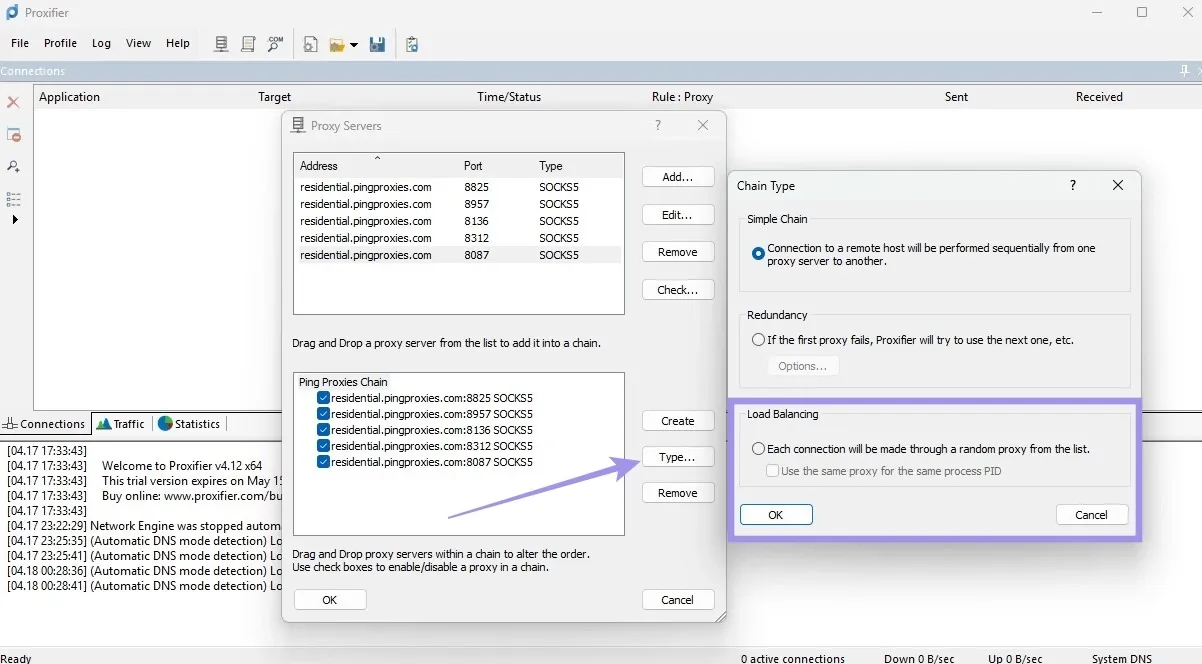
2. Next, click on the Create button to create a new chain. To form the chain, drag and drop the added proxies.
3. Once the proxy chain is completed, click on Type and choose the Chain Type. For demonstration, we have selected Load Balancing.
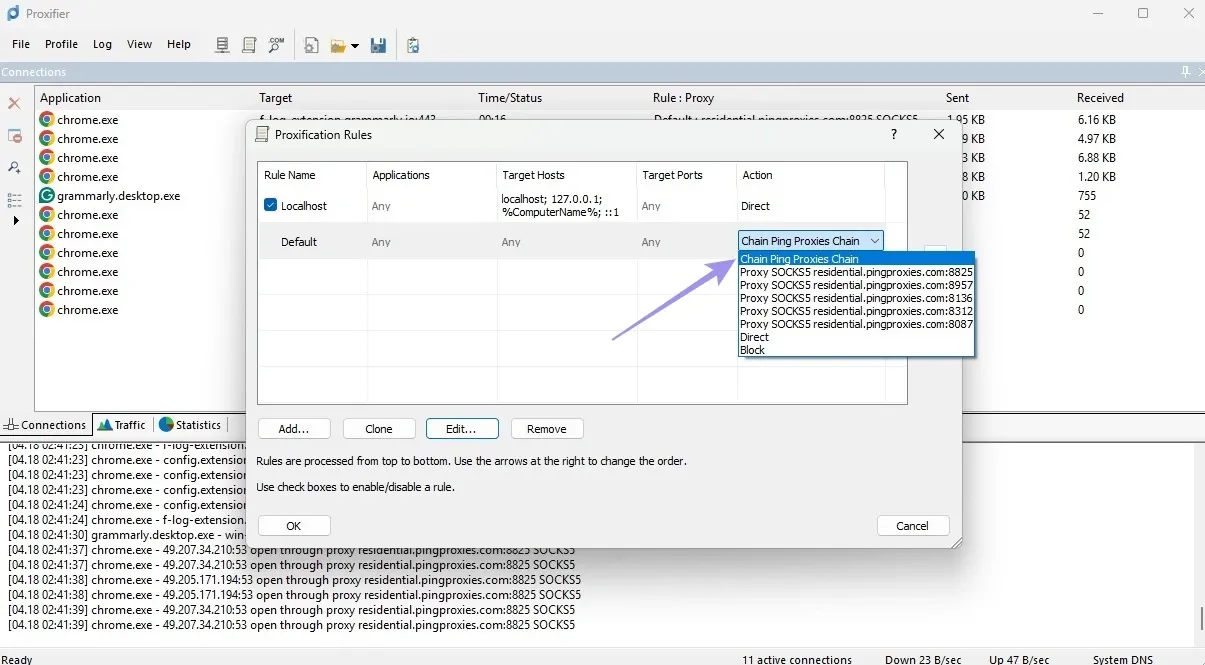
4. The proxy chain is successfully configured. But how do you put it into action? From the home, click on Profile, followed by Proxification rules.

5. Next, deselect Localhost and choose Default. Make sure to set the Action to the proxy chain created, and then click on OK.
Route Proxy Traffic to Specific Apps with Proxification Rules
Earlier, while setting up the proxy chain, we briefly mentioned Proxification Rules. It is crucial to understand the proxification rules to route proxy traffic to specific apps. For those using Proxifier for the first time, proxification rules allow you to route proxy traffic to specific applications, domains, or even ports.
Instead of applying a proxy to all system traffic, you can choose exactly which apps should go through a proxy. To create and manage these rules, follow the steps below.
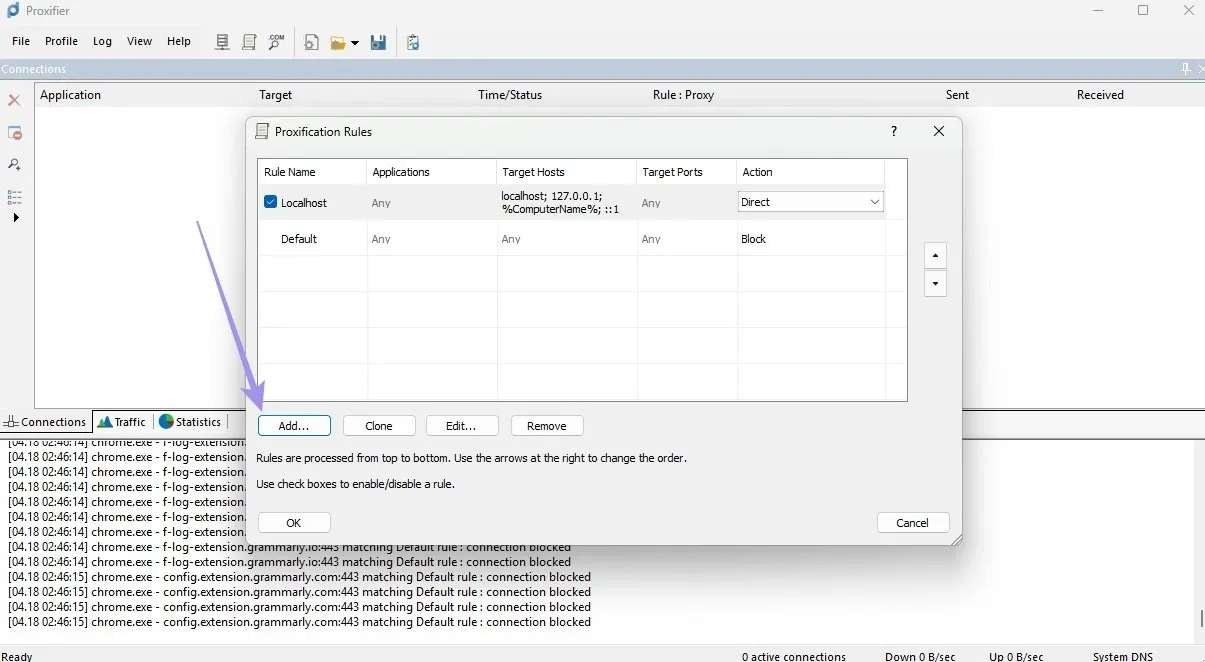
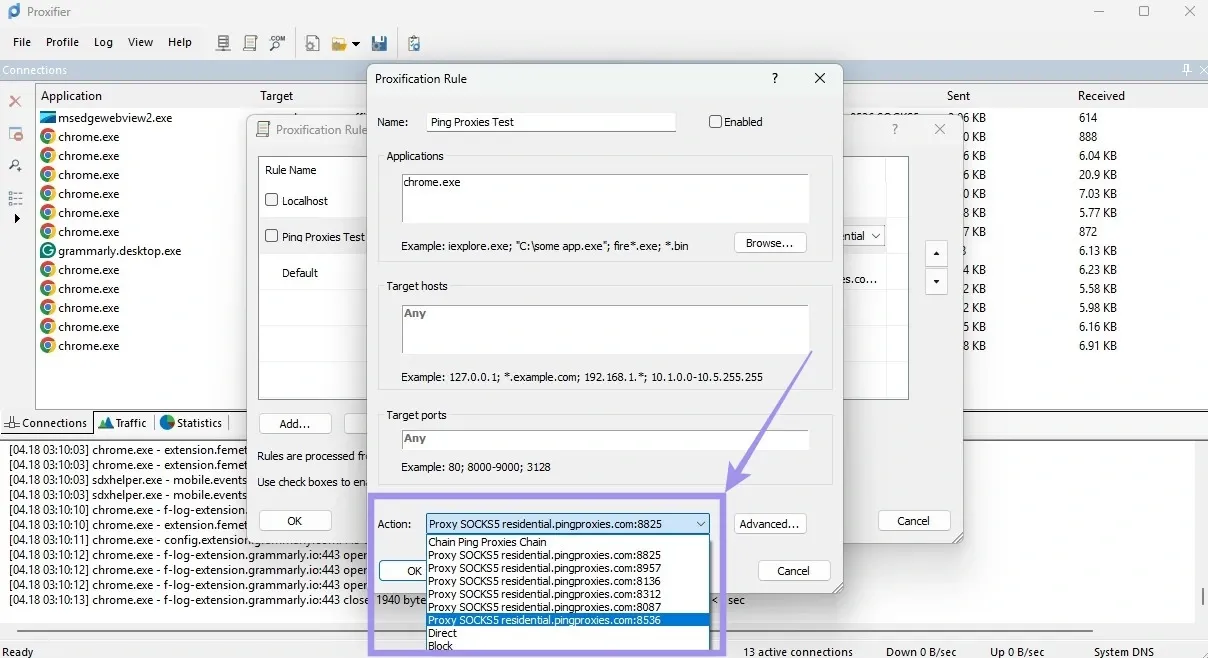
1. From the Proxifier home page, click on Profile and then Proxification rules. Next, click on Add to create a proxification rule.
2. Now, name the proxification rule and then choose the app by clicking on Browse.
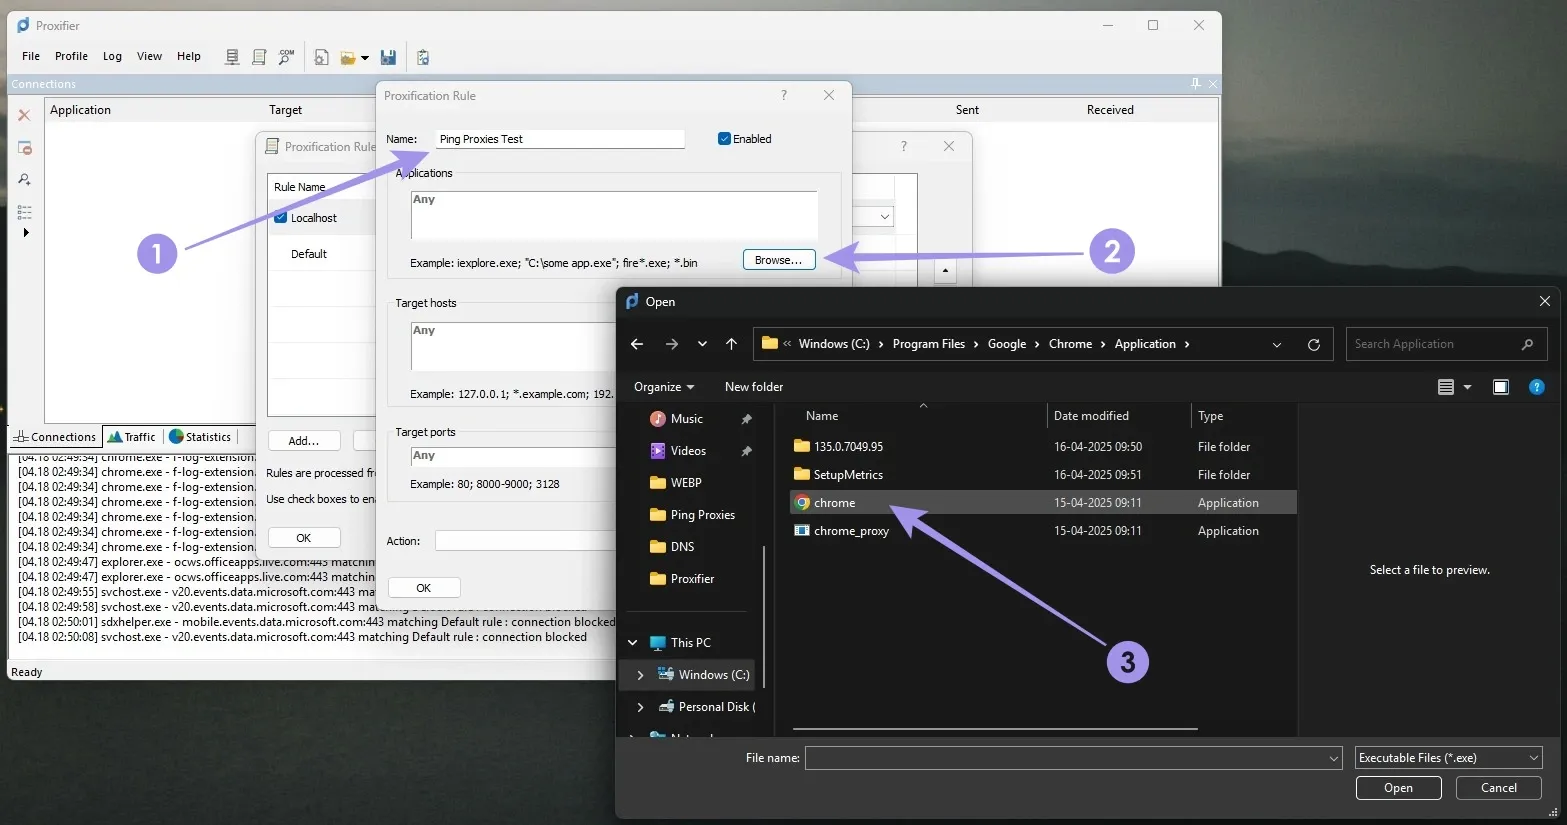
3. Finally, set the action, which is selecting a proxy, and then click OK. You can also modify target hosts and ports.
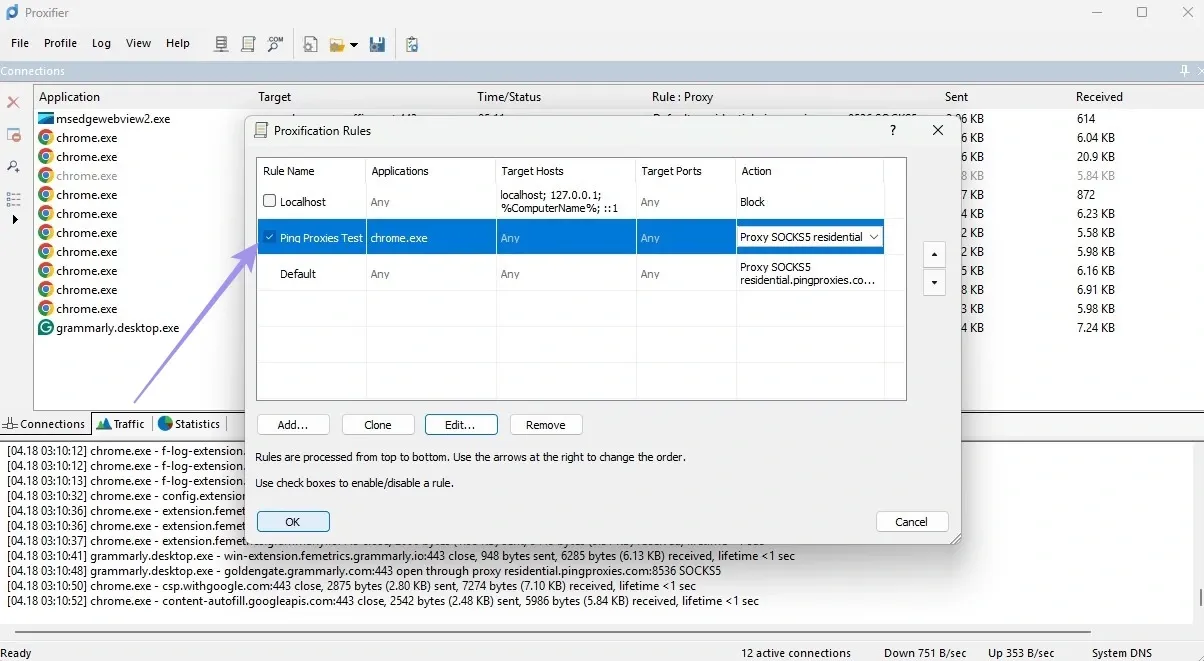
4. Now, select the newly created proxification role and then click on OK.
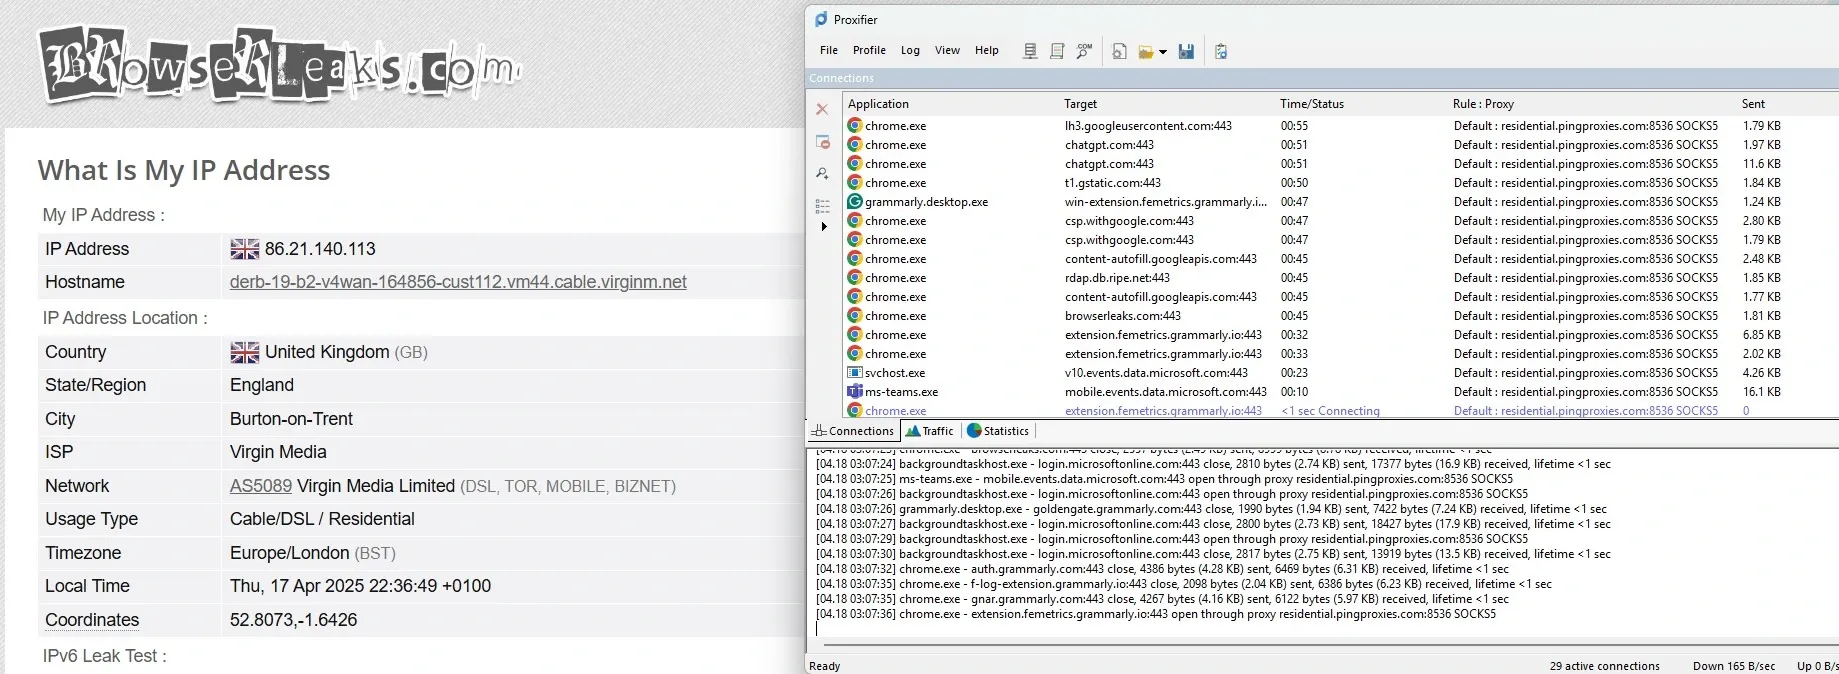
5. For demonstration, we set up the UK residential proxy and tested the proxification rule by visiting the IP address lookup website. As expected, the Proxifier successfully routes proxy traffic through Chrome.
Wrapping Up
Proxifier helps you route internet traffic through proxies, even for apps that don’t support proxy settings. It has features like proxy chaining and Proxification Rules, which give you better control, flexibility, and privacy. Just make sure to follow legal and ethical practices when using proxy tools, especially for data collection or region-based access.
For reliable proxy integration, Ping Proxies offers ethically sourced residential and datacenter options that work smoothly with Proxifier. With broad protocol support, global coverage, exceptional uptime, and low latency, it’s a practical choice for users who need stability without overcomplicating setup.