BitBrowser Proxy Integration Guide: Profiles and Configuration
Most multi-account workflows fall apart because browsers share cookies, device data, and fingerprints. One slip, and all your accounts get linked. BitBrowser eliminates that risk by letting you build fully isolated profiles, each with its own browser identity and proxy route.
In this guide, you’ll quickly learn how to set up profiles, configure proxies, and integrate proxies so your entire setup stays secure, stable, and undetectable.
What is BitBrowser?
If you’ve come across BitBrowser while exploring anti-detect browsers, it’s a tool designed to help you run multiple accounts without triggering security flags. It does this by giving every profile its own unique fingerprint and isolated environment, so each account behaves as if it’s on a separate device.
Key Features of BitBrowser
- Unique fingerprints: Every profile appears to be a different device online.
- Isolated environments: Cookies, sessions, and data stay fully separate.
- Easy multi-account control: Manage many accounts without confusion or mix-ups.
- Simple proxy setup: Add and switch proxies inside each profile.
- Team-friendly sharing: Share profiles securely with your team.
- Bulk proxy integration: Import, assign, and modify multiple proxies at once.
- RPA support: Automate repeated actions with built-in scripting and task sequences.
- Phone Profiles (Cloud Devices): Run mobile sessions using BitBrowser’s cloud phone system for mobile-based platforms.
BitBrowser Installation and Basic Setup
Before you start creating profiles or adding proxies, you’ll need to set up BitBrowser. Follow the steps below to get started.
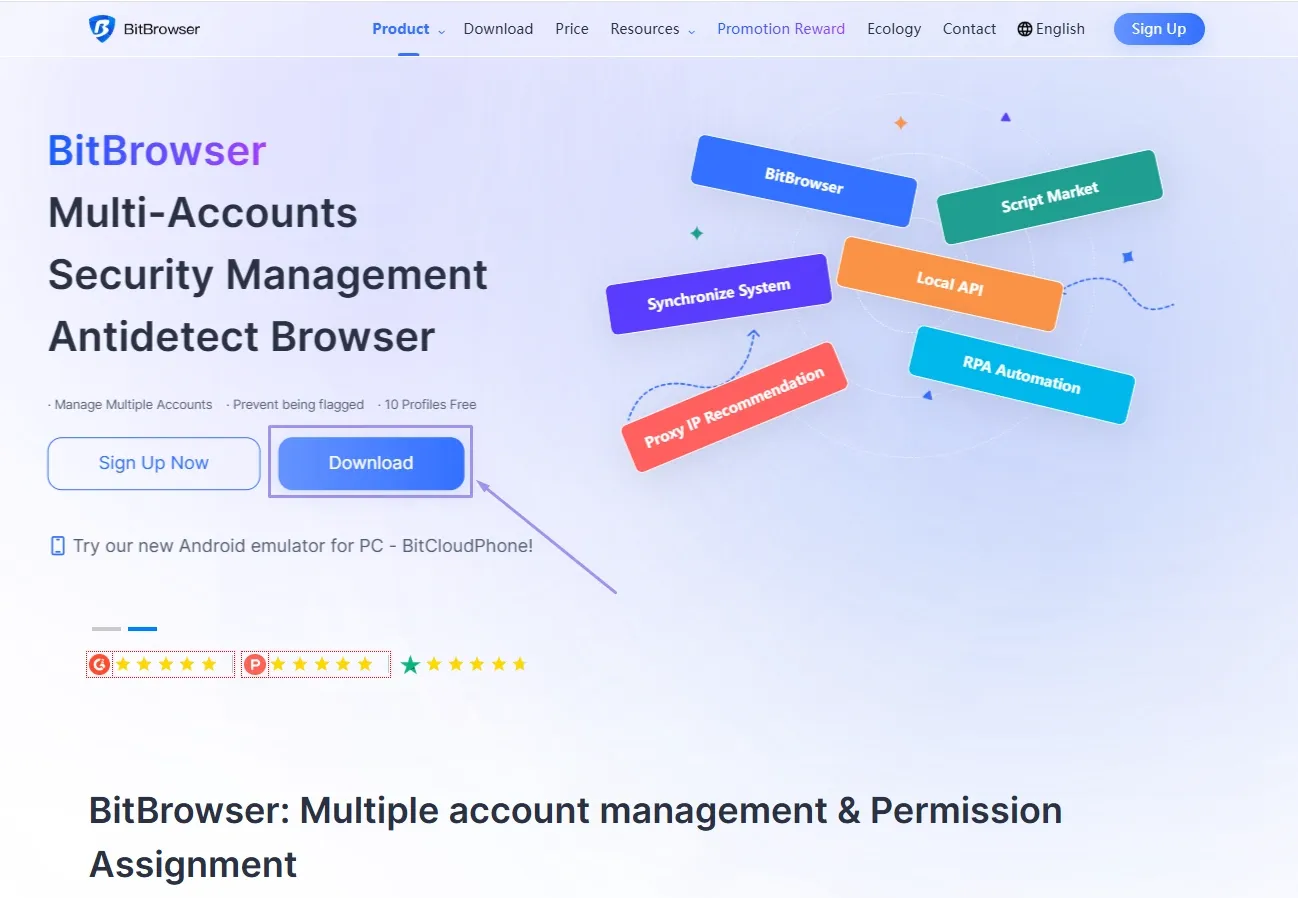
1. Download BitBrowser: Go to the BitBrowser (download the desktop client) for your operating system. Run the installer and complete the setup, which takes about 2 to 5 minutes.
2. Create an Account: Open the app, sign up if you’re new, or log in with your existing BitBrowser account.
3. Log In to the Dashboard: After logging in, BitBrowser will load your workspace and prompt you to start creating profiles.
How to Add Profiles in BitBrowser
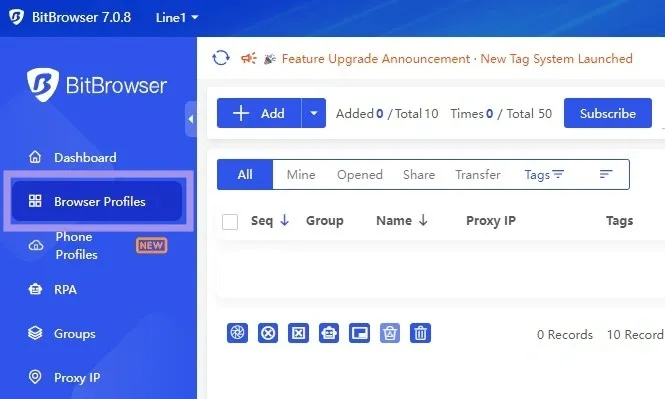
Once BitBrowser is installed and you’re logged in, you can start creating your first browser profile.
1. Open BitBrowser, and you’ll see the “Browser Profiles” tab in the main sidebar on the left. Now, click on it. This is where all your profiles will appear.

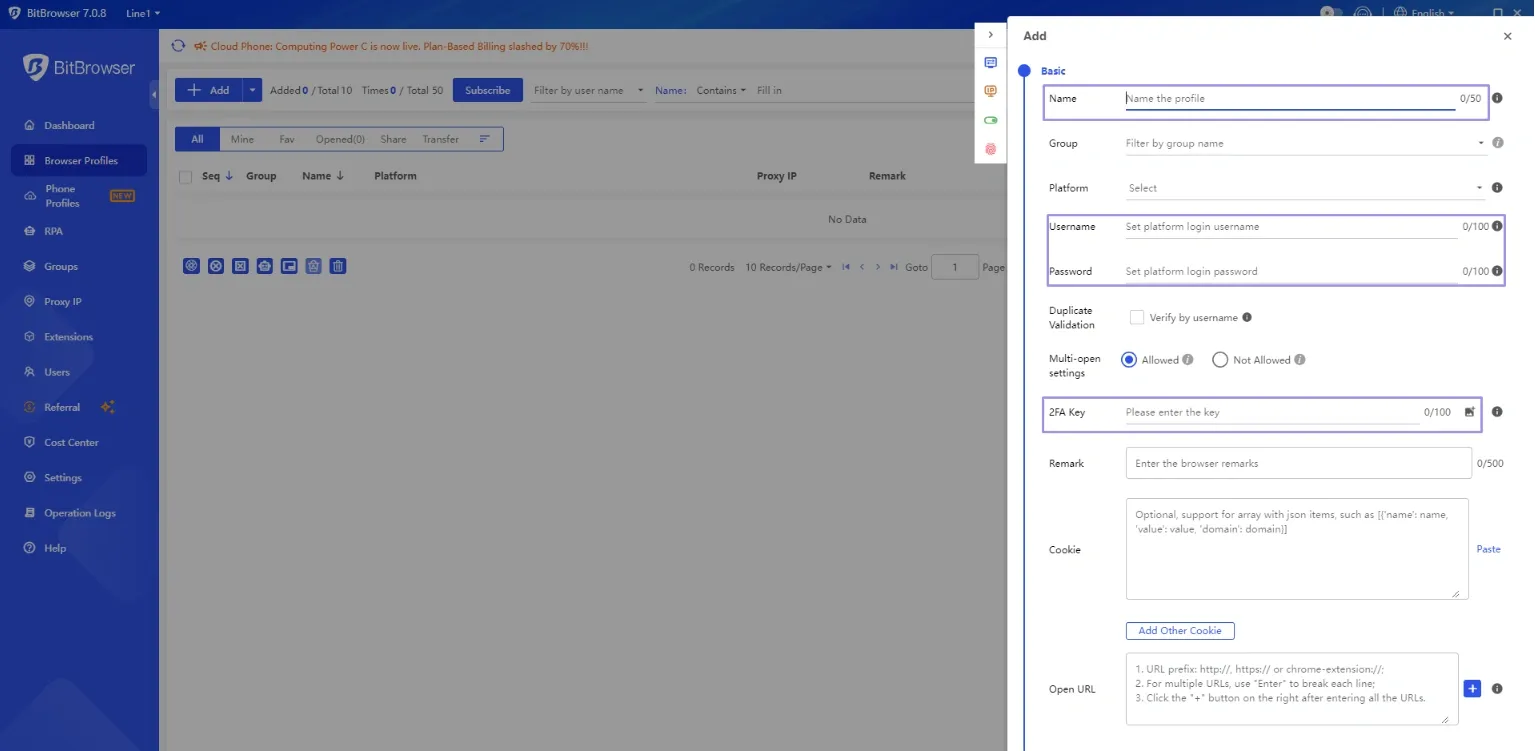
2. Click the “Add” button to create a new profile. This opens the profile setup window, where you configure your new environment.
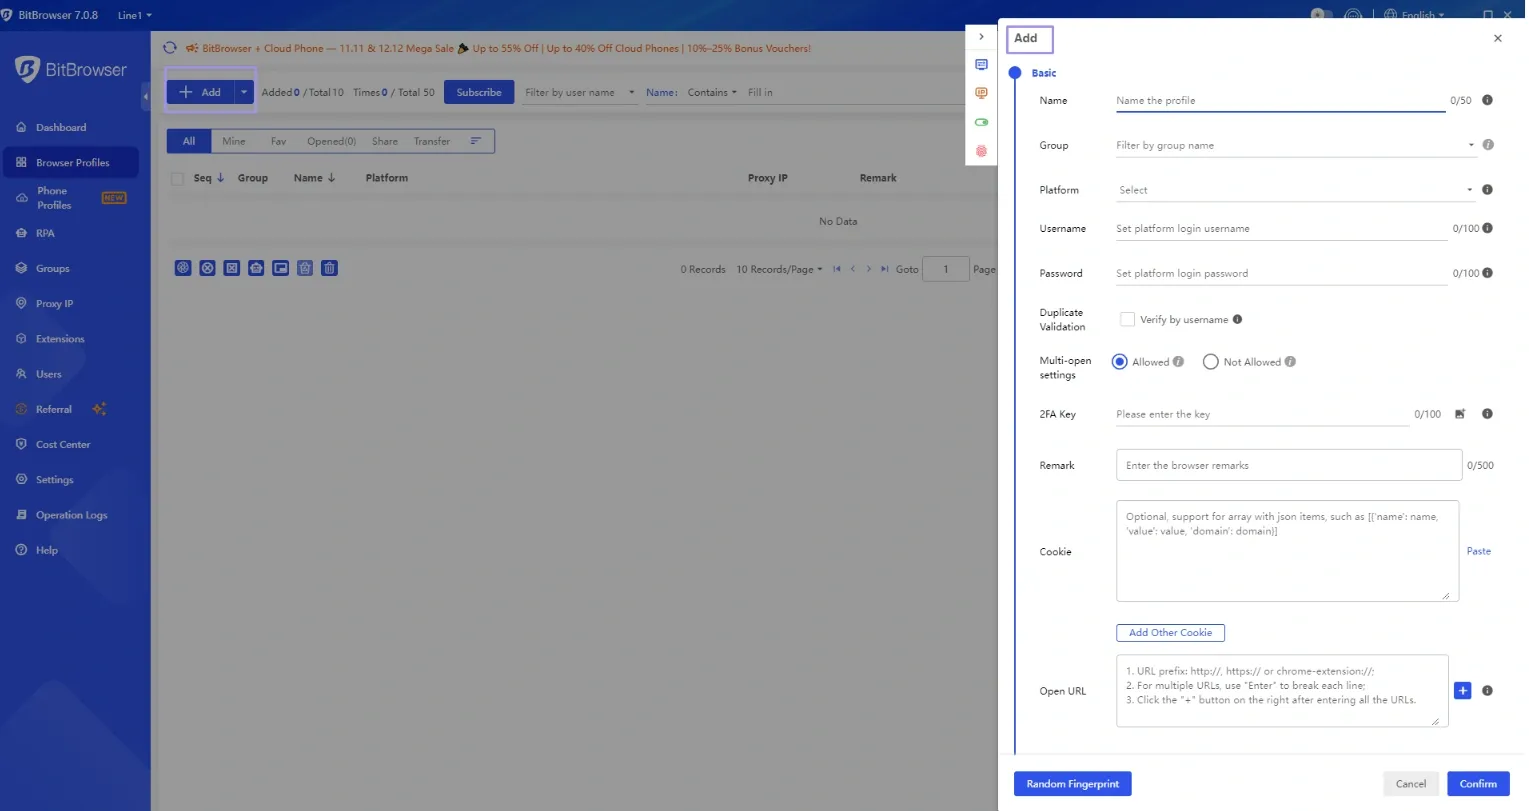
3. Fill out the Basic Information section, such as profile name, Platform/OS, Username, and Password. While groups aren’t necessary at this stage, you can organize profiles into folders or categories later on when managing many accounts.
You can also add cookies or a 2FA key here if you want to bring in an existing login session. These fields help you keep profiles organized and ready for workflow separation.
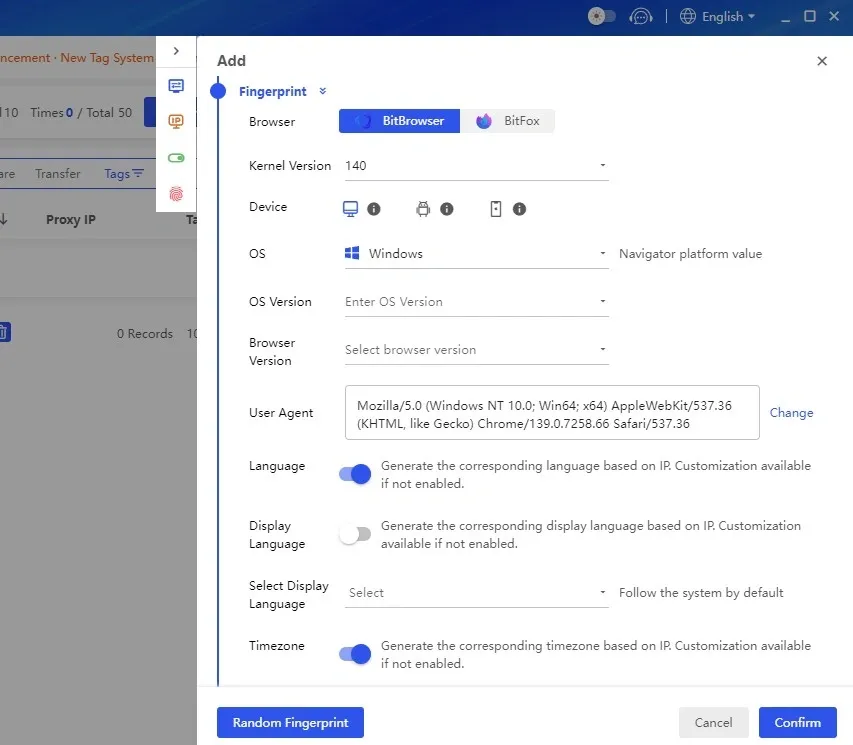
4. Next, adjust the Fingerprint settings. BitBrowser automatically creates a fingerprint, but you can fine-tune it if your setup requires more control. These options let each profile look like a different device without raising flags.
You can adjust key fields like:
- WebRTC: Controls how your real IP is exposed or hidden.
- Timezone: Helps your profile match its IP location naturally.
- Location: Sets the geographic region your browser reports.
- WebGL metadata: Shapes how your graphics card appears to websites.
- Hardware details: Defines your device’s CPU, memory, and display info.
Work with options that you're aware of. We recommend choosing the BitBrowser default fingerprint on your first time.
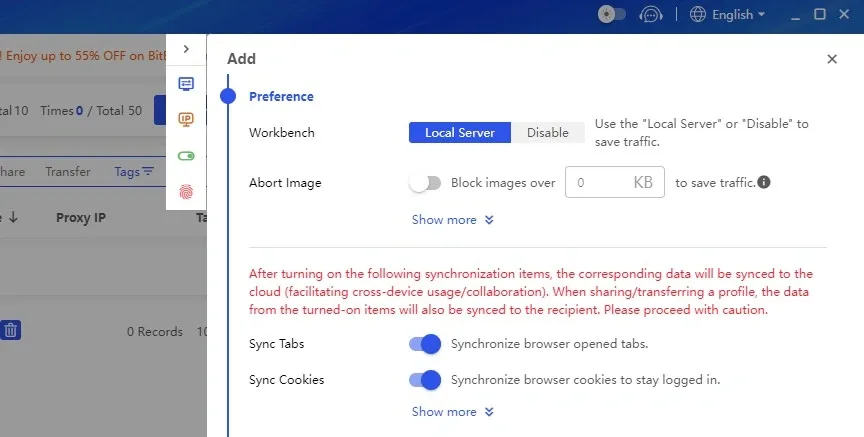
5. Now, review your preferences. Here, you can enable or disable options like cookie saving, account data storage, and how extensions behave. These settings help you control what the profile keeps, what it clears, and how it interacts with add-ons, so choose whatever fits your workflow.
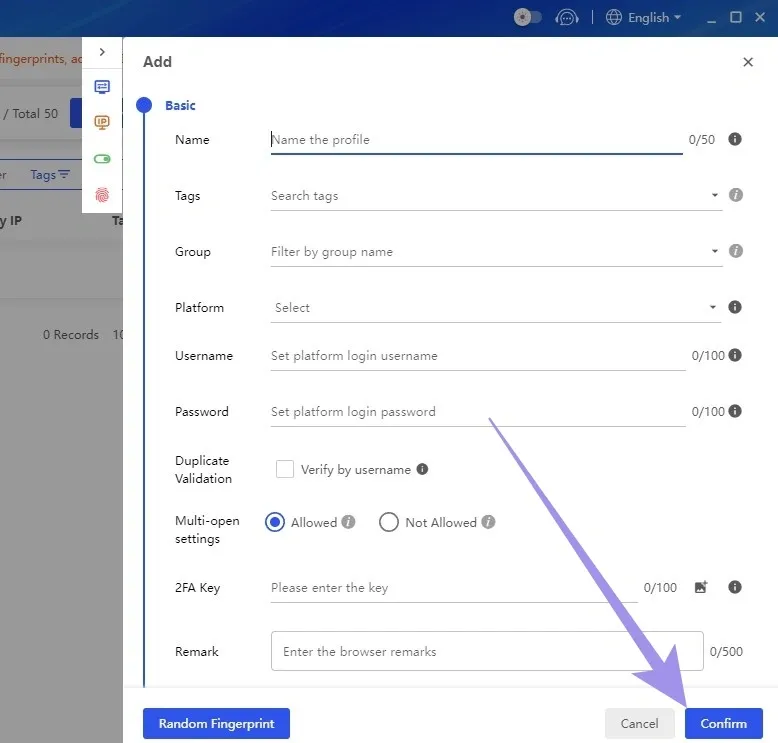
7. Now click “Confirm” to create the profile. Your new profile appears in the Browser Profiles list.
Generate Proxies with Ping Proxies for BitBrowser
The process of generating proxies varies depending on the provider you use. With Ping Proxies, you can generate both static (ISP or datacenter) and residential proxies based on what your workflow needs.
Here’s how easy it is to generate proxies with Ping Proxies.
Static Proxies (Datacenter & ISP)
Static proxies are ideal when you want fast, stable IPs that do not rotate. If you’ve already purchased them from us, you’ll find them directly in your Ping Proxies dashboard.
Generation steps are also not needed. Most proxy providers follow this same approach, so all you have to do is copy the host, port, username, and password and add them into BitBrowser.
Here’s how to access your static proxies:
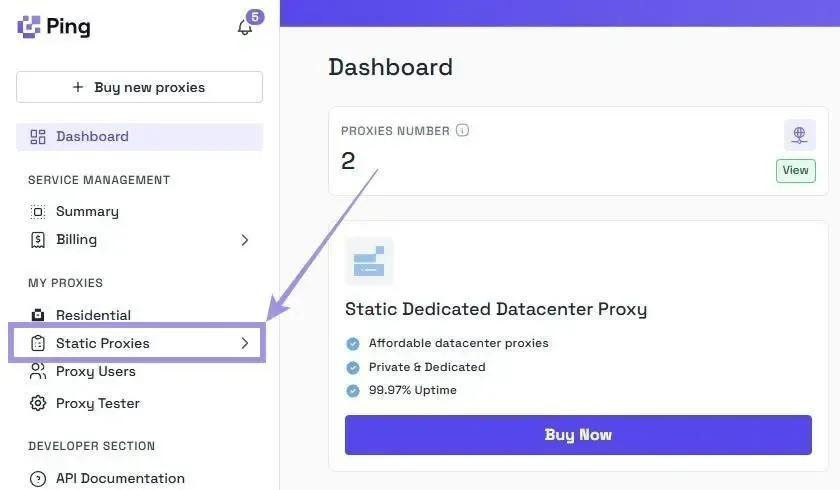
1. Go to My Proxies, then Static Proxies, in the Ping Proxies dashboard.
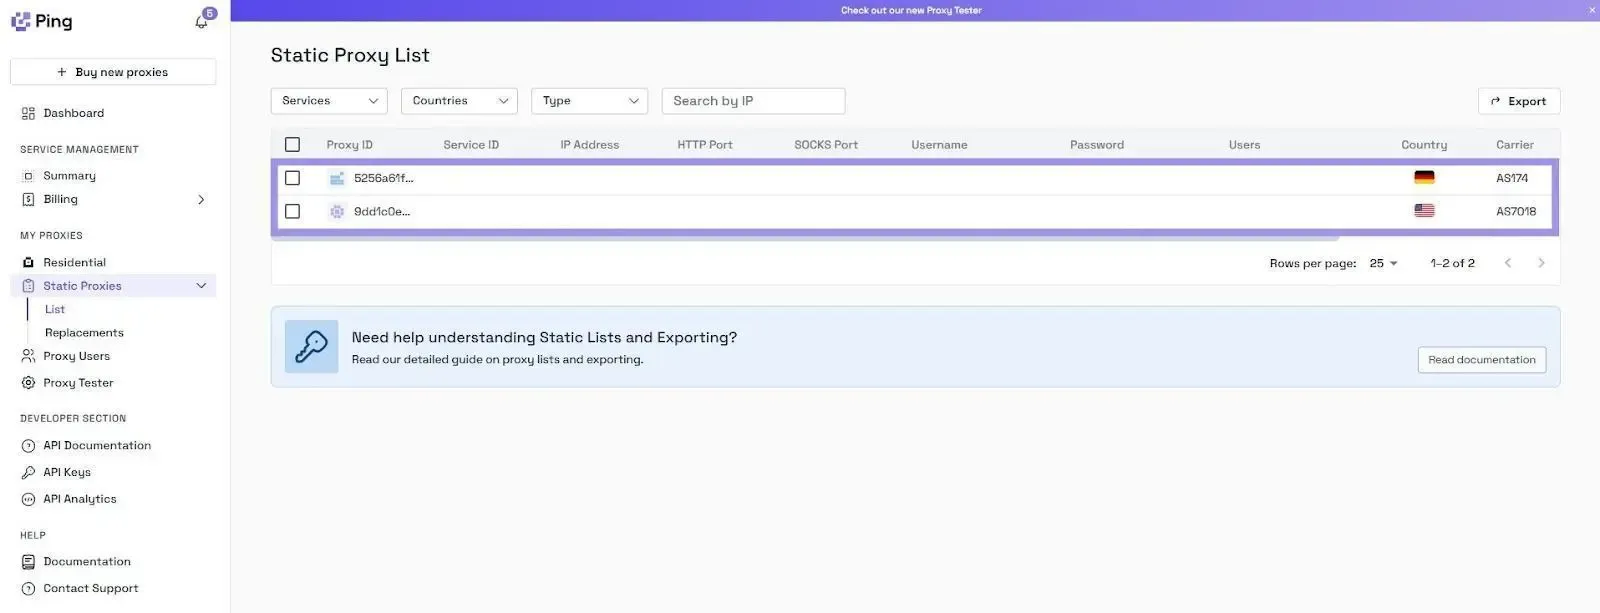
2. Once you open the Static Proxy list, you’ll see each proxy displayed with its hostname, port, username, and password, so you can easily copy the details and paste them into BitBrowser.
Residential Proxies
Residential proxies offer higher trust and better success. Unlike static proxies, generating residential proxies involves a few steps. Our residential configurator makes it easier for you.
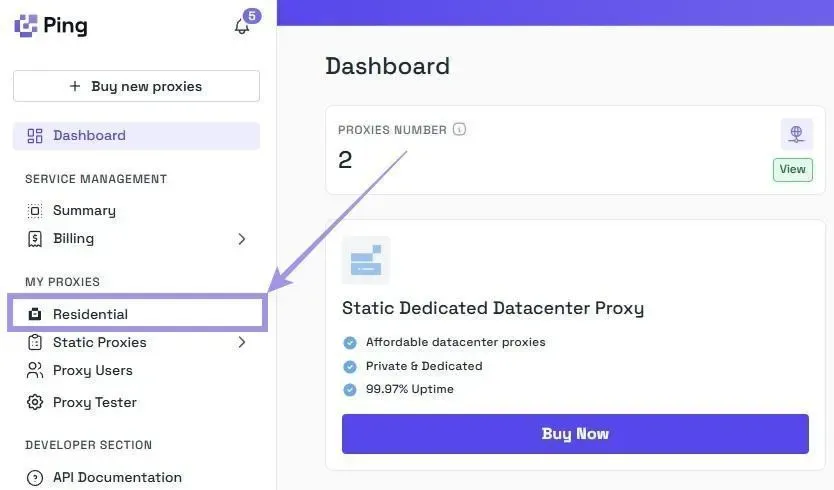
1. On the Ping Proxies dashboard, go to “My Proxies” in the left bar and select the “Residential” option.
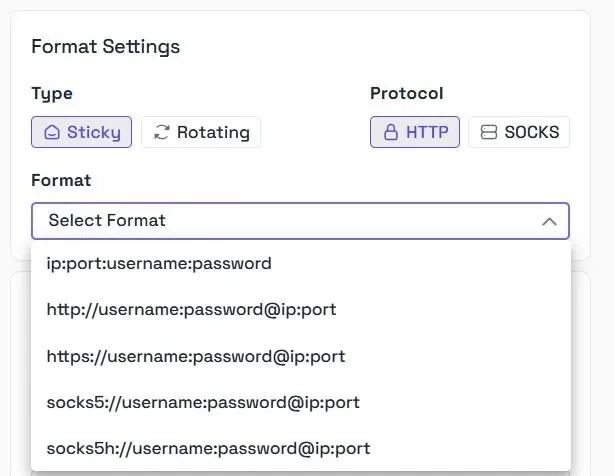
2. Now, choose your format. Ping Proxies provides both rotating and sticky residential options, with support for HTTP and SOCKS5. You can select any format you prefer, or leave it for the configurator to choose based on your choices.
3. Next, set your targeting. You can configure precise, real-time targeting such as country, city, ZIP code, ISP, and even ASN, to match your proxy to the exact environment you need. This level of control helps you shape how your BitBrowser profile is configured and ensures it aligns well with your workflow requirements.
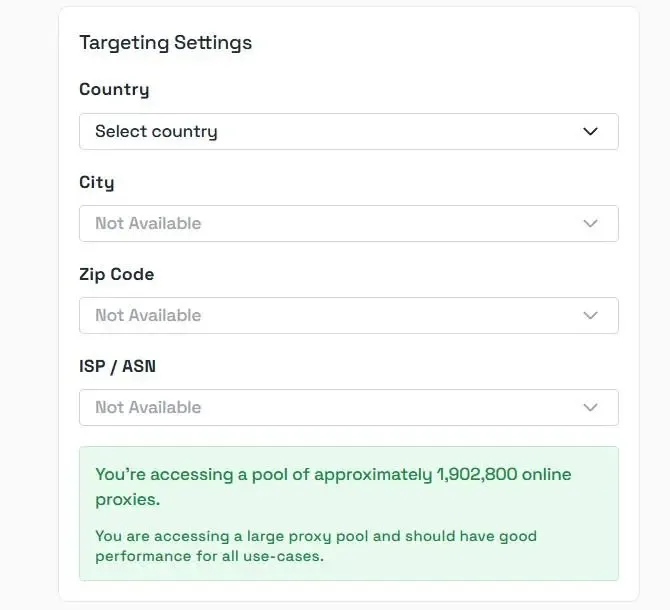
4. Enable SmartPath. SmartPath is our free in-house AI routing layer that sends non-critical traffic over datacenter routes to reduce residential bandwidth usage.
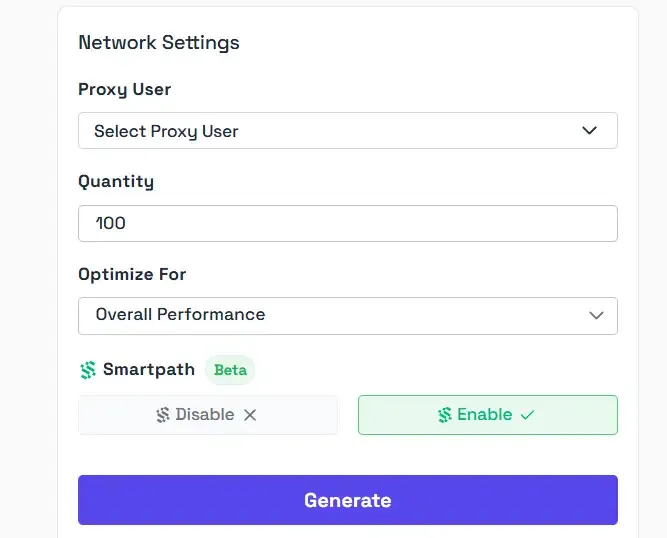
5. After choosing targeting and format, click Generate to generate your residential proxy link.
Your proxy will appear in this structure:
residential.pingproxies.com:8683:user_123:pass@123
Which breaks down as:
- Hostname: residential.pingproxies.com
- Port: 8683
- Username: user_123
- Password: pass@123
Unsure if the residential proxy type is the right proxy for your workflow? Try BitBrowser with 1GB of free residential bandwidth.
How to Integrate Proxies in BitBrowser
Once your proxies are generated, you can add them directly inside any BitBrowser profile.
Steps to Add Your Proxy
1. Go to Browser Profiles, choose the profile you want to edit, or create a new profile.
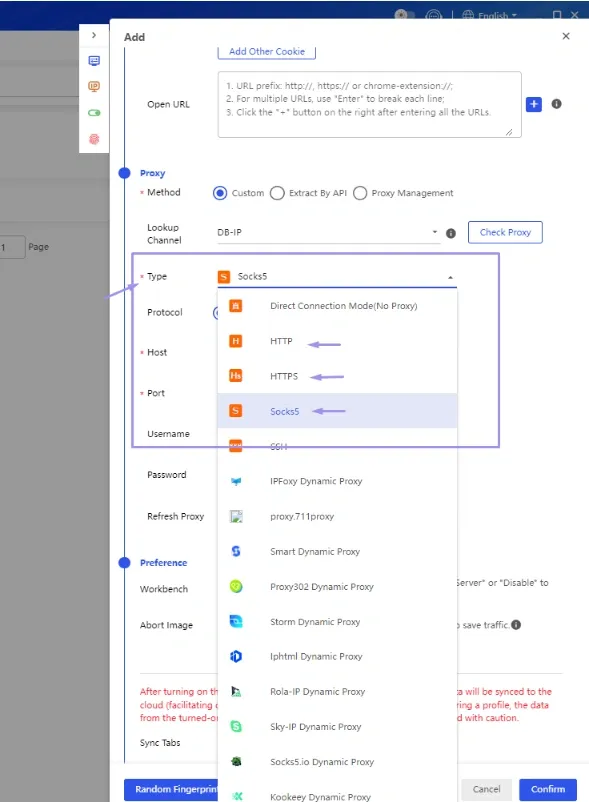
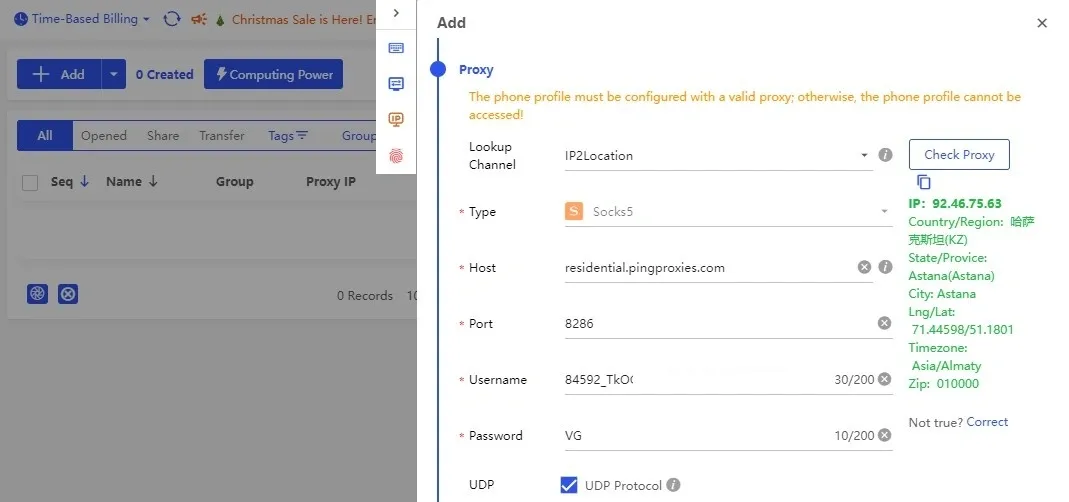
2. Next, move to the Proxy tab. Go to the Proxy section inside the profile. BitBrowser gives you three options for adding a proxy:
- Custom: Paste your Ping Proxies string manually
- Extract By API: Pull proxies using an API link (only if your provider supports it)
- Proxy Management: Select a proxy you’ve already saved inside BitBrowser
If you have a proxy from another provider, it is ideal to choose Custom as it lets you enter the proxy string.

3. Then paste your proxy string. BitBrowser accepts the full format: (hostname:port:username: password). Simply paste your proxy (residential, ISP, or static) credentials into the Host/Proxy field.
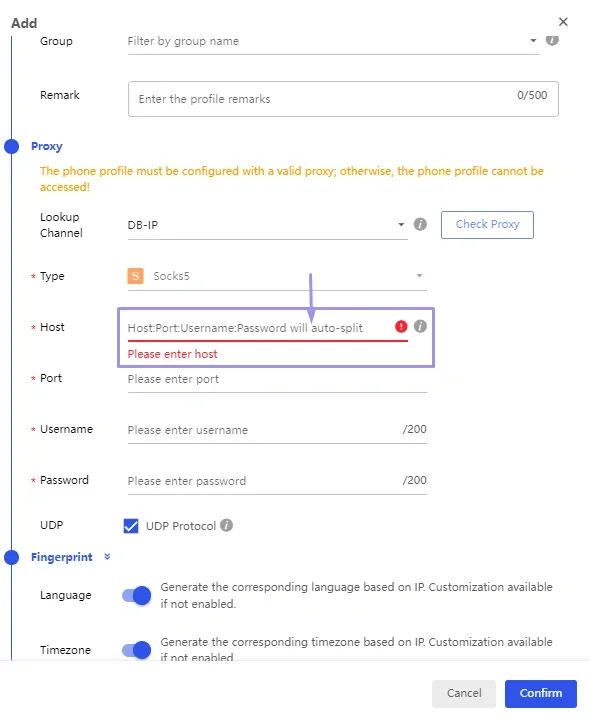
Note: Autosplit can turn tricky. Always double-check each field before proceeding. There are chances for them to be misplaced during autosplit.
4. After filling in the details in the respective fields, select your protocol (HTTP or SOCKS5). Match the protocol you generated in your Ping Proxies dashboard.
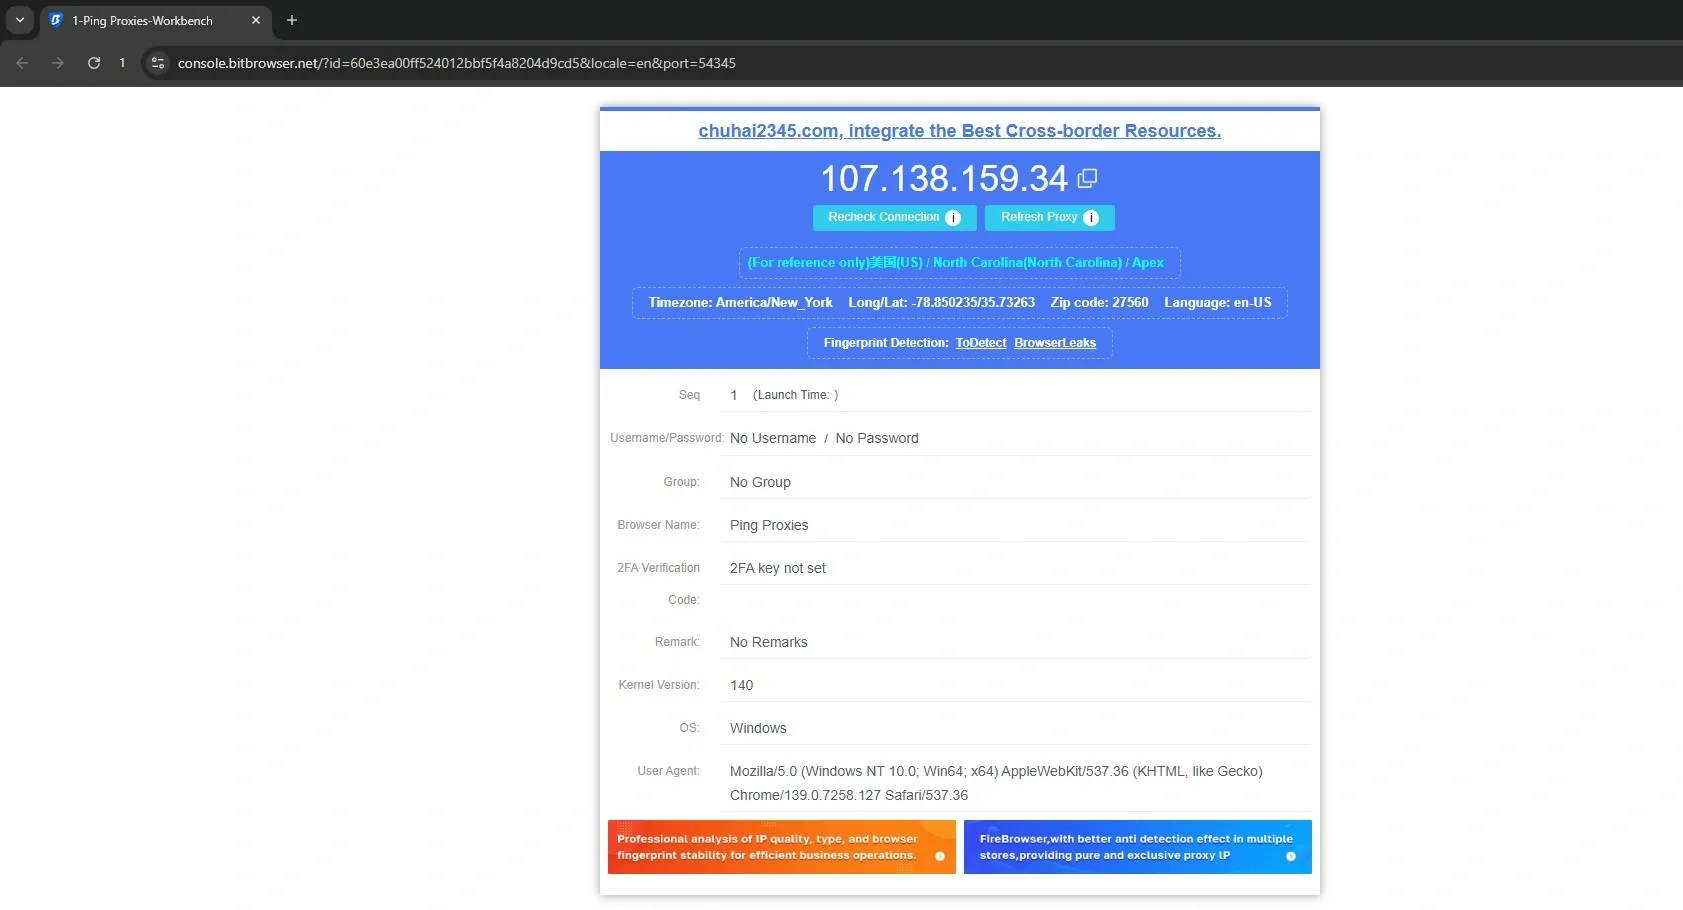
5. BitBrowser will automatically display the IP, ISP, and geo-location after you paste your proxy. Confirm that the detected region matches the location you selected when generating your proxy.
6. Once ready, click “Check Proxy”. BitBrowser will test the connection and display the IP details.
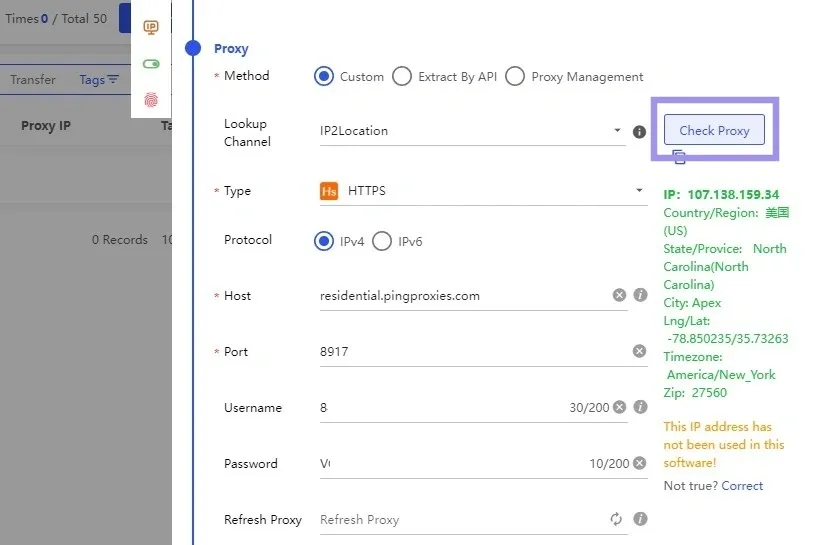
7. Once the proxy check is done without errors, click “Confirm” so BitBrowser adds the proxy to that profile.
Can We Add Bulk Proxies to BitBrowser?
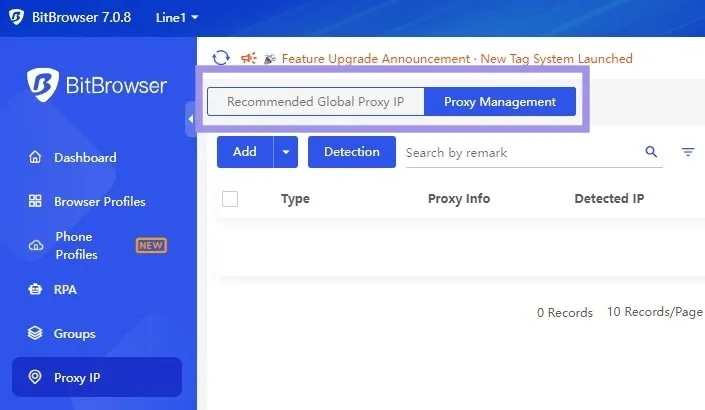
BitBrowser does support bulk proxy import. BitBrowser supports bulk imports via the Proxy Management panel in the dashboard. Here’s how to add multiple proxies at once.
1. Open BitBrowser. On the left side, click on “Proxy IP”. At the top left corner, select “Proxy Management”. This panel stores all saved proxies and is the only place where batch addition is available.
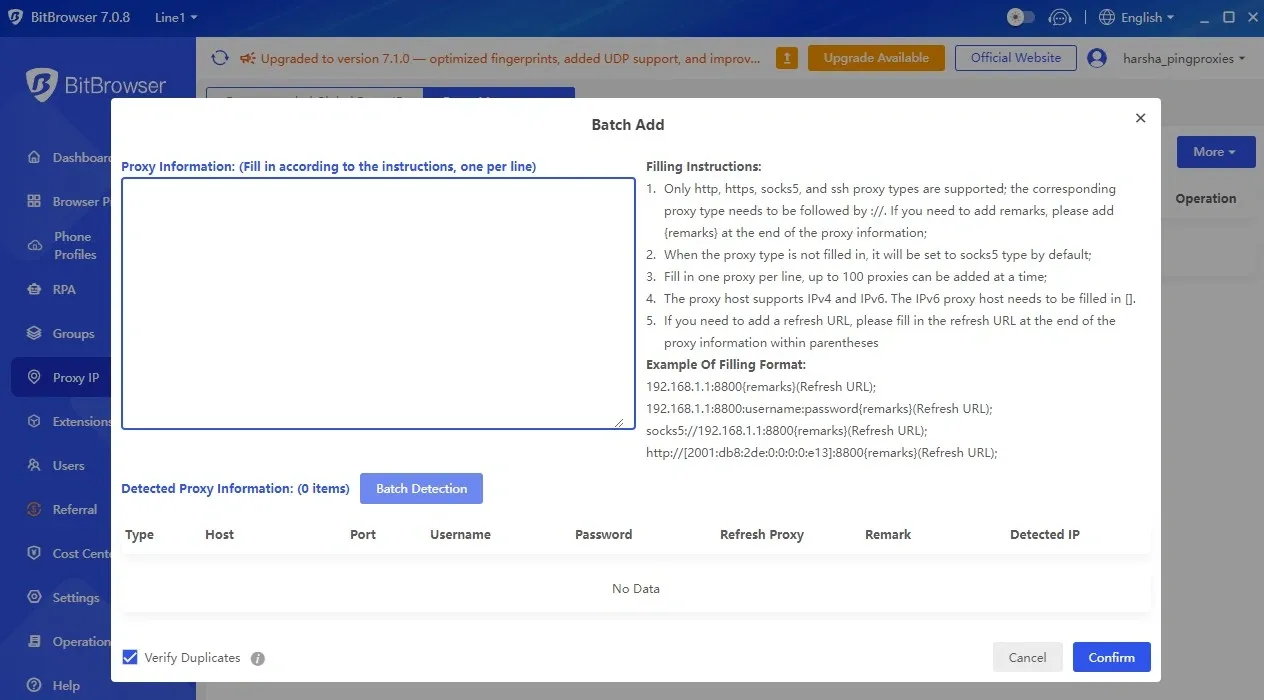
2. Click on the small arrow next to “Add”. It displays two options: “Batch Add” and “Bulk Import of Proxies”.
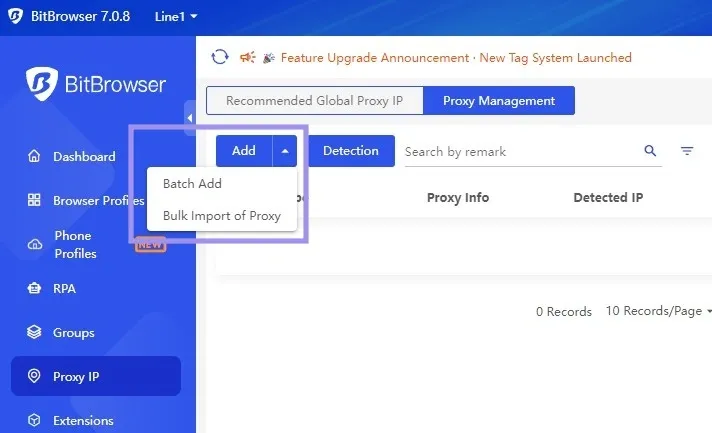
3. Paste or upload your list. If you select Batch Add, a pop-up appears where you can paste all your proxy entries. If you choose Batch Import of Proxy, upload your Excel/CSV file instead.
Testing Proxy Integration on BitBrowser
BitBrowser includes a built-in proxy checker that verifies whether your Ping Proxies connection is valid before you start browsing. After adding your proxy:
- Open the profile you’re editing. Go to Proxy > Custom> Check Proxy.
- BitBrowser will return the detected IP, region, and status.
If the proxy does not connect, the issue is usually related to:
- Incorrect host, port, username, or password
- Selecting the wrong protocol (HTTP vs SOCKS5)
Once the built-in proxy checker establishes a connection, run the profile. You will find the BitBrowser profile working together with proxies, and the IP is updated.
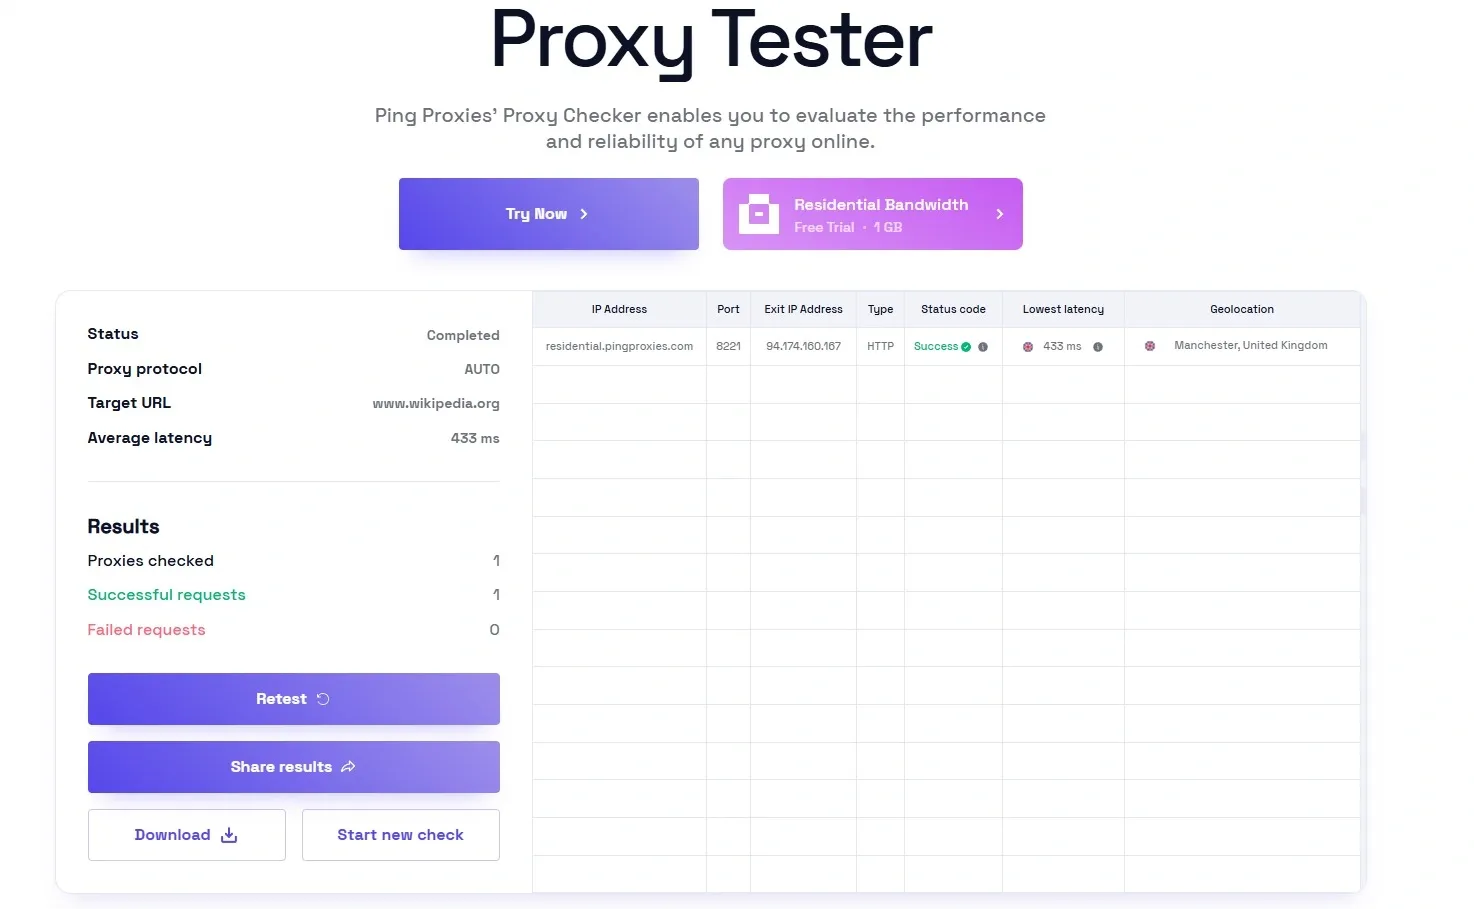
Using Ping Proxies Proxy Tester
If you are working with a bunch of proxies, it is always easier to test them first before adding them to BitBrowser. Our Proxy Tester helps you check if a proxy is working before using it for any task, preventing potential connectivity issues. It’s a free tool that checks your proxies for uptime, speed, and regional performance.
Just paste your proxy list, hit test, and instantly see which ones are good to go. You can even share or export the results if needed.
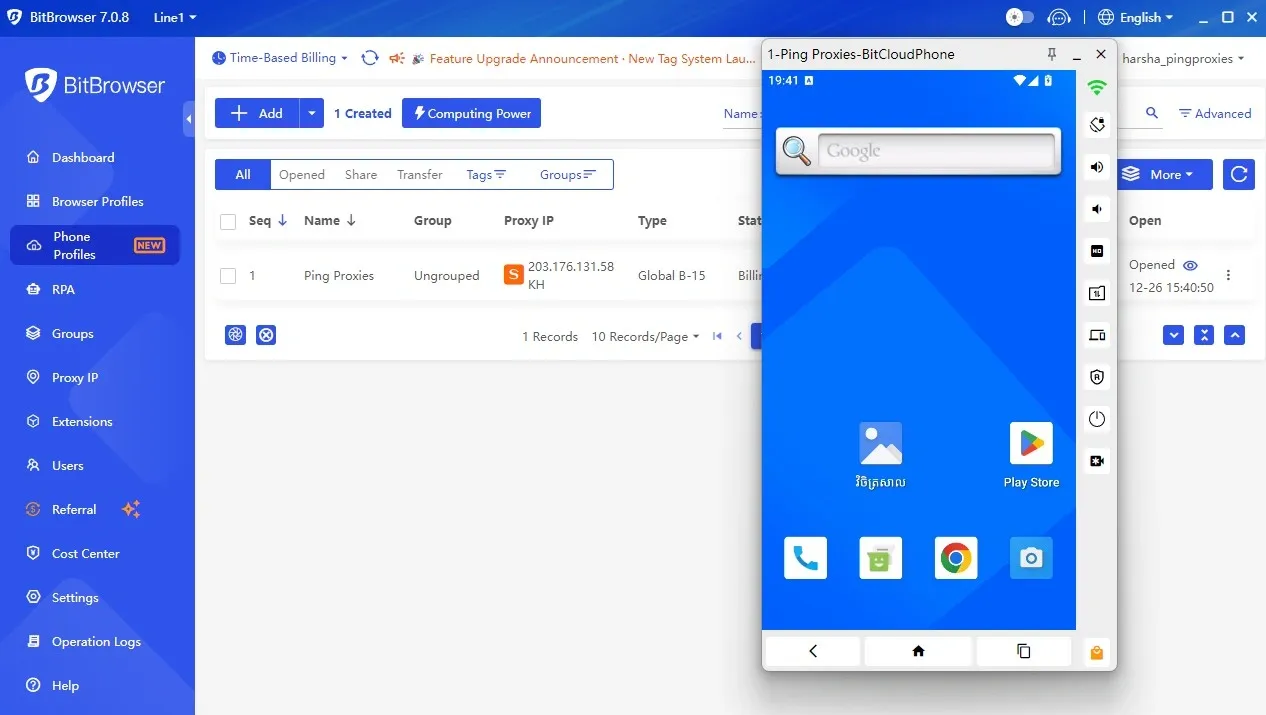
What Are BitBrowser Phone Profiles?
BitBrowser also supports mobile-based workflows through its Cloud Phone feature. Instead of relying on physical devices, Cloud Phone gives you access to Android environments running in the cloud.
Cloud Phone works the same way regular BitBrowser profiles do, but with a complete mobile OS. You can install apps, switch locations, manage multiple phones at once, and keep each device isolated from the others.
These mobile profiles come with their own device fingerprints, app environments, and network behaviour, which proves ideal for platforms that strictly verify mobile activity.
How to Set Up a Phone Profile in BitBrowser (BitCloudPhone)
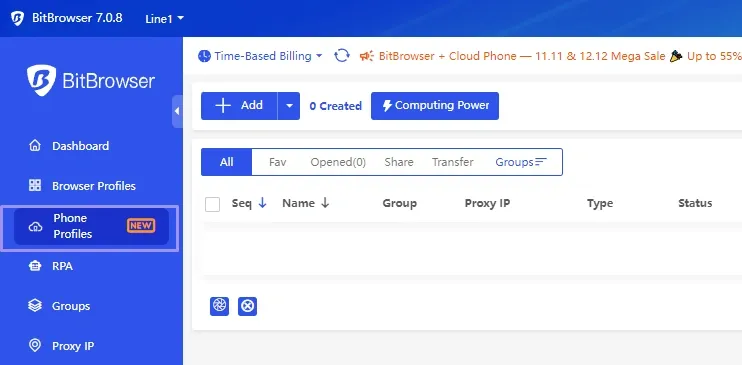
1. Open BitBrowser and go to the Phone Profiles section.
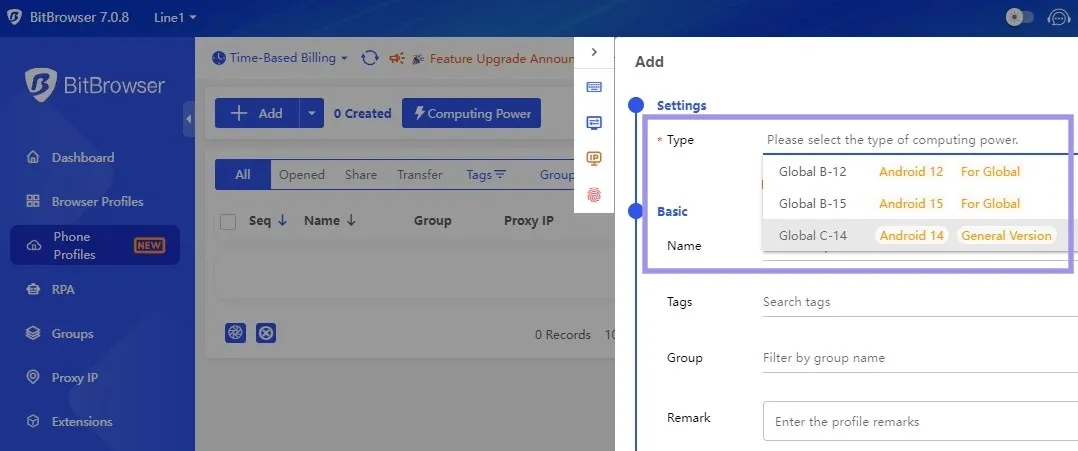
2. Click “Add”. A pop-up window opens. In the settings, choose:
- Device model
- Android version
- Region & language
- Additional hardware parameters
3. Assign a proxy (just like browser profiles).
4. Launch the cloud device to start installing apps, testing workflows, or running mobile-only tasks.
Want to try a free cloud phone? Check out the BitBrowser phone trial.
Stable Multi-Account Workflows with BitBrowser
BitBrowser becomes far more effective once profiles, fingerprints, and proxies are aligned. When each profile runs with a consistent fingerprint, a region-matched proxy IP, and clean browser storage, your sessions behave exactly like real users.
This reduces verification loops, lowers the chance of account links, and keeps long-term workflows stable. Whether you're managing e-commerce accounts, ad panels, or social media activity, the combination of isolated BitBrowser profiles and reliable residential or ISP proxies helps maintain consistent identities across all tasks.
Treat each profile as a separate device, test proxies before adding them, and keep GEO, protocol, and fingerprint signals steady. This structure keeps BitBrowser efficient, reduces disruptions, and supports smoother automation across multiple accounts.