How to Set up a Proxy in Lalicat Browser

Lalicat is an anti-detect browser you can use to keep separate profiles and reduce tracking across sessions. If you add a proxy, the site sees the proxy’s IP instead of yours, which helps when a site blocks your network or shows the wrong region. It won’t make you invisible, but it does change what sites can see at the network level.
In this guide, you’ll set up a proxy in Lalicat by entering the proxy host and port, then adding credentials if your proxy needs them. And you’ll verify it’s working by running a quick IP check before you start browsing.
Note: Lalicat doesn't supply proxy IPs, so you'll need to get them from a third-party provider. If you don't have one yet, we have a section below that covers how to generate credentials from Ping Proxies in just a few clicks.
Setting Up a Single Proxy in Lalicat Browser
Start by downloading the Lalicat browser from its official website. Run the setup file, install it, then create an account using your email and password.
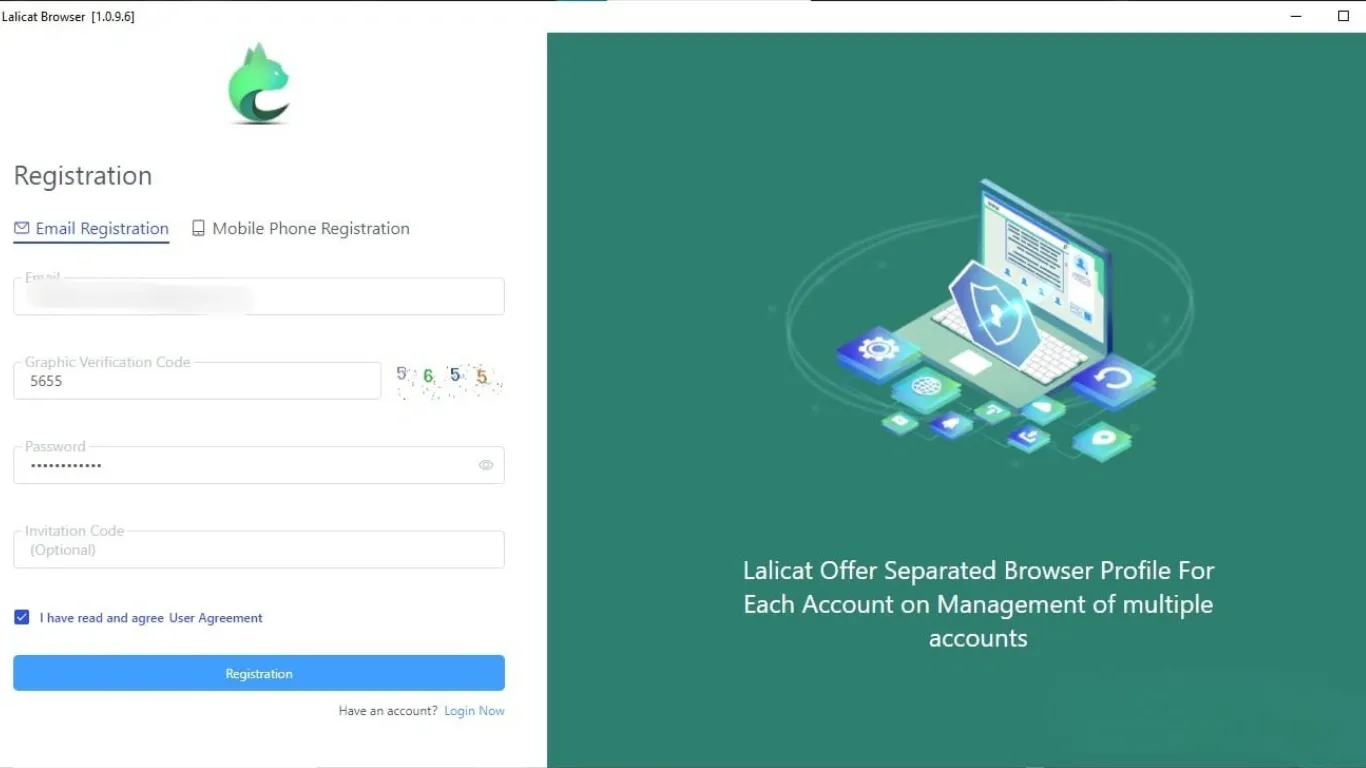
You’ll need either an active subscription or a free trial to use Lalicat. To request a free trial, you’ll have to email their support team at support@lalicat.com or message them through Telegram. If you’d rather not do a trial, you can buy a subscription instead. Plans may vary based on how many users need access.
Once you're in the dashboard, follow the steps below to configure the proxy in the Lalicat browser:
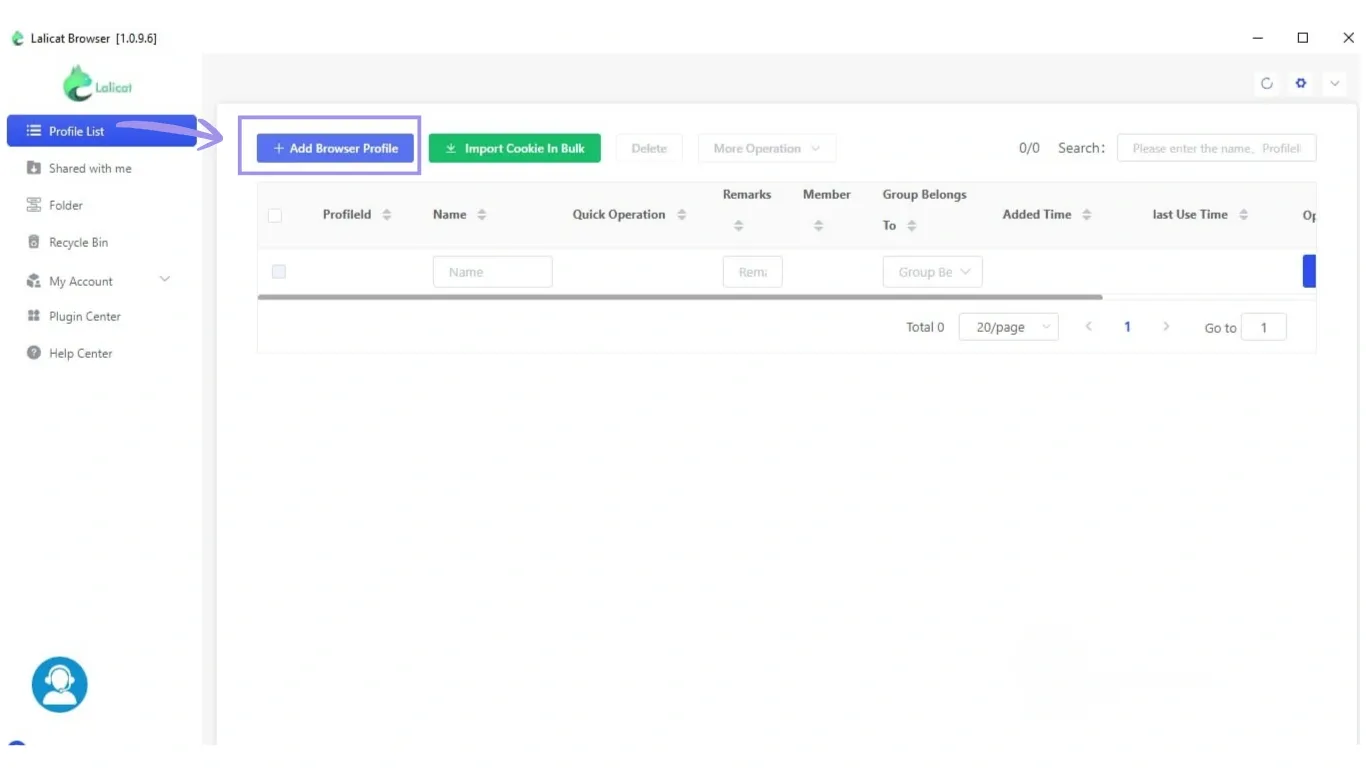
1. From the left sidebar menu, go to Profile List and click Add Browser Profile to create a new profile.
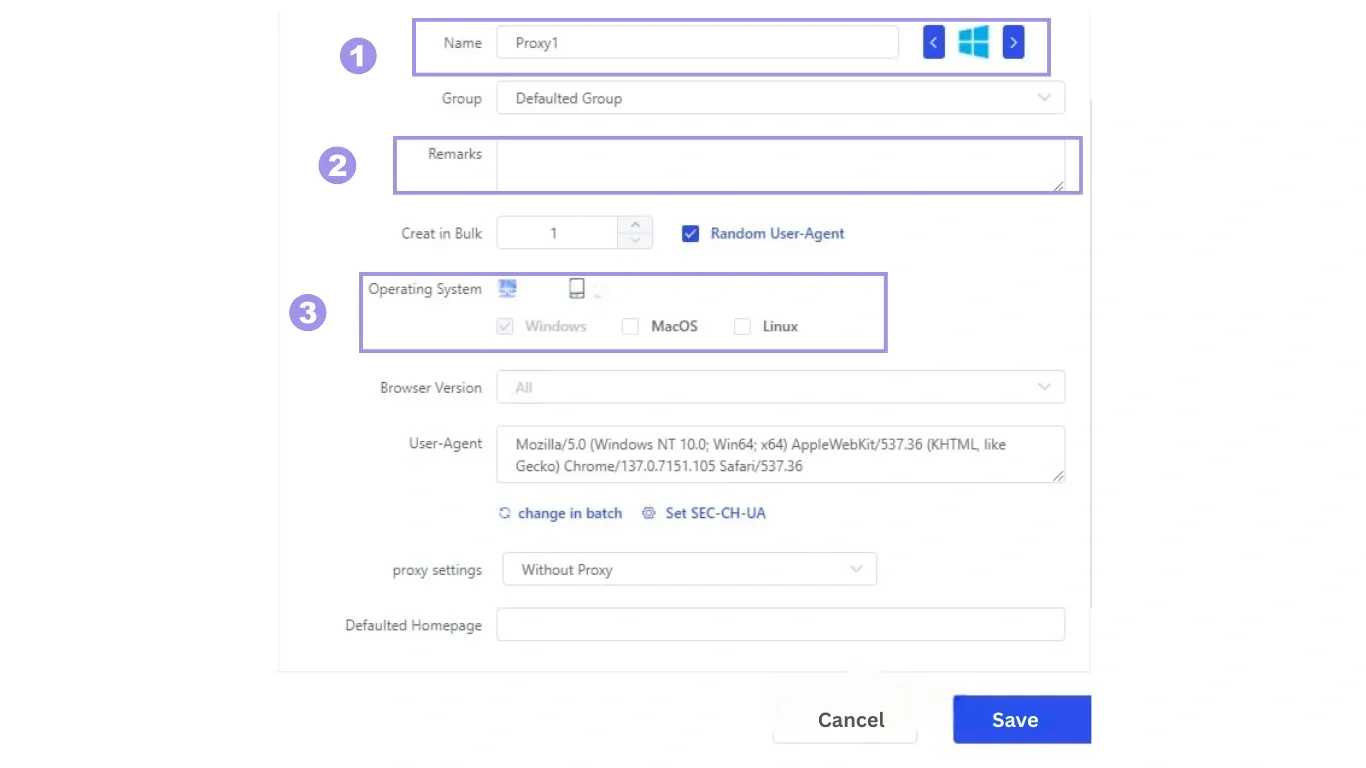
2. Afterwards, you’ll get a view of the fields that you need to fill out. Add a profile Name and put something useful in the Remarks so you can recognize it later when you have many profiles. Also, choose the simulated Operating System and Browser Version you want this profile to use. These settings determine how the profile appears when you launch it.
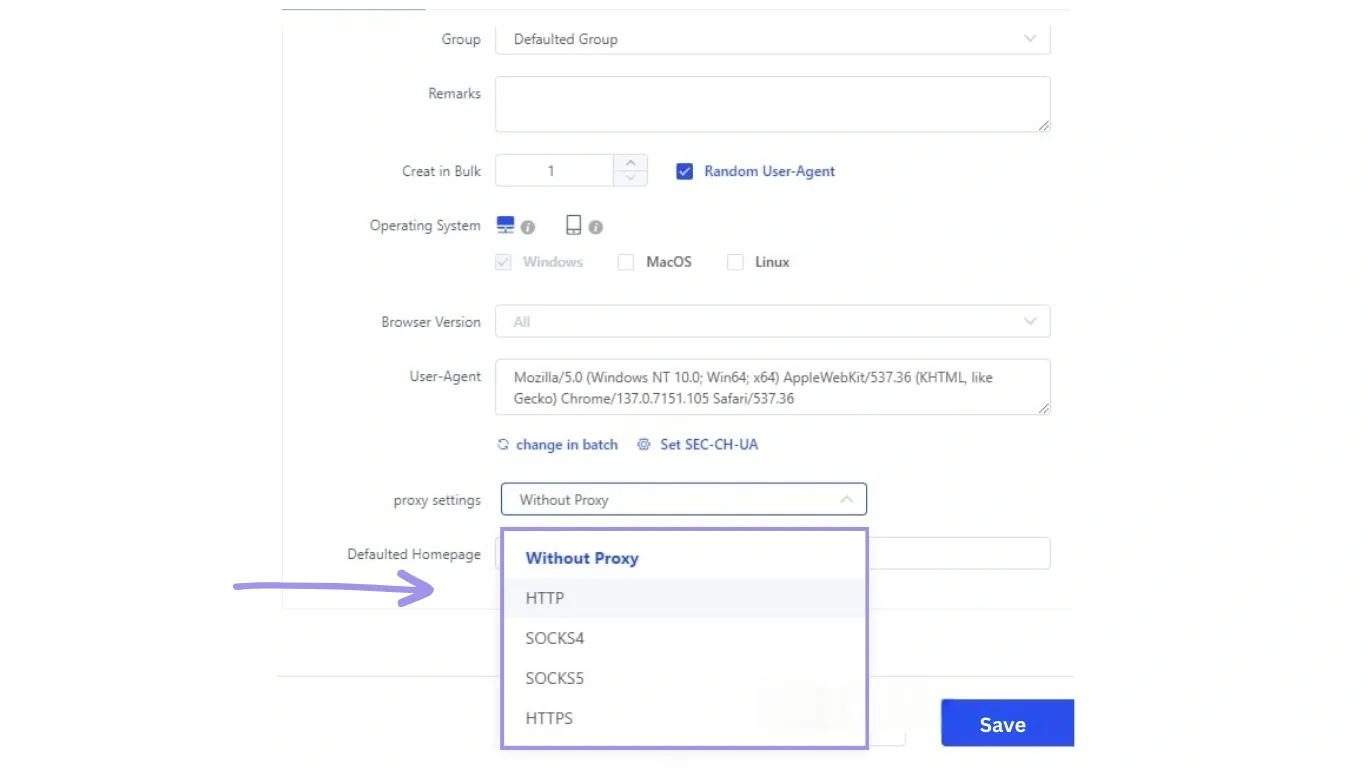
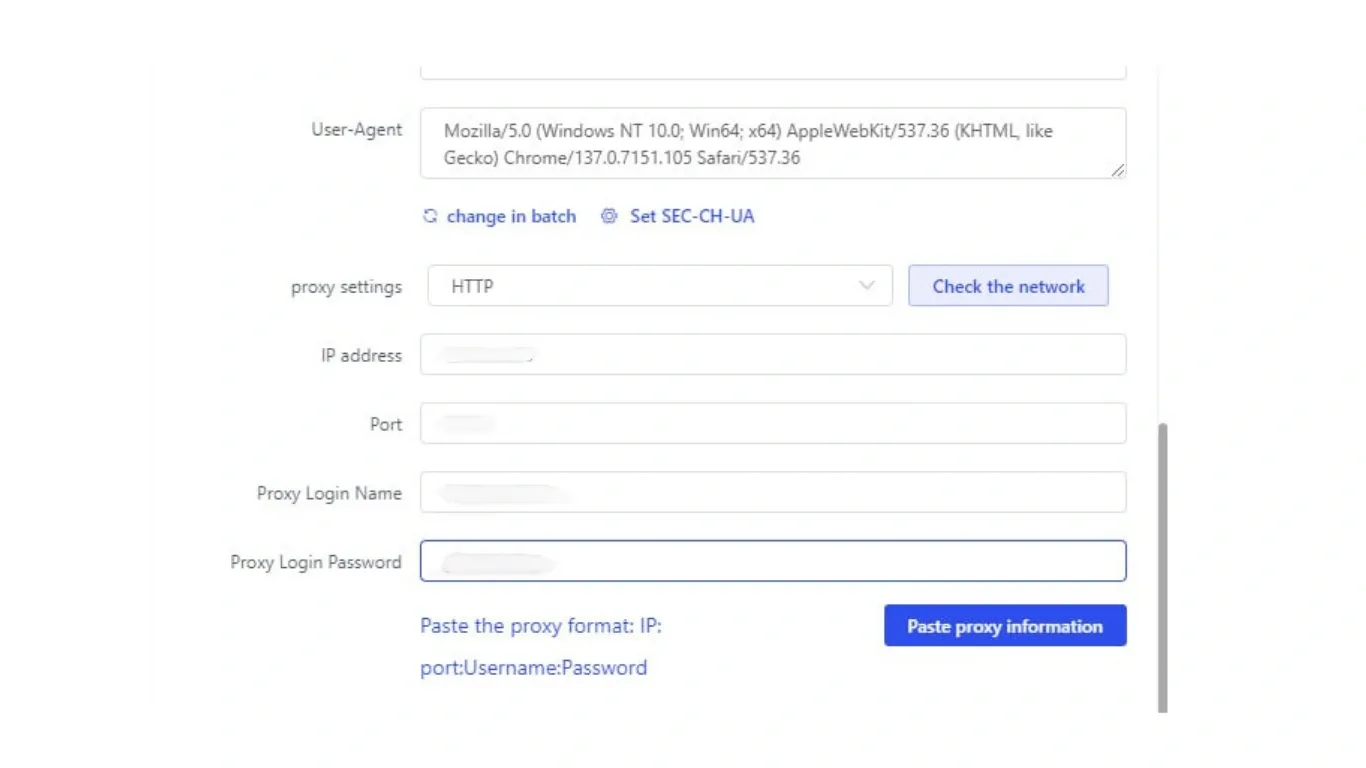
3. Look for the proxy settings under the User-Agent field, then select the proxy type. You’ll find options from the drop-down, such as SOCKS5, HTTPS, and more, which the anti-browser supports.
4. Enter the proxy details such as IP address, port, Proxy login name/username, and Proxy login password from your proxy provider. Here’s how each field should be filled:
- IP: The server address (e.g., 203.0.113.10)
- Port: The port number assigned to the proxy (e.g., 8080 or 8523)
- Username: Your proxy authentication username
- Password: Your proxy authentication password
For example, if your proxy string looks like this:
203.0.113.10:8080:user123:pass123
You would enter:
- IP: 203.0.113.10
- Port: 8080
- Username: user123
- Password: pass123
If your provider gives you a full proxy string, you can use the Paste proxy information button to auto-fill the fields. However, always double-check that each value is placed correctly, as formatting differences can occasionally cause fields to populate incorrectly.
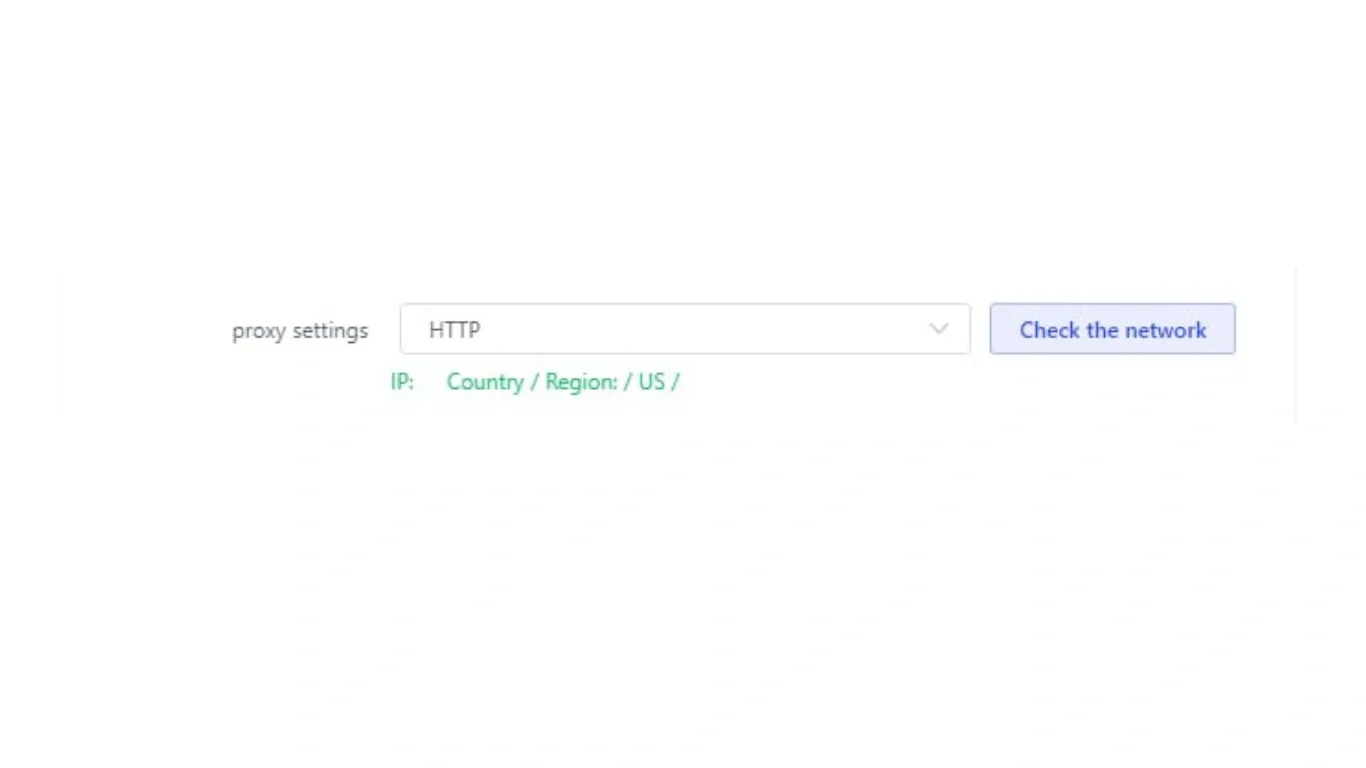
5. Click the Check the network button to verify the connection's stability. If it turns green and you can see the detected IP information, the proxy is working for that profile. If it fails, start by re-checking proxy type, port, and login details; those are the most common issues.
6. Click Save, and congratulations, you’ve created a Lalicat browser profile and integrated a proxy to it.
Setting up a batch proxy list in Lalicat
Here are the steps you can take to configure a batch proxy setup:
What’s covered in the previous section is only the setup of a proxy for a single profile. If you create many profiles, setting up proxies one by one may be handy.
This method keeps the same profile setup you just did, but you create multiple empty profiles at once, then assign proxies to them in a single import.
1. Prepare all the proxies you have and create a list of them, which typically follows this format:
IP ADDRESS: PORT:USERNAME:PASSWORD
Example:
203.0.113.10:8080:userA:passA
198.51.100.15:3128:userB:passB
192.0.2.20:9090:userC:passC
198.51.100.99:8000:userD:passD
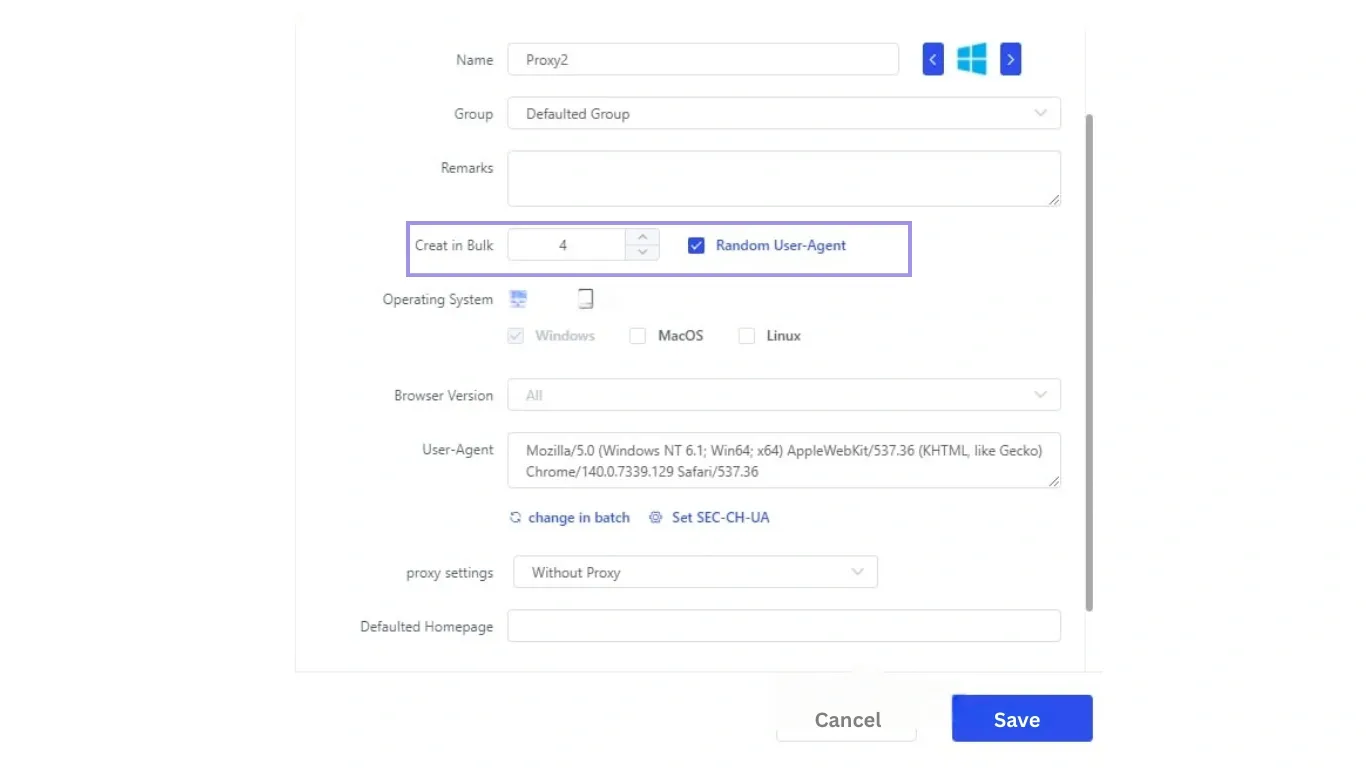
2. Same as you did earlier, go to Profile List and click Add Browser Profile. Fill out the same basics, such as Profile Name, Remarks, Operating System, and Browser Version.
3. Afterwards, look for the Create in Bulk option. Change it from 1 to the number of proxies you have in your list.
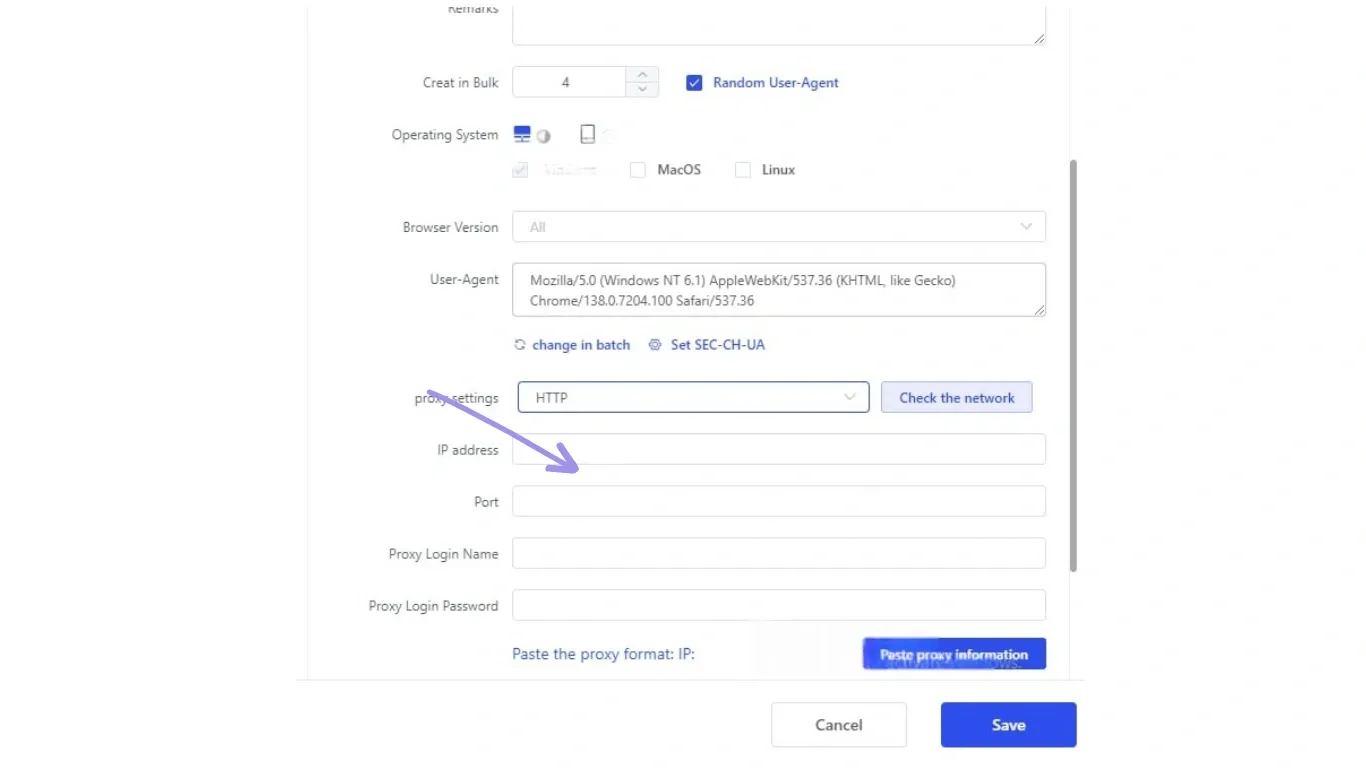
3. Under the proxy settings, set the proxy type, but do not paste proxy IPs yet. Leave the proxy host, port, username, and password fields empty for now. The import will fill those in for you.
4. Click Save, and you should now see a list of your newly created profiles.
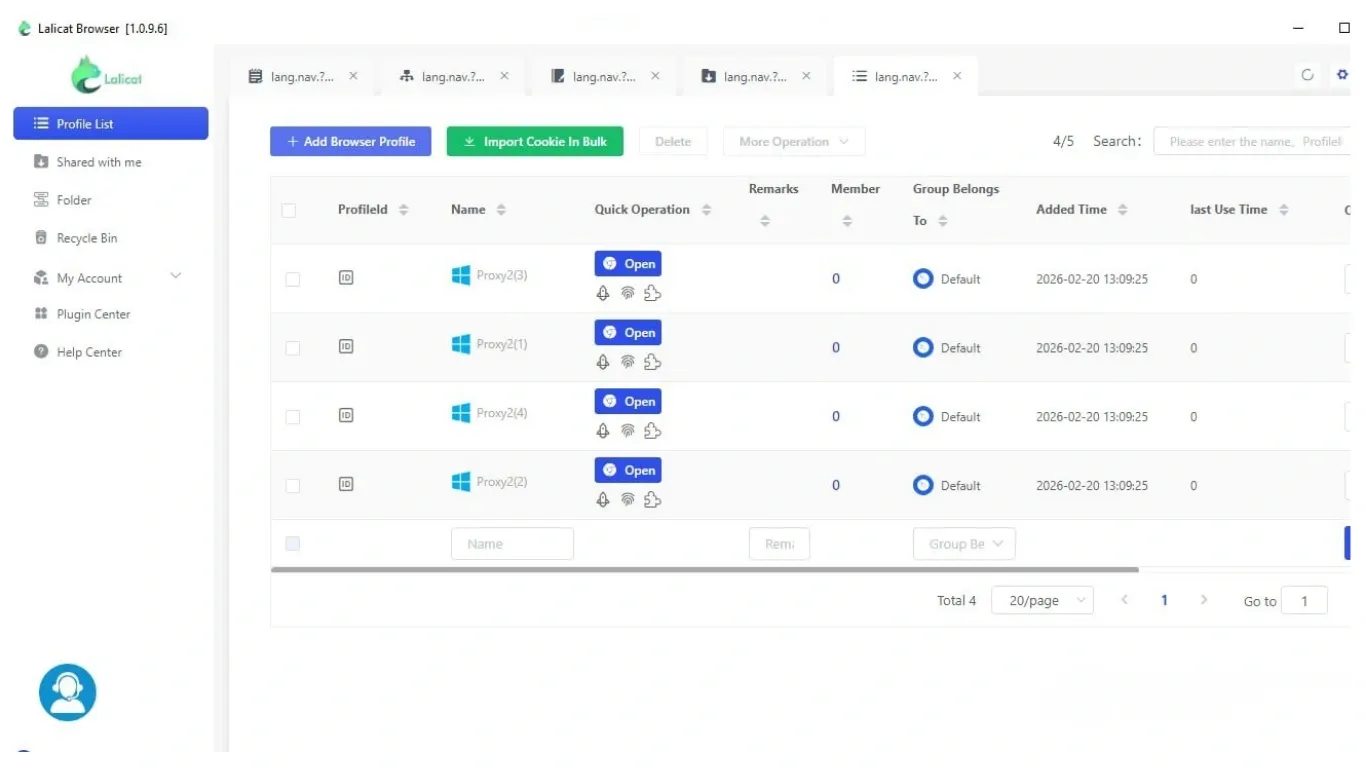
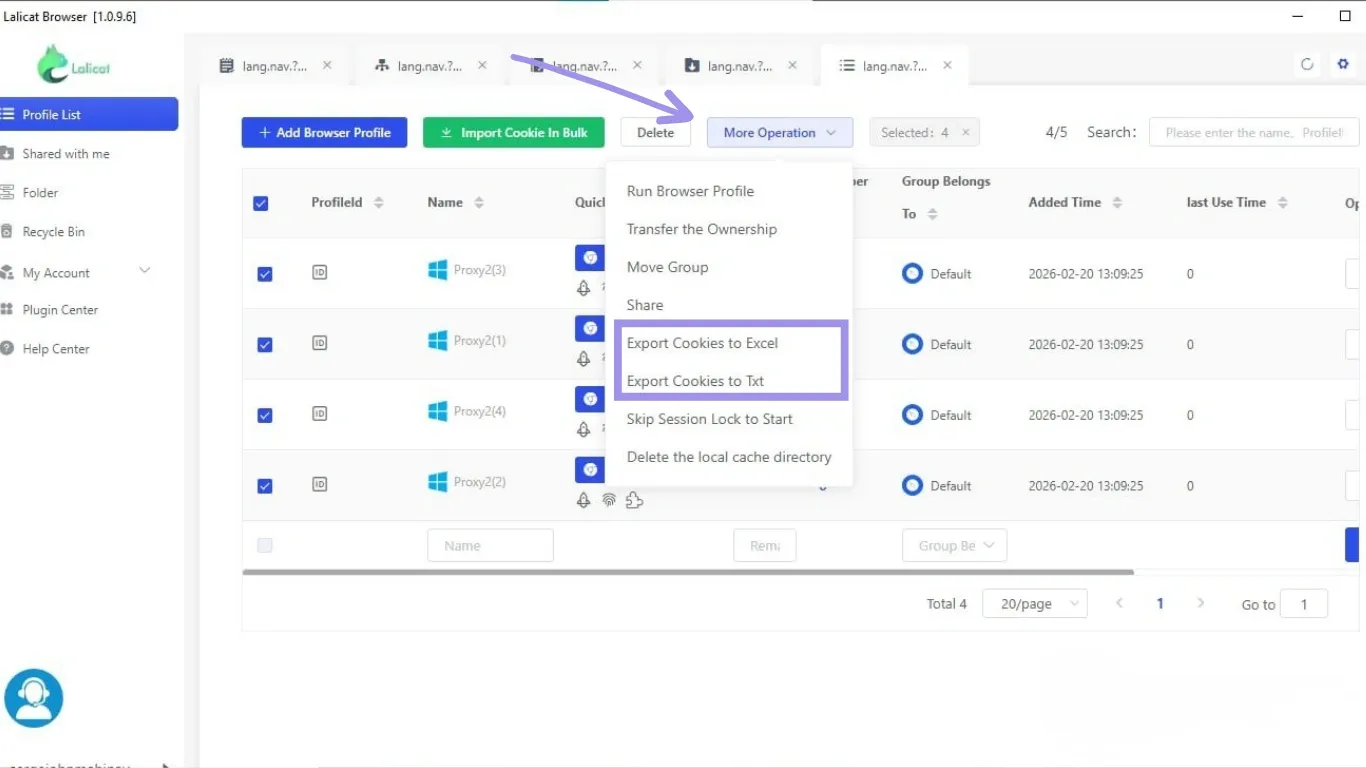
5. Now select all the profiles you want to add proxies to. Then, click More Options. In the dropdown, choose between the two options, either export cookies to Excel or to .Txt. This is to obtain a standard template we can use for adding proxies later.
For this, we suggest exporting it to Excel, as it provides straightforward visuals that are easy to understand.
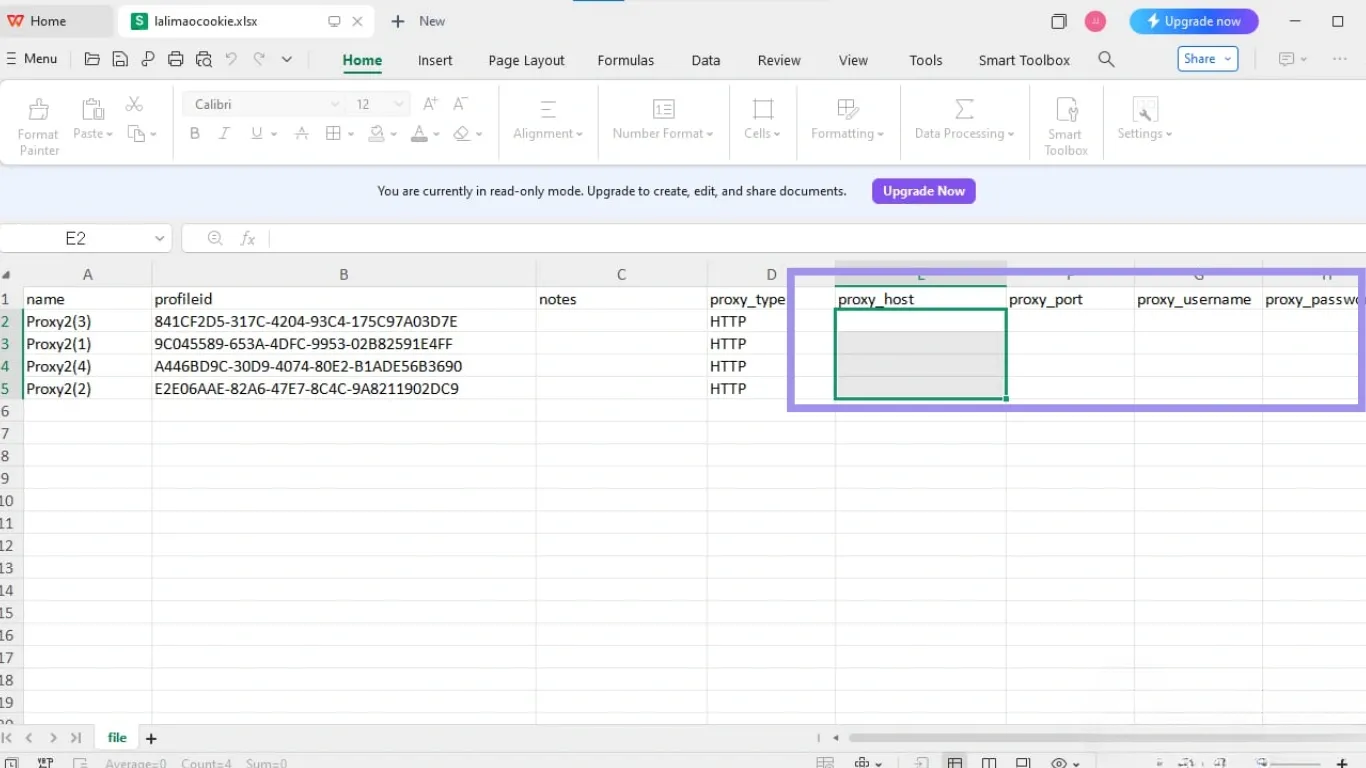
6. Open the Excel sheet you exported and add all the proxy details you have in the right fields.
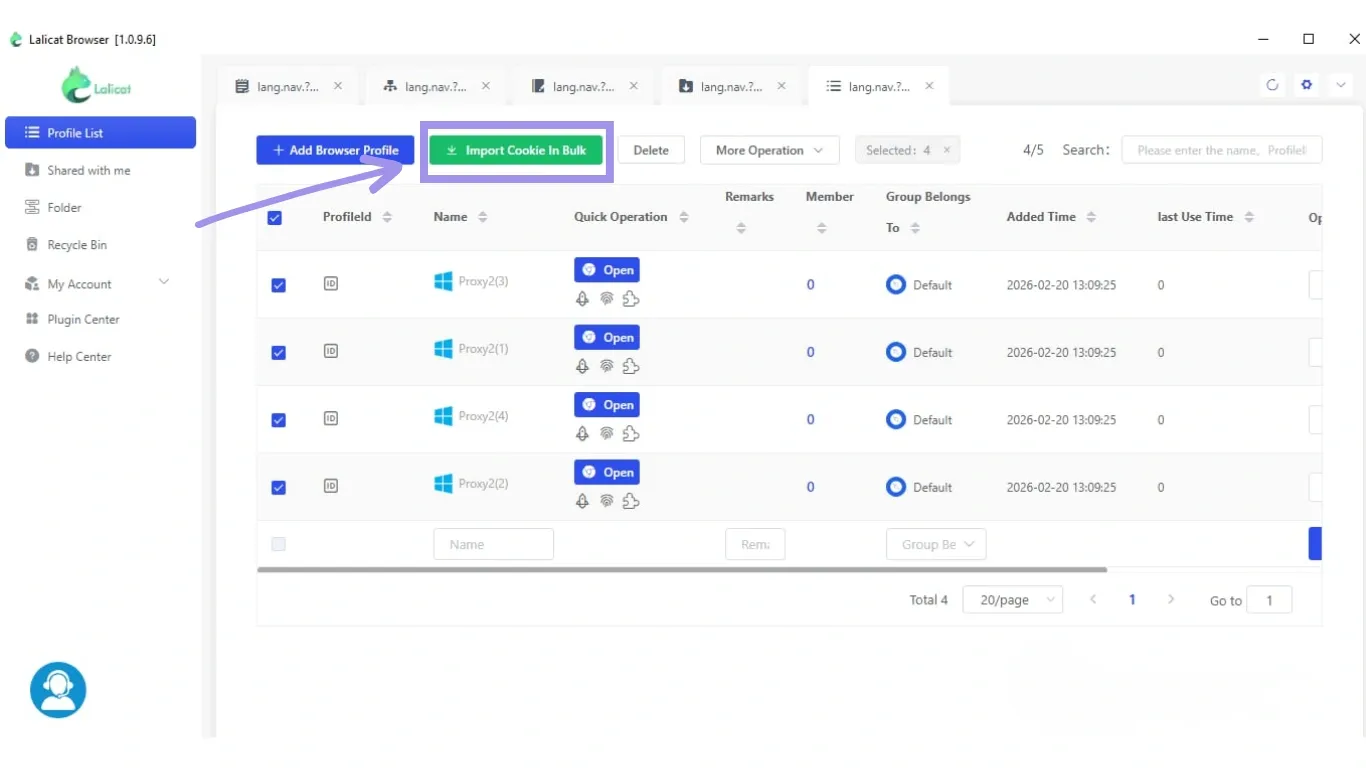
7. Go back to your Lalicat browser and then select Import Cookies in Bulk. It will open your computer's folder, then select the Excel file you modified earlier.
And that’s it, you’ve successfully added the proxies to your profiles in bulk.
Tip: Keep one protocol per batch, run a separate batch for SOCKS5 and another for HTTP(S). Also, match the number of profiles to the number of proxy lines, otherwise some profiles will end up without a proxy.
Generating Proxies with Ping Proxies
We offer residential, ISP, and datacenter proxies, all accessible directly from the dashboard without any command-line setup. If you're not sure which type to use, residential proxies are the safer option for platforms with aggressive detection.
Datacenter proxies are faster and cheaper, and they work well for lower-risk tasks. For a full breakdown, check out our comparison of datacenter vs residential proxies.
Generate Static Proxies (Datacenter & ISP)
If you have static proxies on your plan, sign in to the dashboard and navigate to Static Proxies.
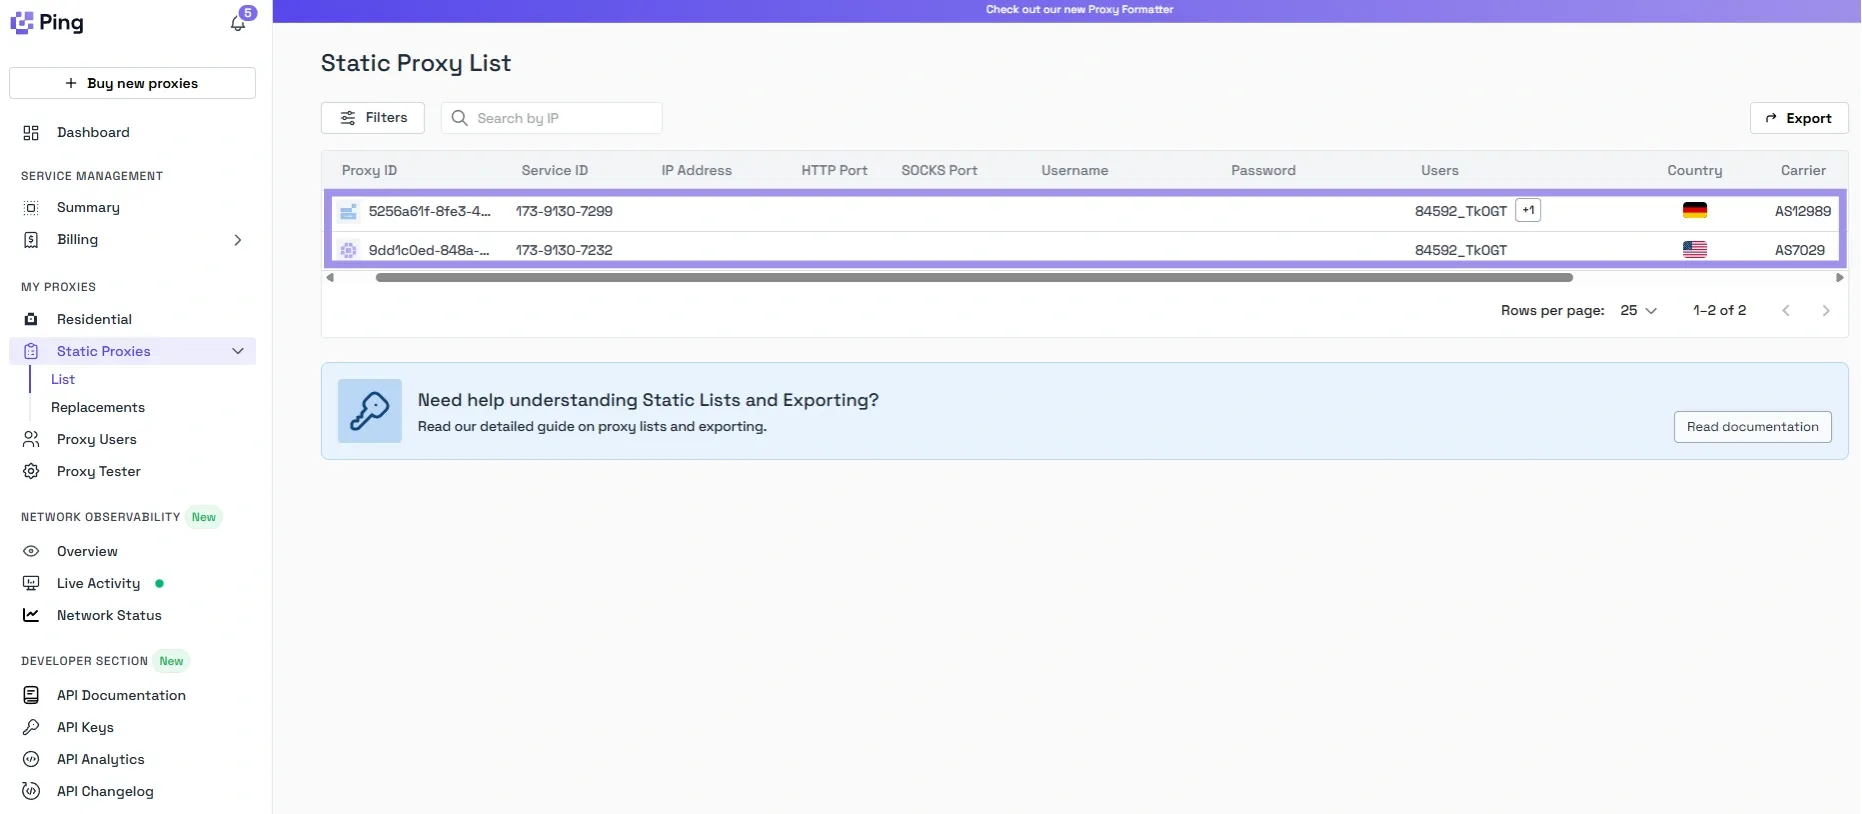
You’ll find your proxy list there, including the hostname, port, username, and password. With that, you can copy those credentials, and you’re now good to go. No generation needed.

Generate Residential Proxies
Compared to static proxies, residential proxies require a few more steps because you need to configure them to match your use case. Here’s how easily you can work on it:
1. Sign in to the dashboard, then go to Residential.

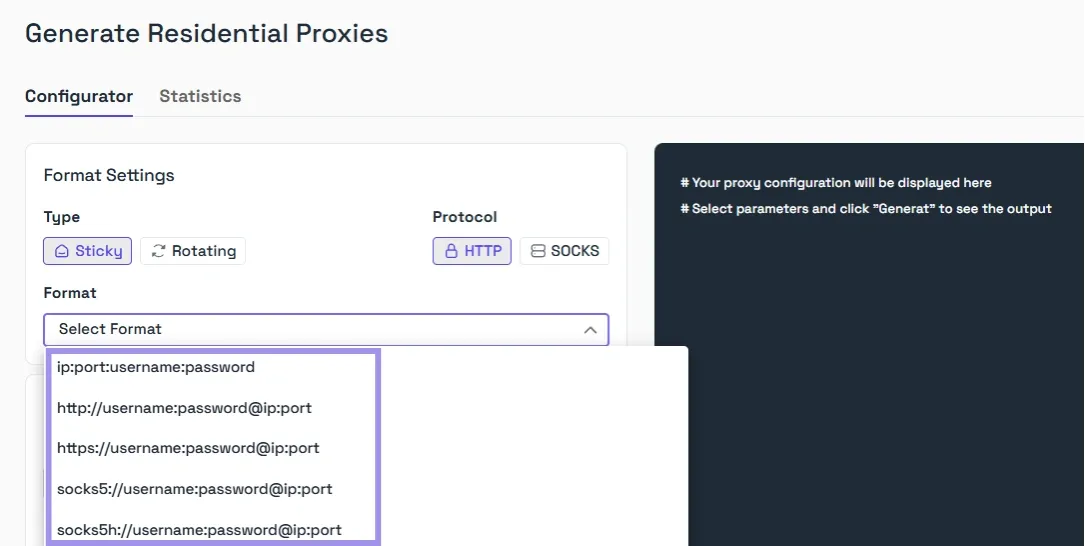
2. Select your ideal format setting. Choose Rotating as it may change frequently (often per request), depending on provider behavior, or Sticky if you need the same IP to persist across a session (recommended for account logins). Pick your protocol. For residential proxy, we support HTTP and SOCKS5. SOCKS5 typically gives more stable performance for multi-account management.
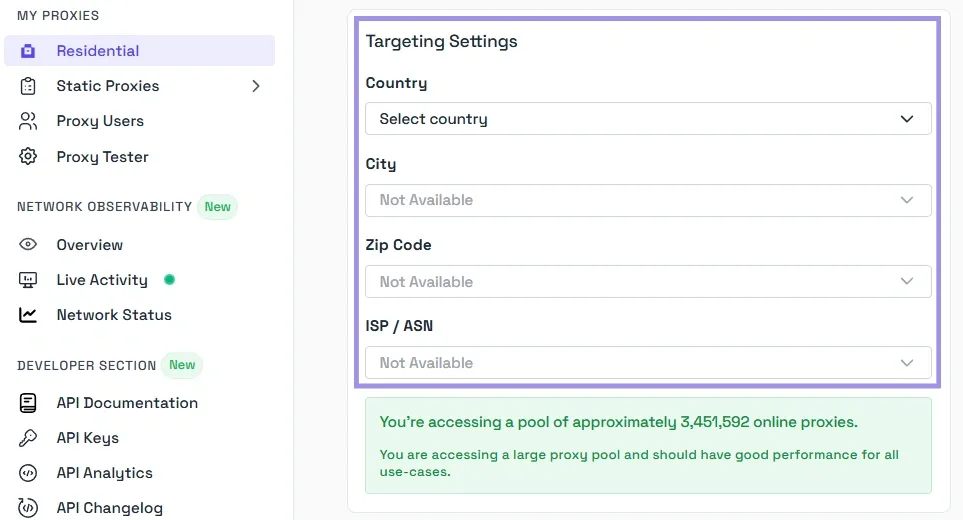
3. Set your targeting options: country, city, zip code, or even ISP/ASN if your use case is that specific. A larger targeting scope gives you a bigger proxy pool to draw from.
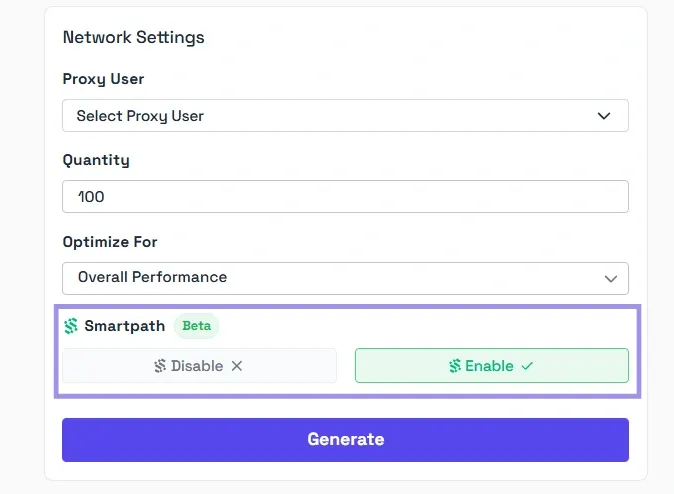
4. Enter the quantity, then click Generate.
Your proxy list will appear in the format you selected. Here's what a typical residential proxy string looks like:
The structure is: hostname:port:username:password. For sticky sessions, make sure the location code is included in the username. Skipping it routes you to the wrong location.
One more thing worth noting: if you enable Smartpath, our AI routing system automatically sends non-essential traffic through datacenter IPs. This keeps your residential bandwidth usage down and reduces costs without you having to manage it manually. You can read more about how Smartpath works.
Testing Proxies in Lalicat
residential.pingproxies.com:8523:username_c_us_s_SESSIONID:password
During the setup earlier, we mentioned the Check the network button inside Lalicat to verify the connections stability. While that may work, you can use the steps below to further check if your proxy is working correctly:
- Open the browser profile you configured.
- Visit an IP-checking website like browser leaks.
- Confirm that the detected IP address matches the proxy you assigned.
- Check the reported country and city to ensure correct geo-targeting.
If the IP shown matches your proxy details, your setup is working properly.
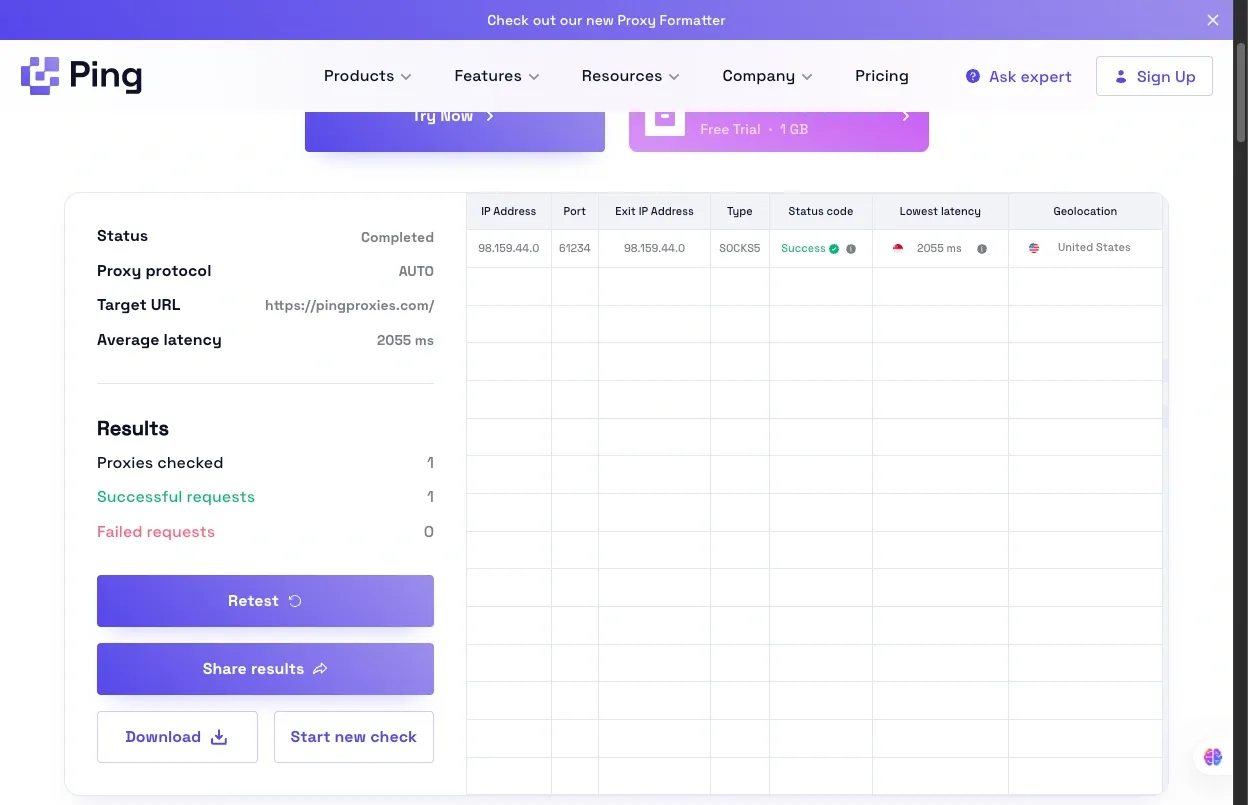
For additional validation, you can also use our Proxy Tester before launching the profile. It confirms:
- Exit IP address
- Location (country/city)
- Connection success status
- Latency / response time
This helps you confirm the proxy is active and correctly routed before attaching it to important accounts.
Best Practices for Using Proxies in Lalicat
It's easy to set up a proxy in Lalicat, but if you want to have consistent stability in your profile, you can refer to the following best practices below:
- Use one proxy per profile: If you really want to be seen as a different user across your browsers, using a different proxy per profile is essential as it prevents your account on being linked to each other.
- Match proxy type to your use case: Residential proxies are generally better for high-detection platforms while datacenter proxies on the other hand work well for lower-risk automation or scraping tasks.
- Avoid changing proxies mid-session: Switching IPs while logged into an account can trigger verification checks. If you need to change a proxy, log out first and relaunch the profile.
- Test before scaling: Always check your proxies using the built-in network check and a third-party IP test before running multiple profiles.
Wrapping Up
Once your proxy passes the network check, you're good to go. Each Lalicat profile maintains its own proxy settings, so you can run multiple profiles side by side without them sharing an IP address.
If you're managing more than a handful, the batch import method covered above will save you a lot of repetitive clicking. Just keep the proxy type consistent within each batch and ensure the number of lines matches the number of profiles.
For those still deciding on a provider, we let you generate and test credentials directly from the dashboard without any command-line setup, which pairs well with Lalicat's paste-and-check workflow.
You can also run a quick verification with our Proxy Tester before committing proxies to your profiles. It displays the exit IP address, geolocation (country/city), whether the proxy connection was successful, and latency/response time, so you can confirm the proxy is active, correctly routed, and responsive before using it.