How to Configure Proxies in Kameleo Anti-detect Browser

Anti-detect browsers are a cornerstone of many online activities, including affiliate marketing, e-commerce, social media account management, web scraping, and other web automation tasks. Additionally, when combined with a proxy service, they provide a complete solution for bypassing geo-restrictions and offering a high level of privacy and security.
In this guide, we’ll explore Kameleo, a leading anti-detect browser that offers a comprehensive set of features for creating multiple online identities. We’ll cover how to create and configure profiles in Kameleo, and how to integrate it with a proxy service.
What is Kameleo?
Kameleo is an anti-detect browser that allows users to run multiple browser profiles with unique identities on the same client device. These profiles are created by spoofing fingerprint data such as browser type, OS, screen resolution, and other attributes. With these profiles, a user can manage multiple online accounts or run web automation activities without getting banned by websites.
In addition to desktop browsers, Kameleo provides anti-detection for mobile devices, with more support, especially for Android. It allows emulating mobile browser profiles with specific mobile fingerprint data.
Kameleo also offers an SDK that enables integration with web automation tools and makes it possible to programmatically manage profiles and use different Kameleo features. Kamaleo provides several advanced security features, including proxy integration.
How to Create Profiles in Kameleo?
To follow along with the coming steps, you’ll first need to create a Kameleo account. There’s a free plan that allows you to test Kameleo’s features on a limited scale. Then you’ll need to download Kameleo and install it on your device.
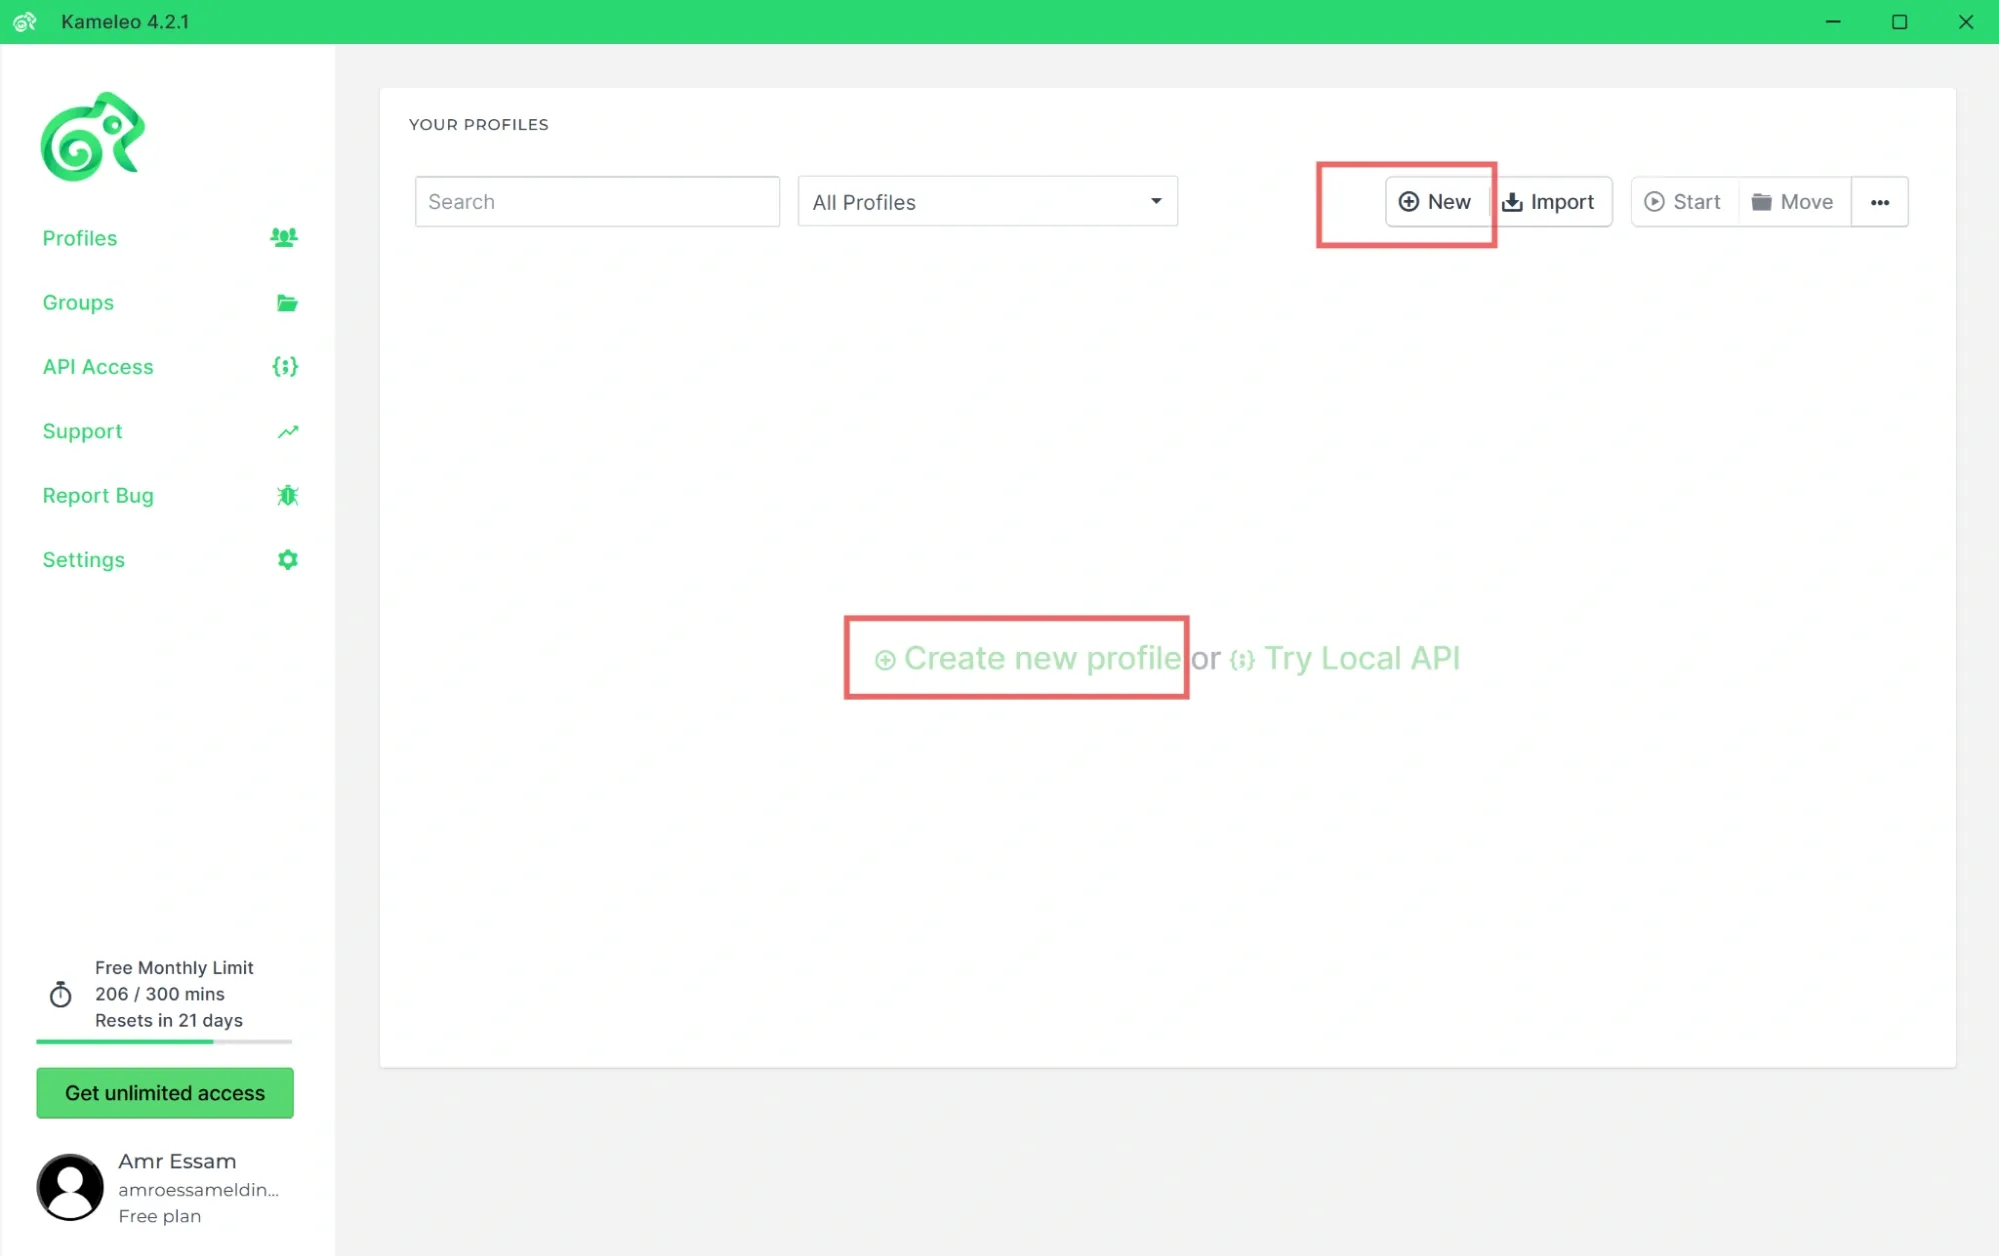
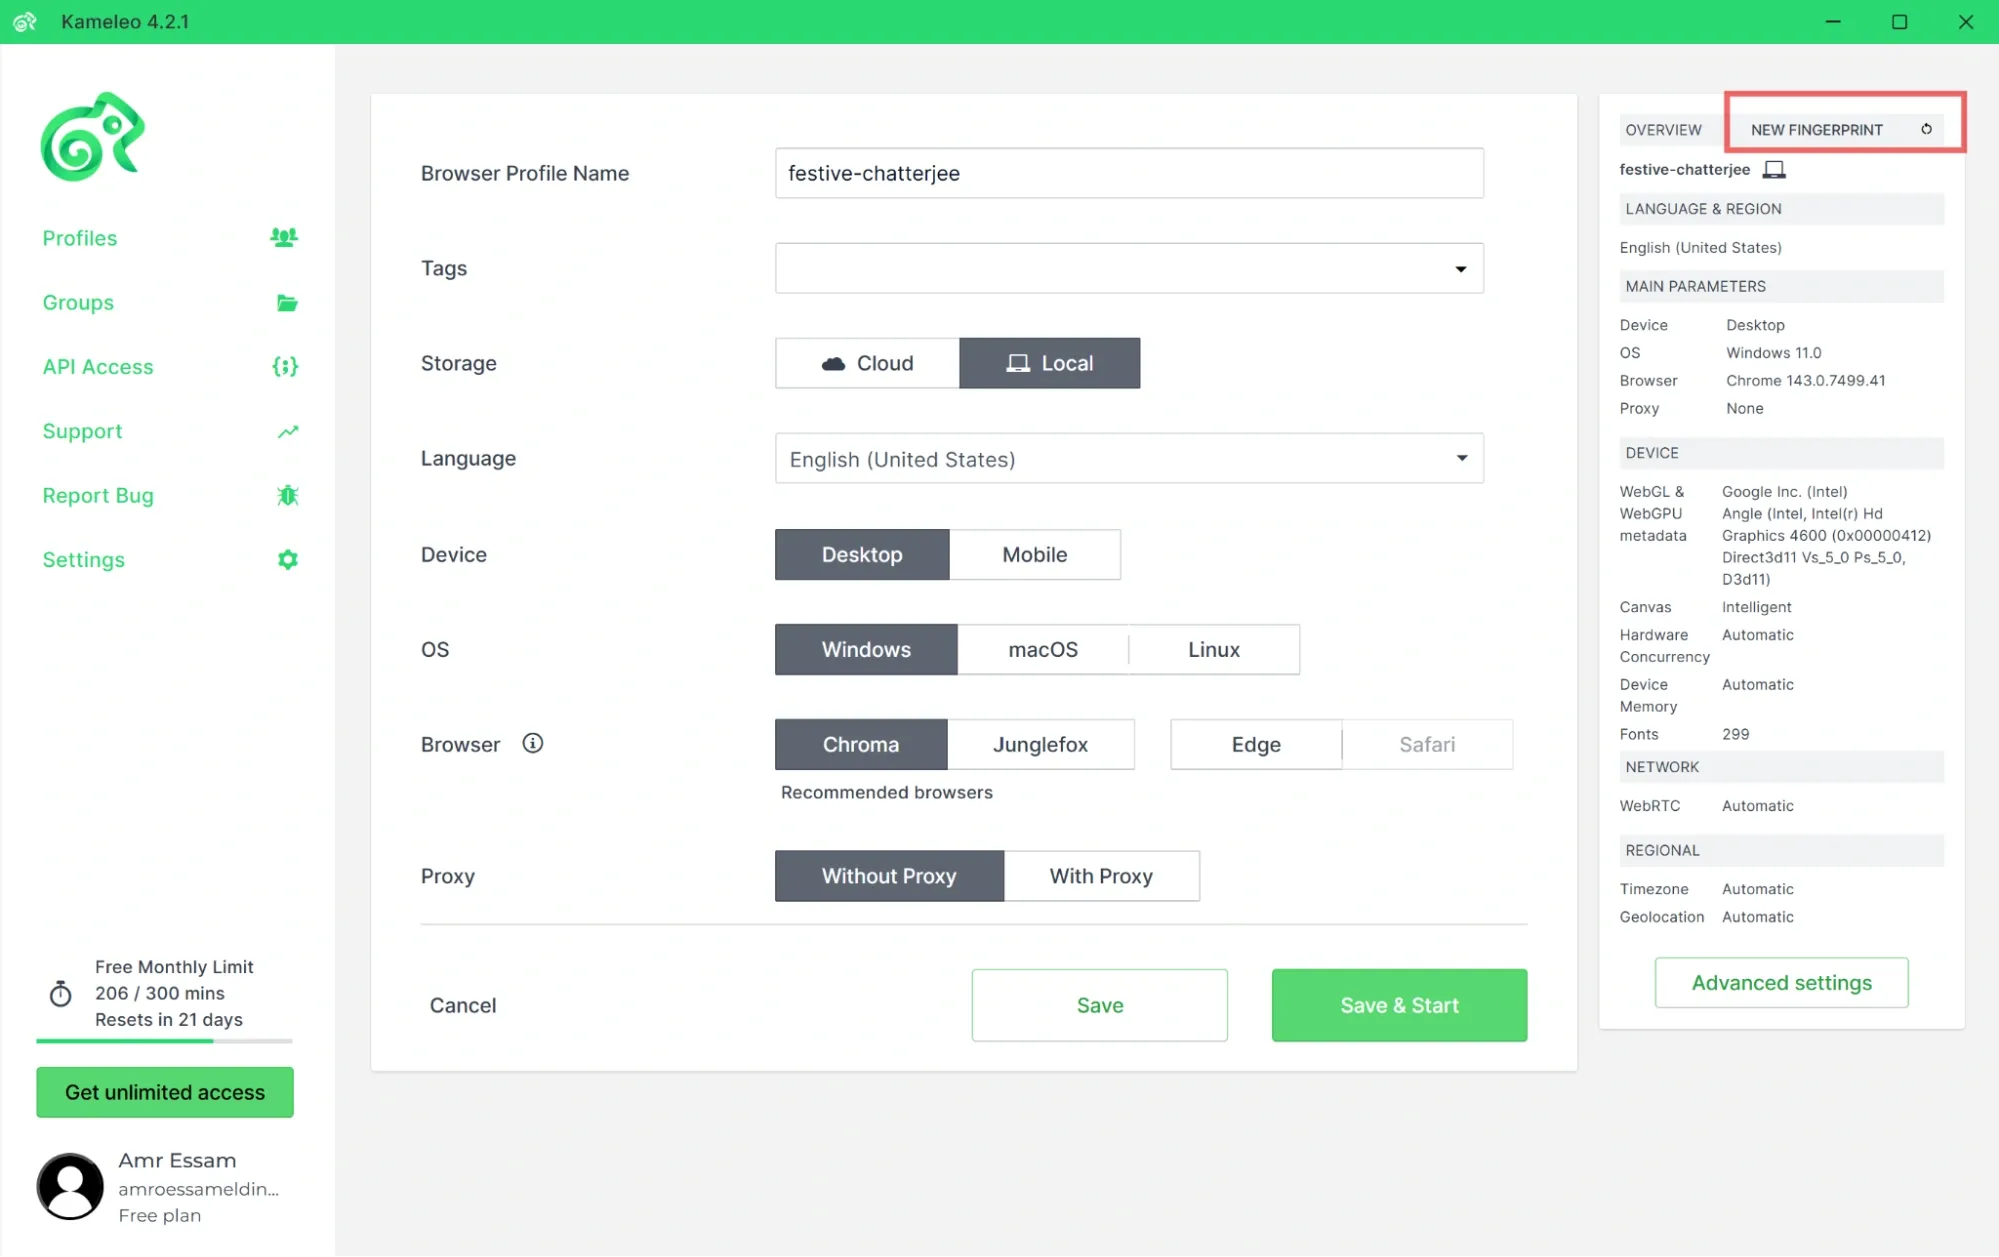
1. Open Kameleo, you should see an option to Create new profile in the middle of the page, or you can select New on the top-right.
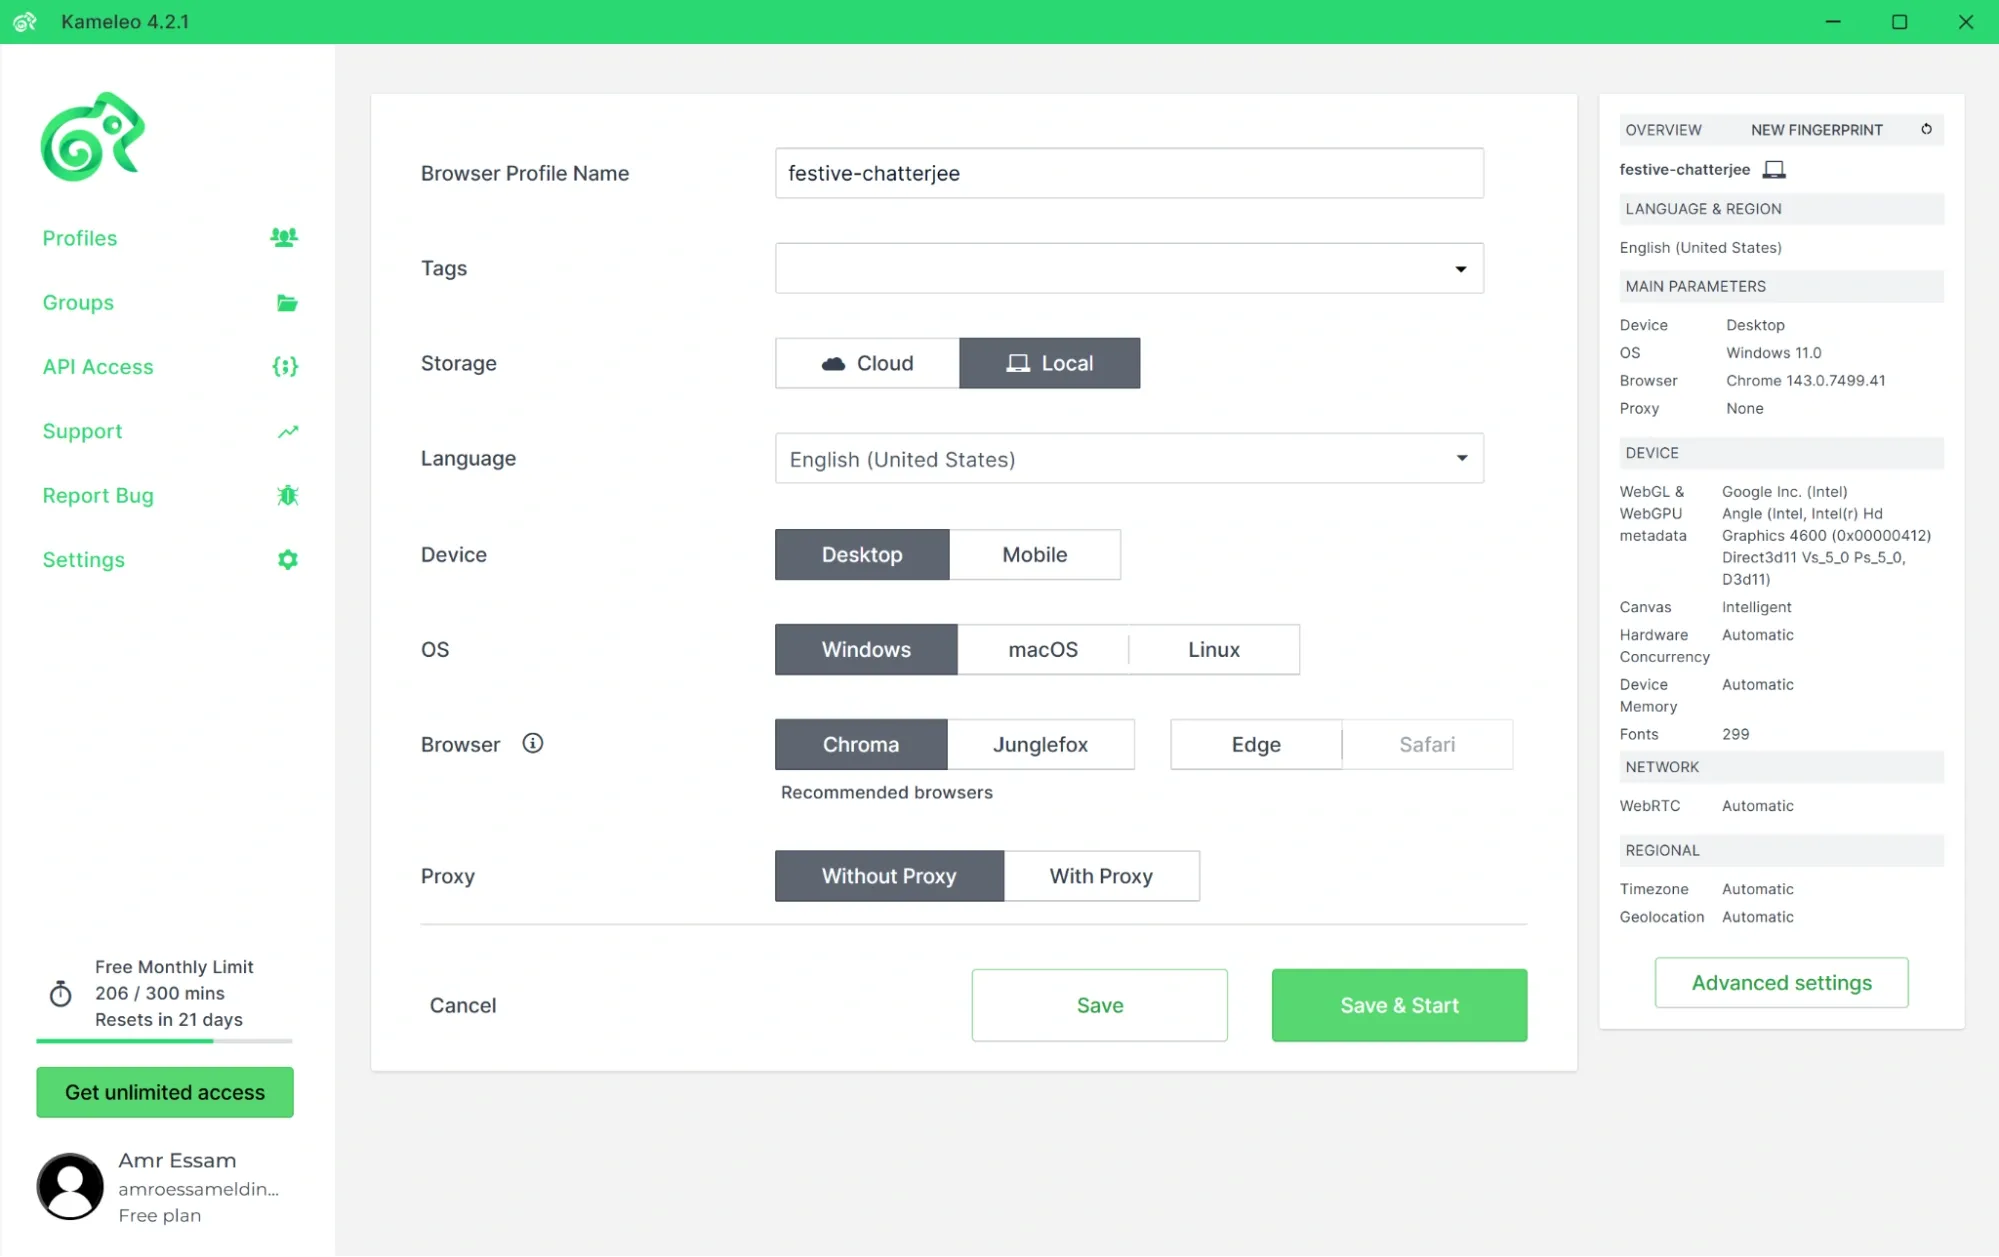
2. You’ll be directed to the profile configuration page where you can adjust different settings for your profile including name, device type, OS, and browser.
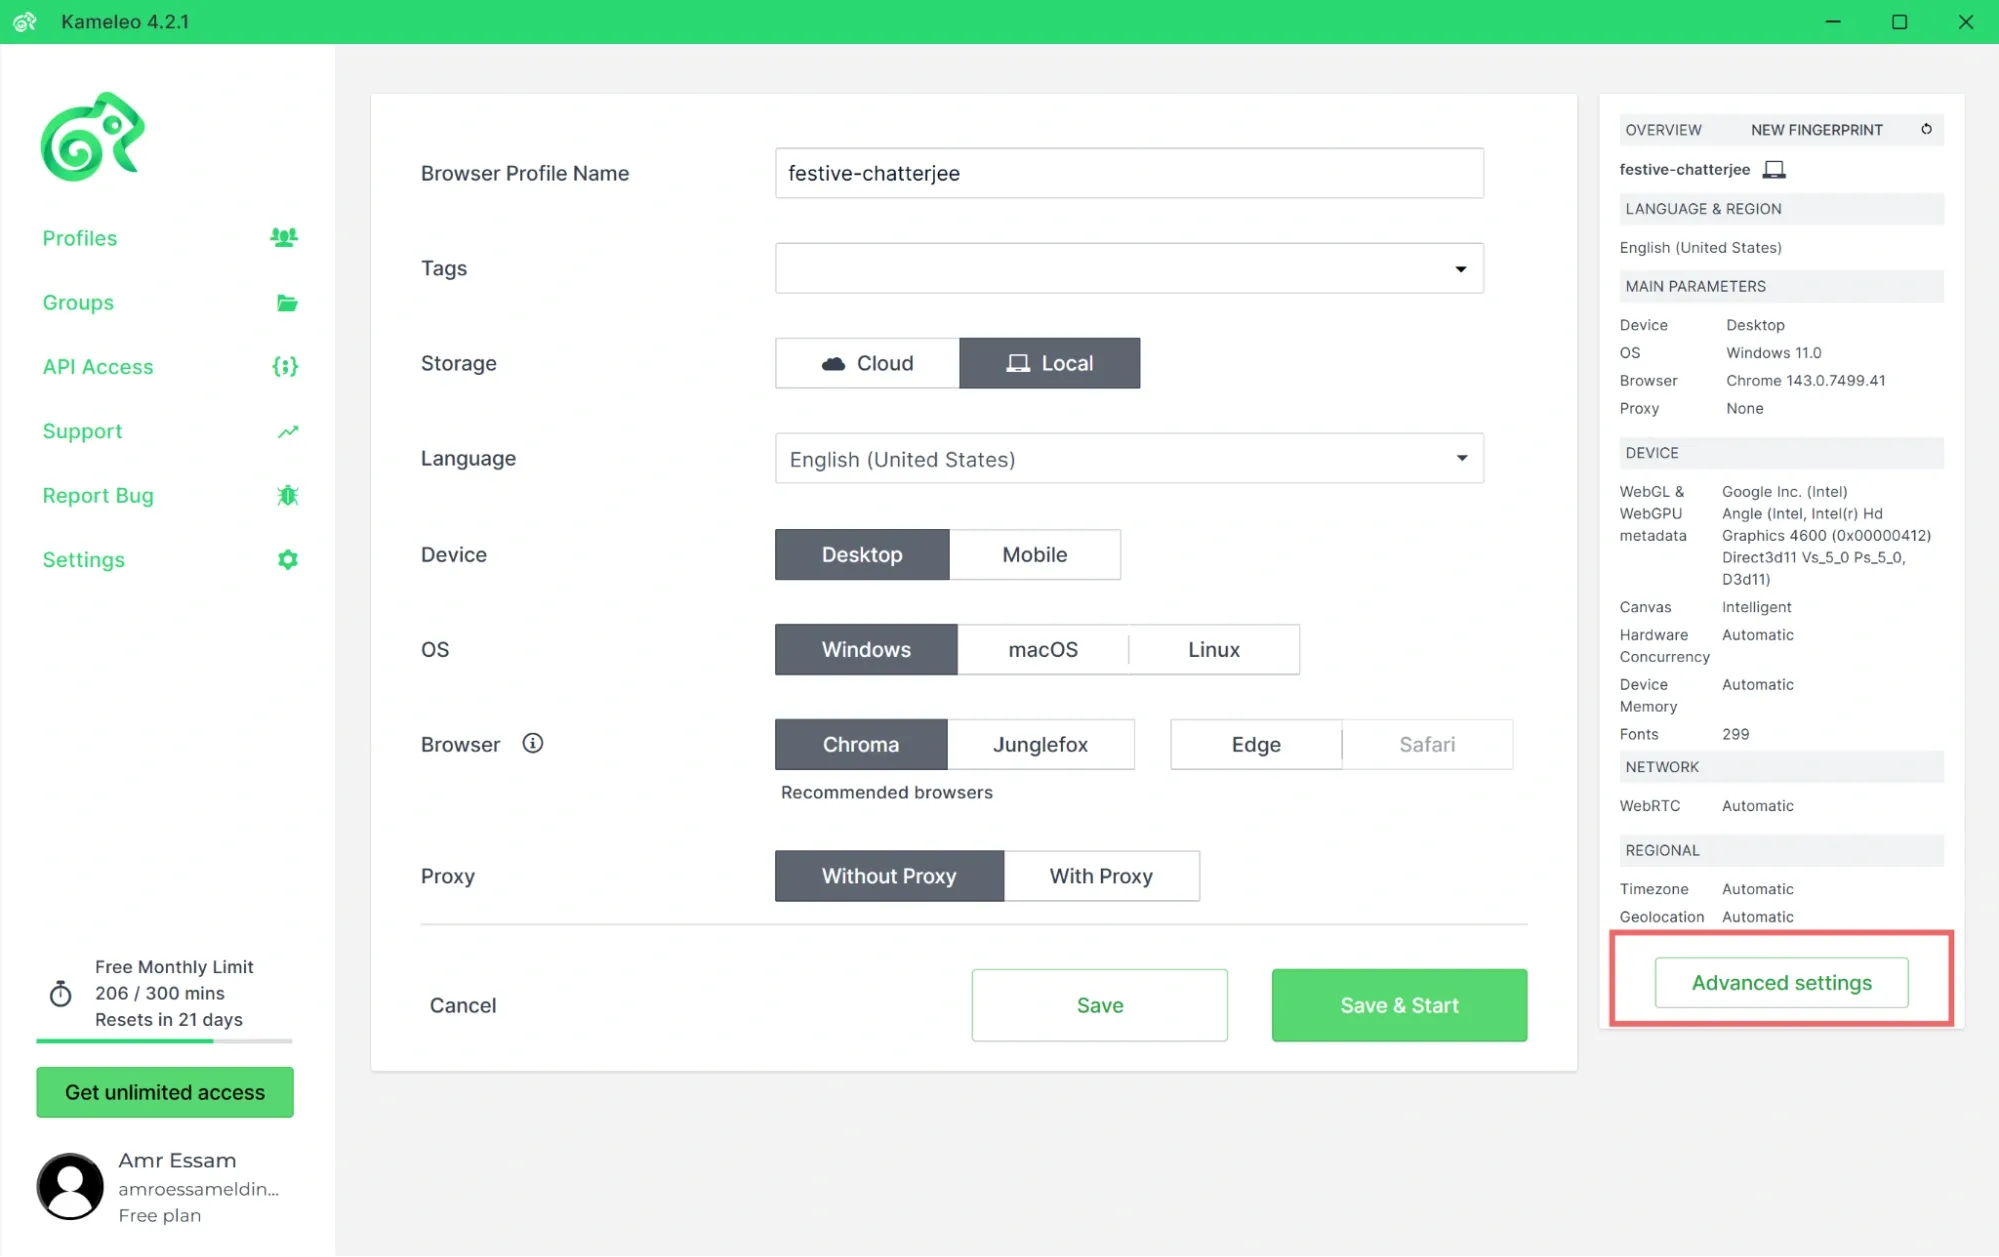
3. You can also manually provide additional profile details for the fingerprint data by selecting the Advanced settings option.
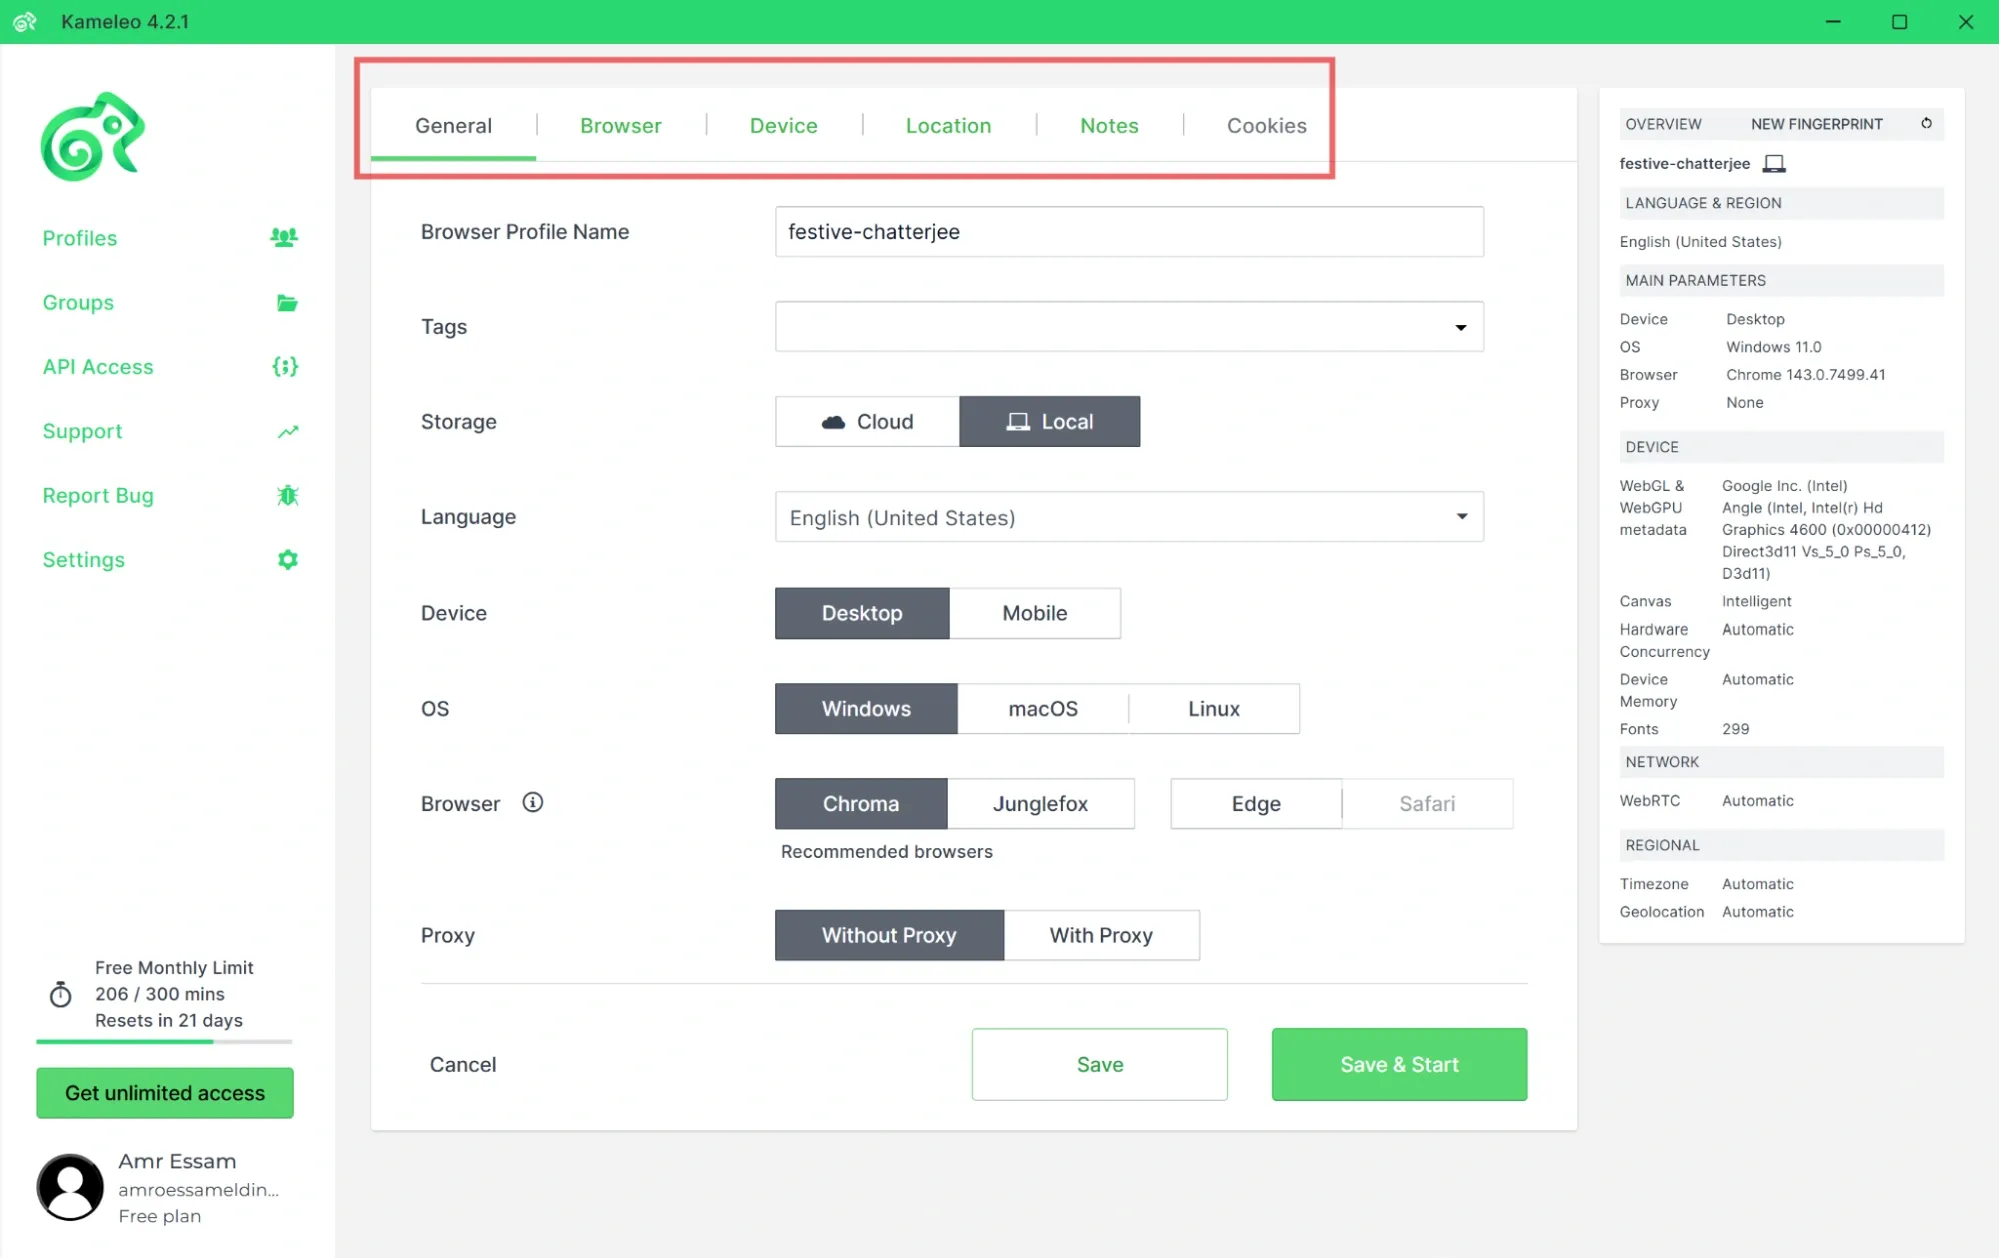
4. You’ll be presented with multiple tabs for adjusting different fingerprint data.
5. Under the device tab, you can adjust things like WebGL, WebGPU metadata, and Screen resolution.
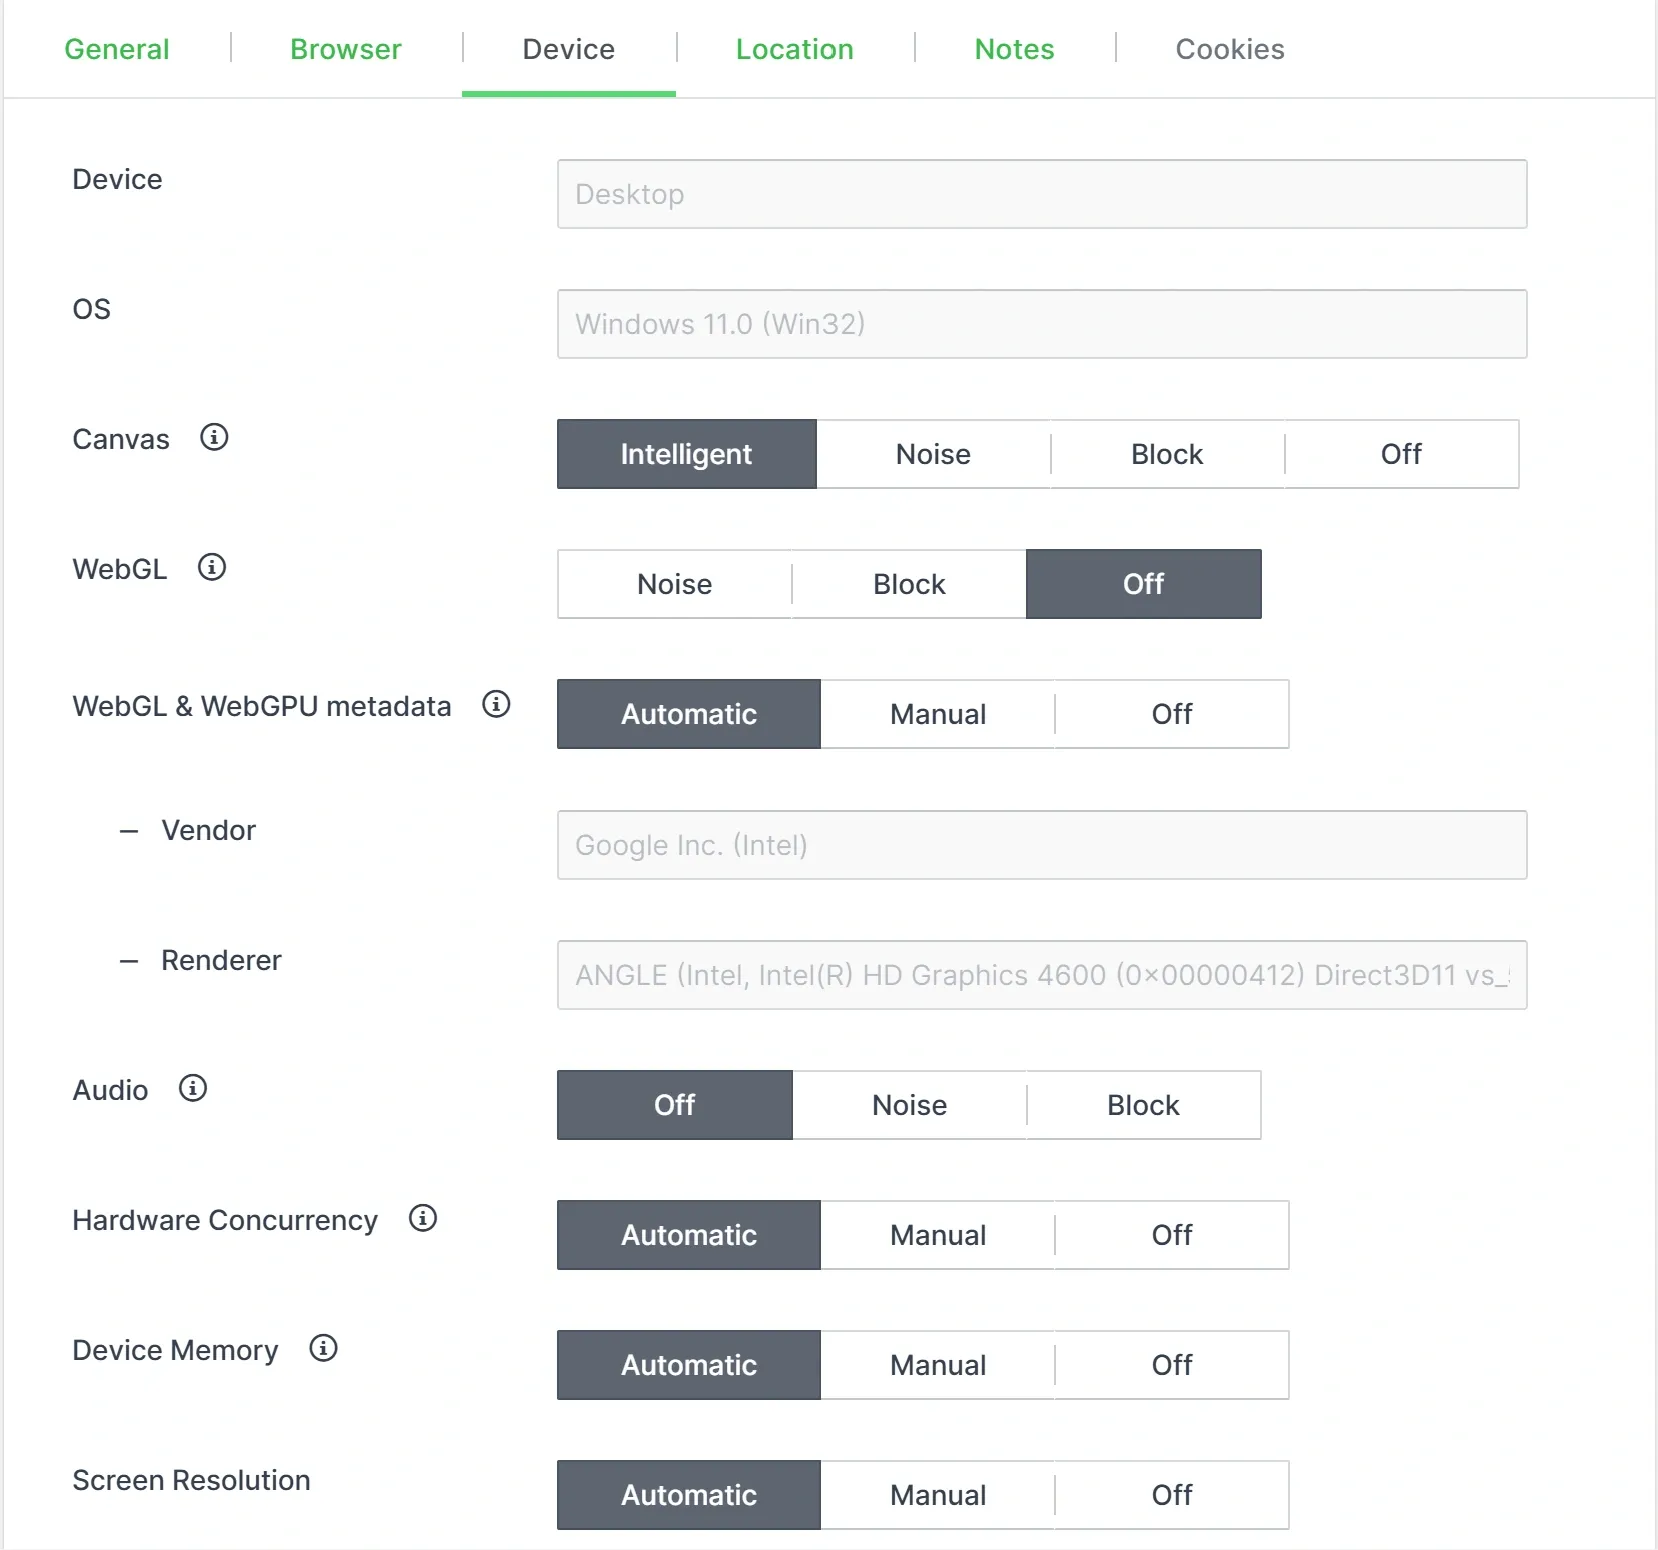
6. From the Location tab, you can configure WebRTC, TimeZone, and Location.

7. Suppose you want to quickly generate the profile fingerprint without having to manually adjust every setting. Click on the NEW FINGERPRINT option at the top-right of the page.
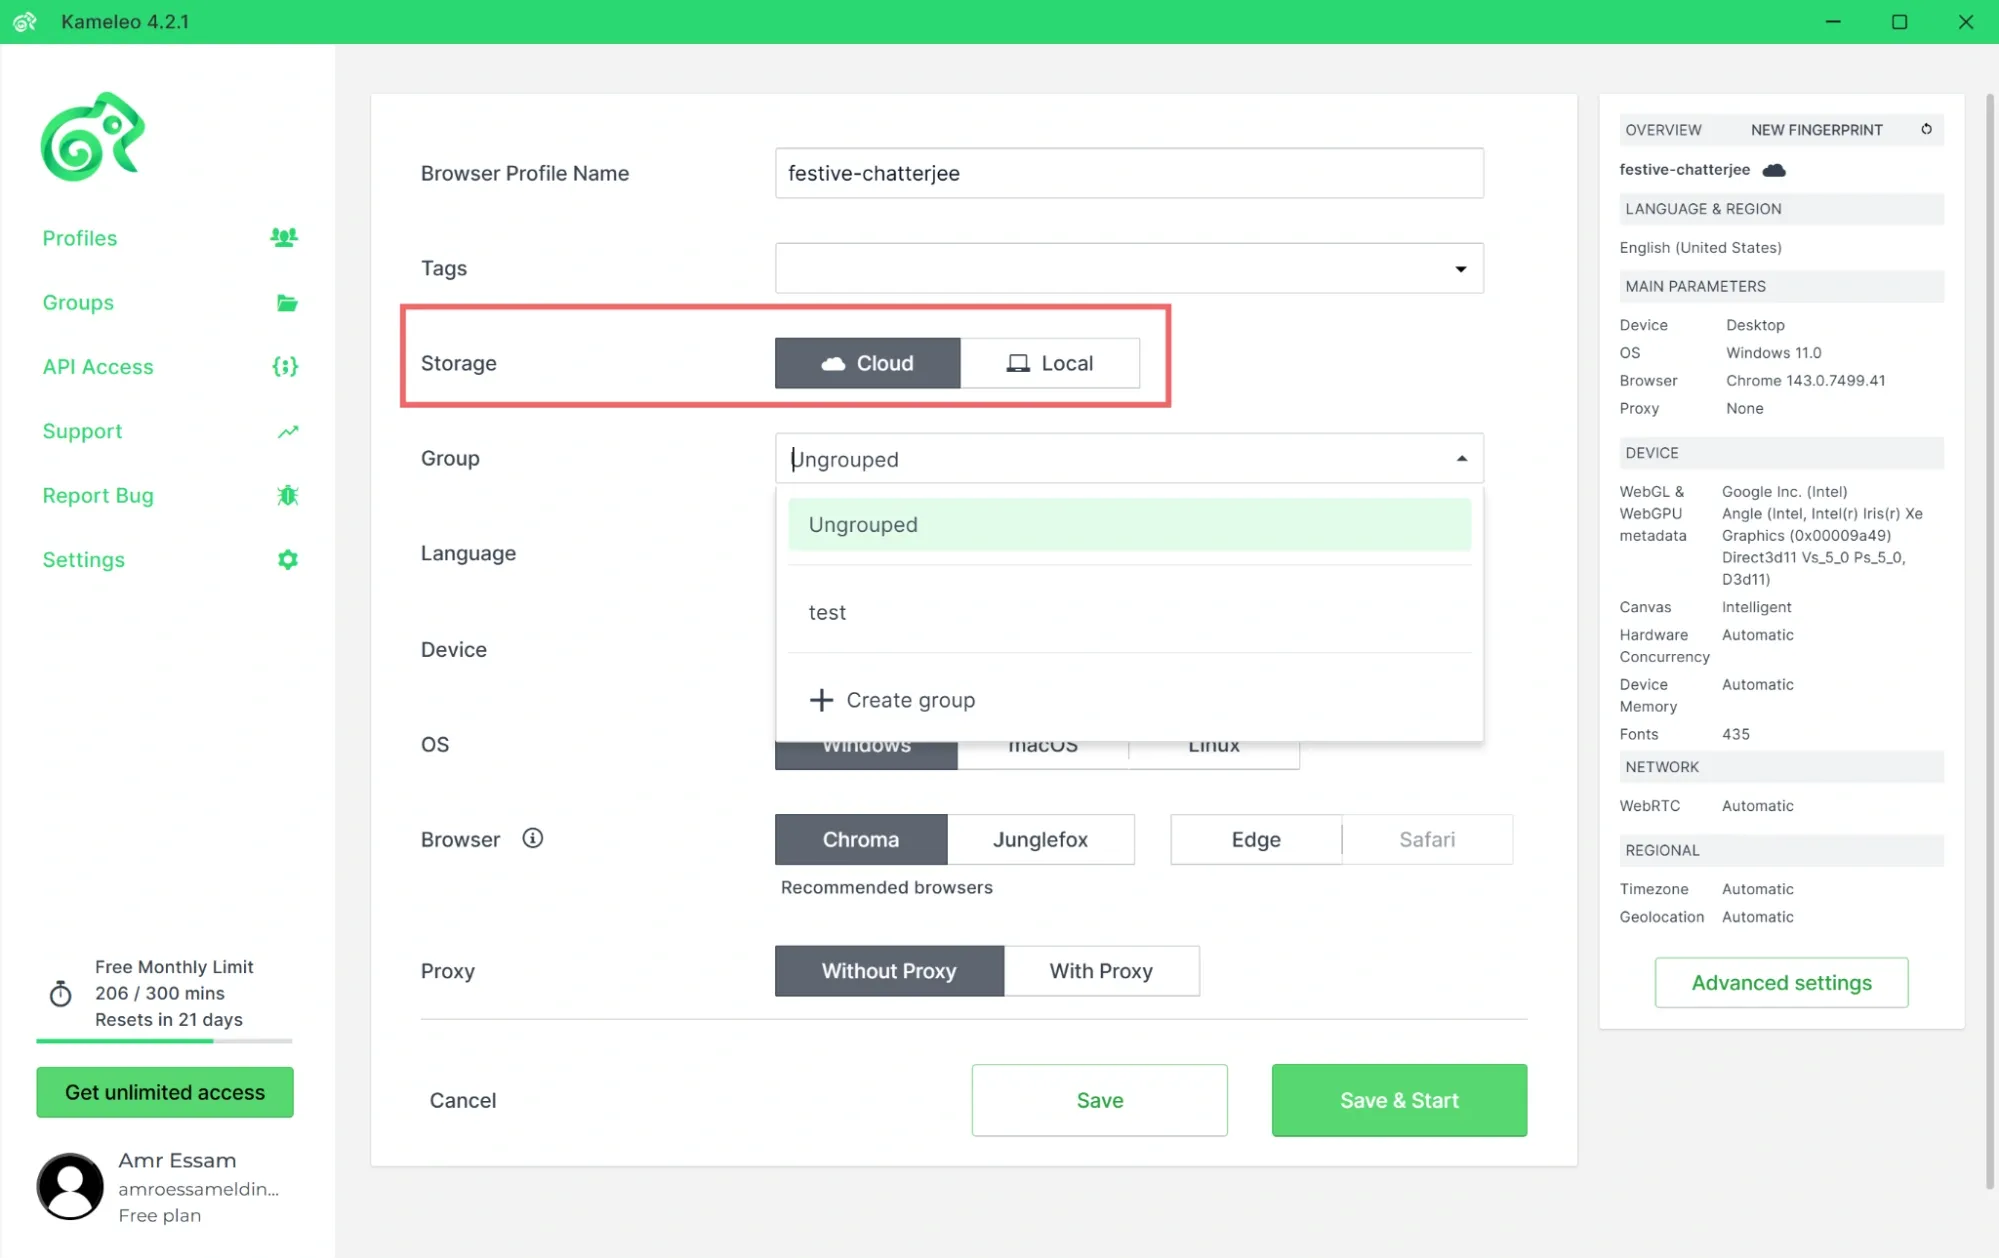
8. Also, one of the options that can come in handy when working across a team or an organisation is using Groups. Groups let you store and share collections of profiles with other users, enabling seamless collaboration and more efficient workflows.
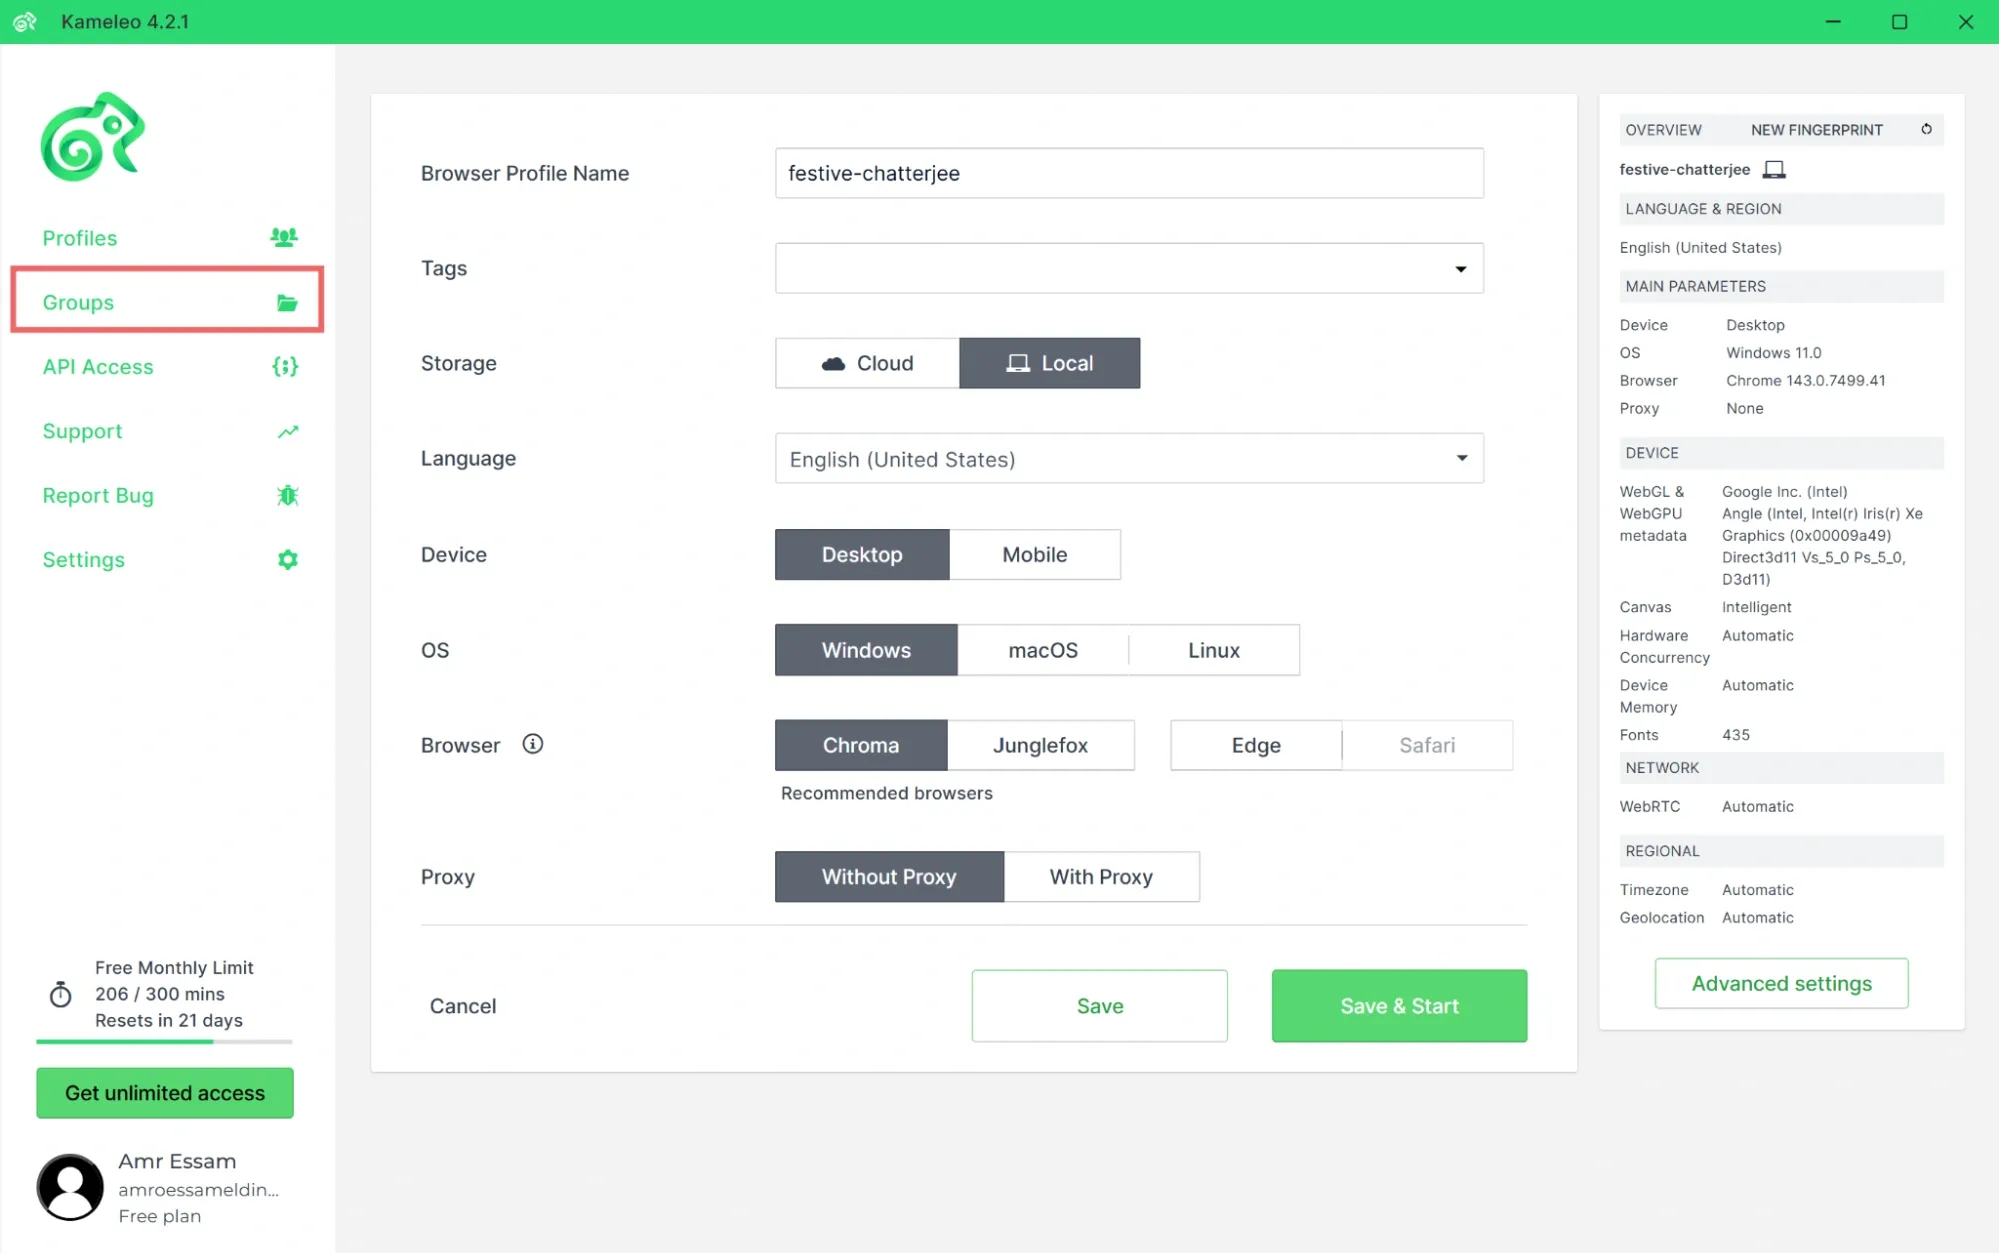
9. You can store your Groups on the cloud to enable them to be accessible to other team members.
How to Use Proxies with Kameleo?
One final crucial step when creating a profile is to use a Proxy. They work together and are essential to the operation of anti-detect browsers.
Before we add the proxy configuration to the profile, we first need to generate the proxy. For this guide, we’ll be using Ping Proxies as the proxy provider. While the steps might vary depending on the proxy provider, the approach remains the same.
Generate a Proxy with Ping Proxies
With Ping Proxies, you can generate a proxy in just a couple of clicks, eliminating the overhead of managing underlying complexities. All you need to do is create an account (Get 1GB Residential bandwidth free) and generate the type of proxy you want from the dashboard.
You can choose from different proxy types, including ISP, datacenter, and residential. To learn more about the differences, check out our proxy comparison guide.
Generate Static Proxies (Datacenter & ISP)
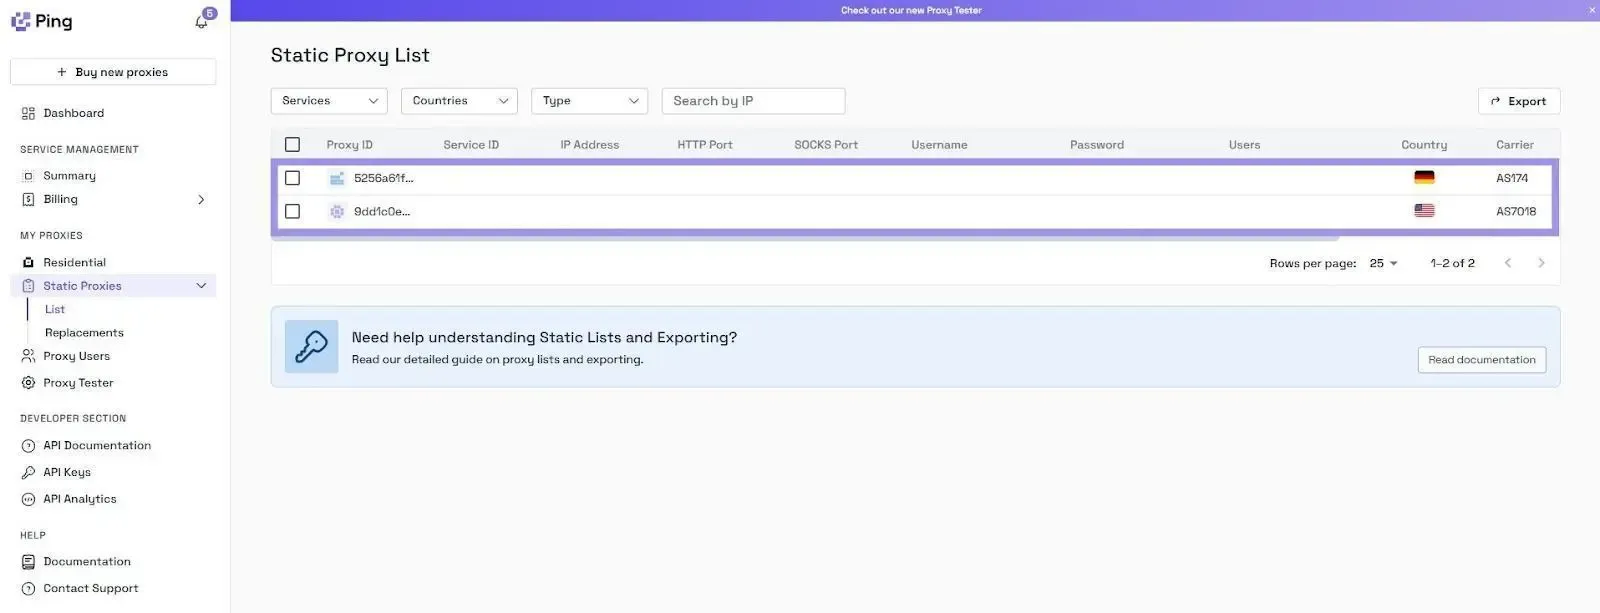
If you’ve bought a static proxy offering from Ping Proxies, you can select Static Proxies from the left pane under the My Proxies section.
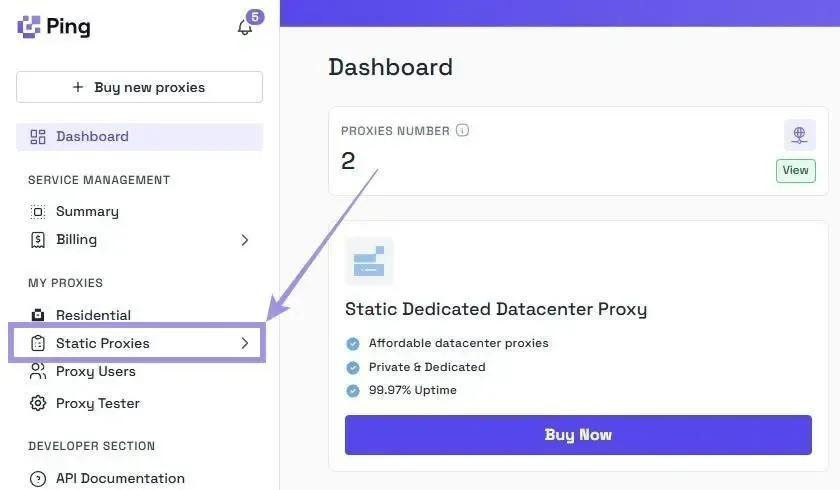
You’ll see the list of proxies you have with their details, including hostname (IP address), port, username, and password. You just need to copy these details to add them into Kameleo.
Generate Residential Proxies
Residential proxies need a couple more steps for their setup, offering you different options to tailor the configuration for your specific requirements:
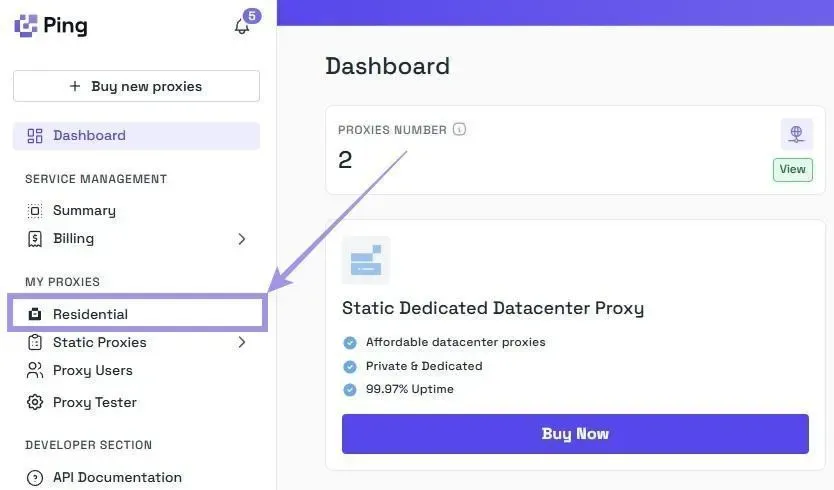
1. Again, under the My Proxies section in the dashboard, but this time select Residential.
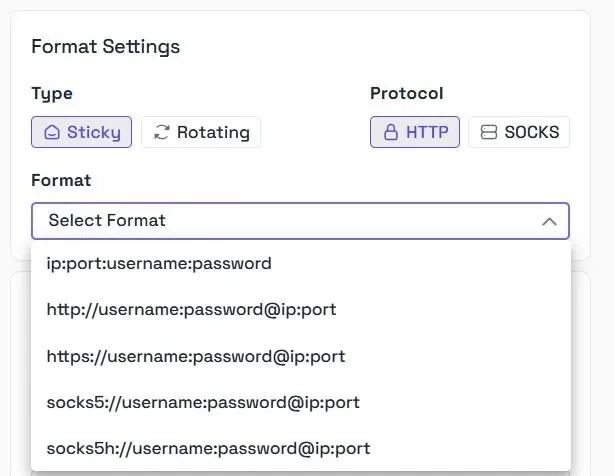
2. Under the Format Settings, choose the type of residential proxy you want, whether sticky or rotating and select the protocol. We support both HTTP and SOCKS5 protocols. You can then choose the format you want to generate proxy details in.
3. We provide you with total control over the targeting settings, including Country, City, Zip Code, and also the ISP/ASN if required.
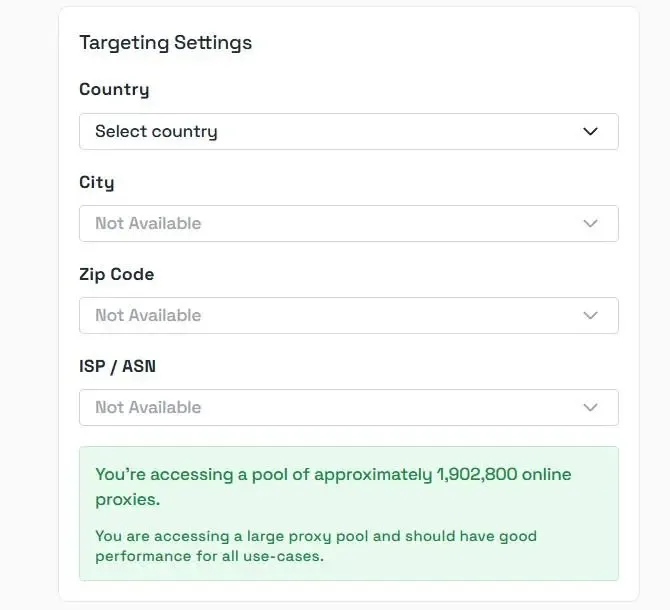
4. Finally, enter the quantity, then click Generate. The proxy details will be displayed in the format you’ve selected.
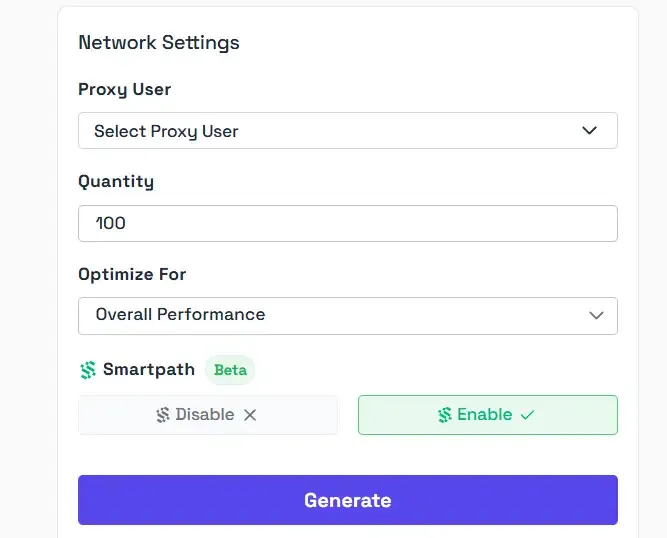
If you’re wondering what Smartpath is, simply put, it is an enhanced routing mechanism that determines which traffic is non-essential and routes it through datacenter IPs rather than consuming residential bandwidth. It uses AI techniques for making these intelligent routing decisions.
Once the proxy is generated, you can add its details to Kameleo. But first, let’s understand what each part in the generated proxy means.
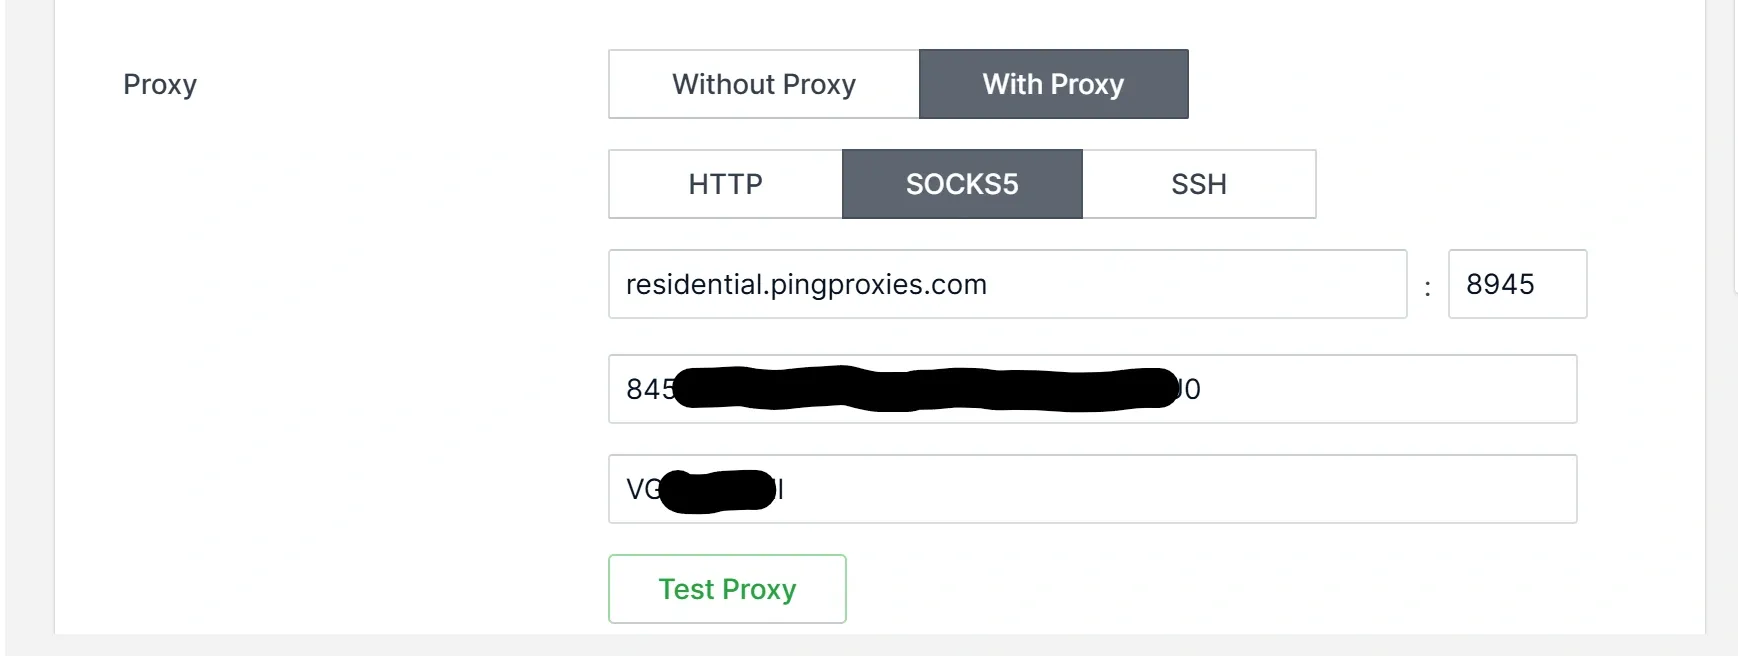
Typically, a generated proxy will have a structure like this: residential.pingproxies.com:1234:user_xyz_c_us_s_NOTKR0UOC65RI6H5:pass123
There are four sections in this proxy structure, each separated by a colon (:) character. Each section represents a specific part of the proxy information as follows:
- residential.pingproxies.com: The hostname.
- 1234: The port number.
- user_xyz_c_us_s_NOTKR0UOC65RI6H5: The username and location. Adding the location to the username is essential for sticky proxies to make sure traffic is always routed to the correct location.
- pass123: The password.
Add and Test the Proxy in Kameleo
Now that we’ve generated our proxy, we can add it to Kameleo as follows:
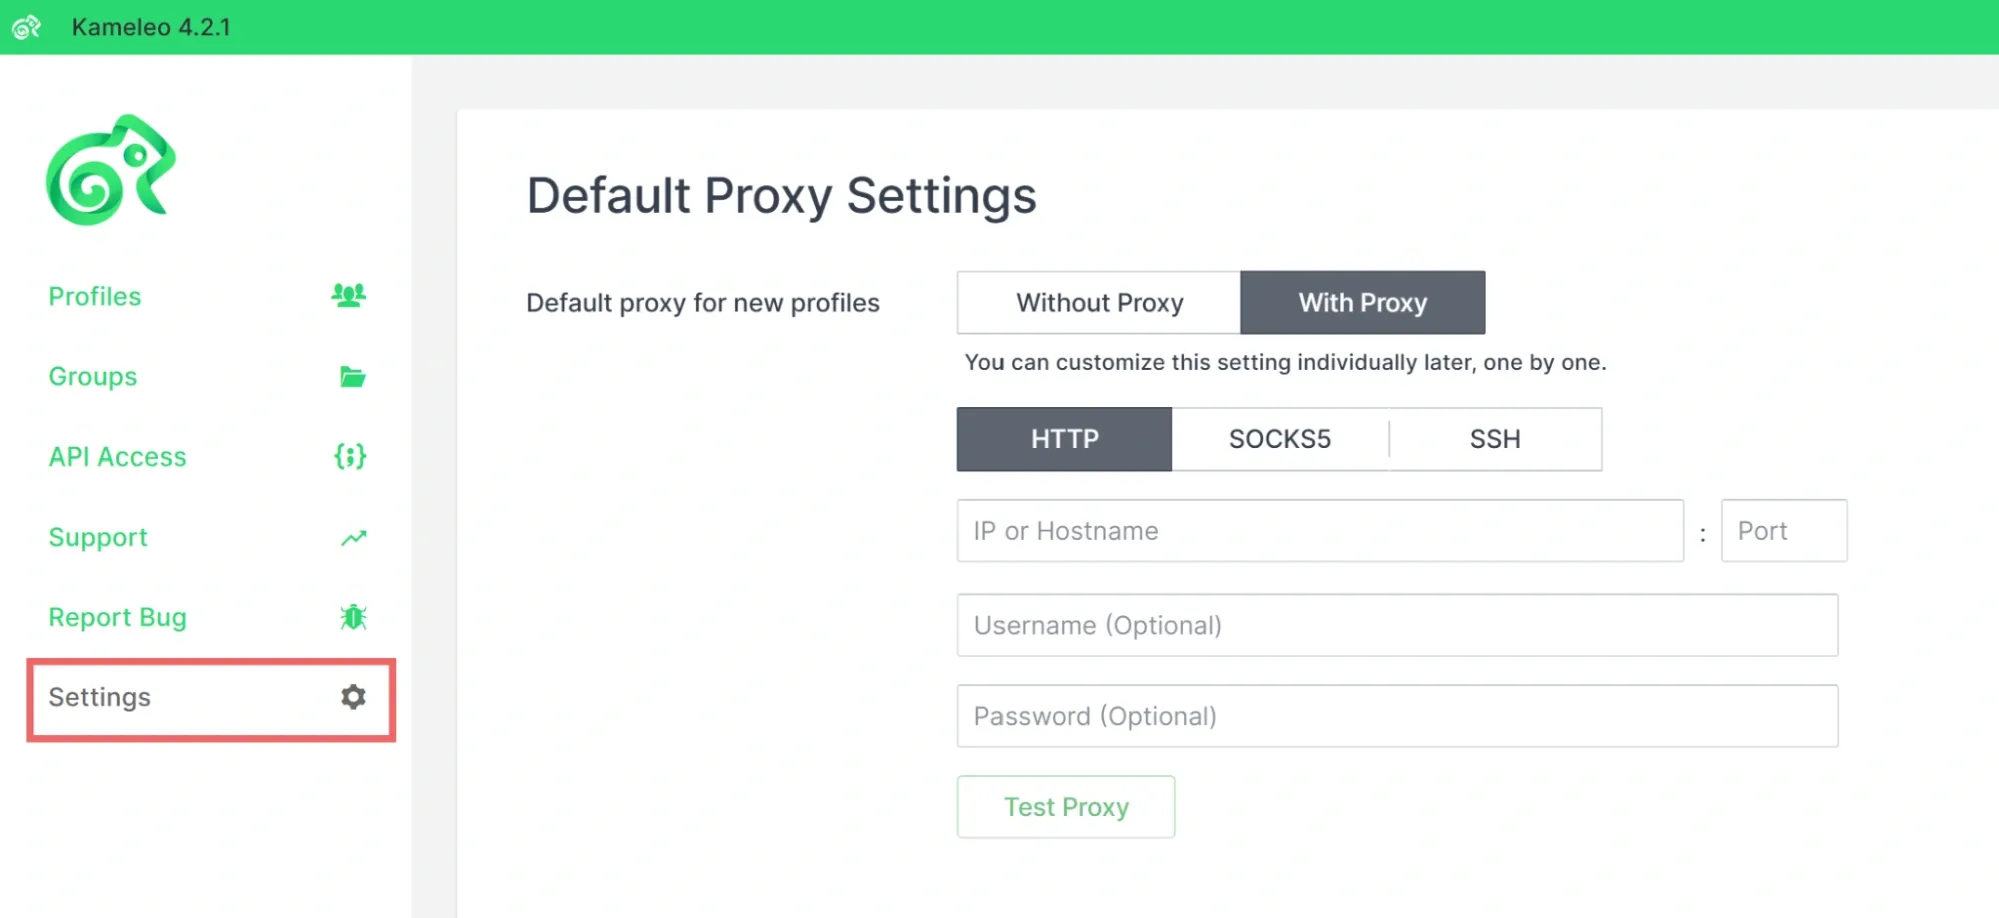
1. In the proxy configuration under the profile, select the With Proxy option. You’ll be presented with different options for choosing the proxy protocol. Select the protocol you’ve used when generating the proxy.
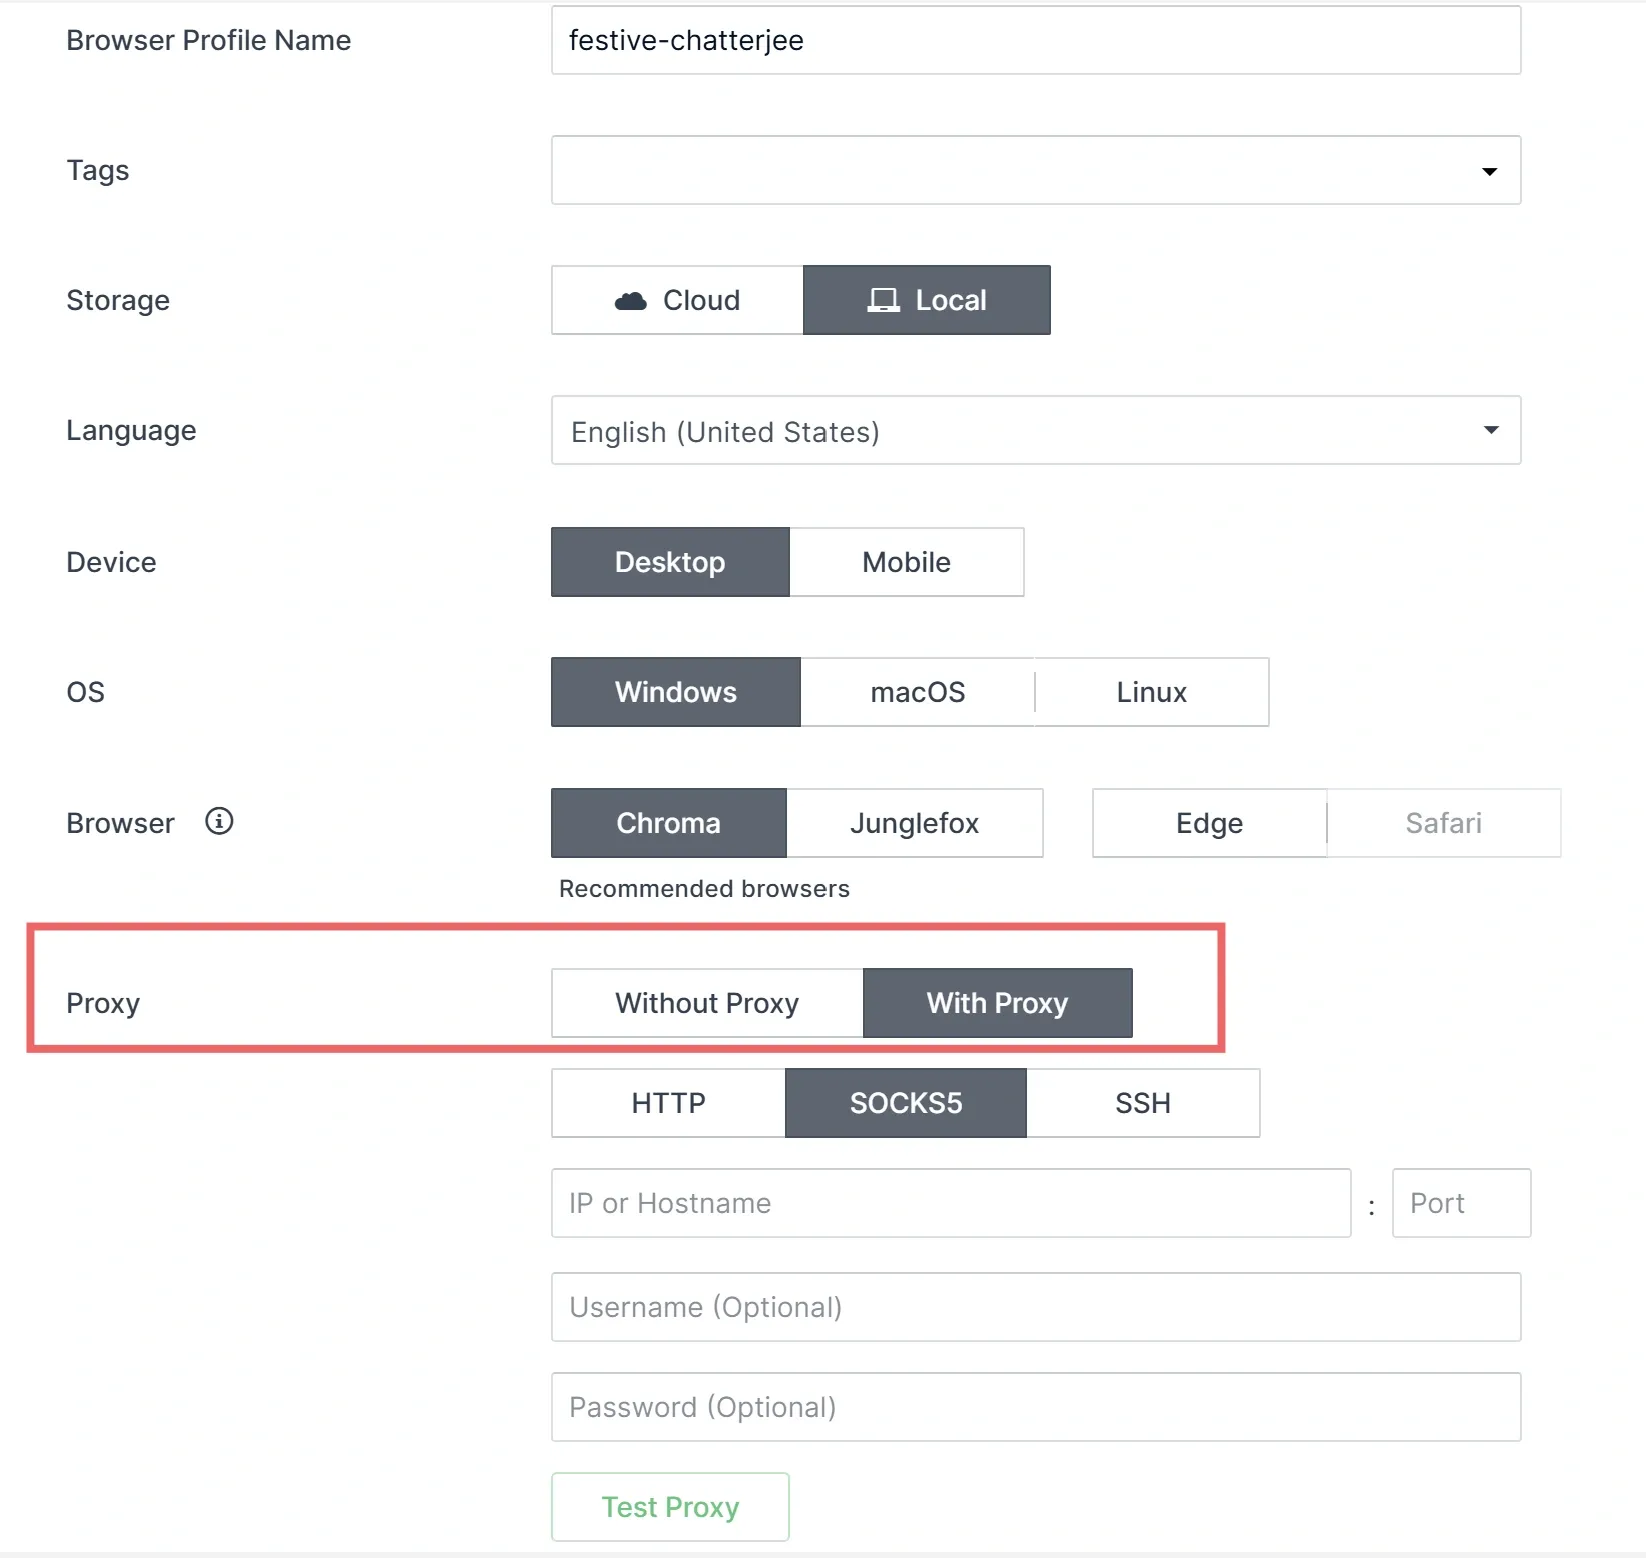
2. Add the proxy details from the generated proxy format, as we’ve explained previously, and what each part means.
3. Click on Test Proxy to verify that everything is working. Kameleo will display the test results and the proxy location.
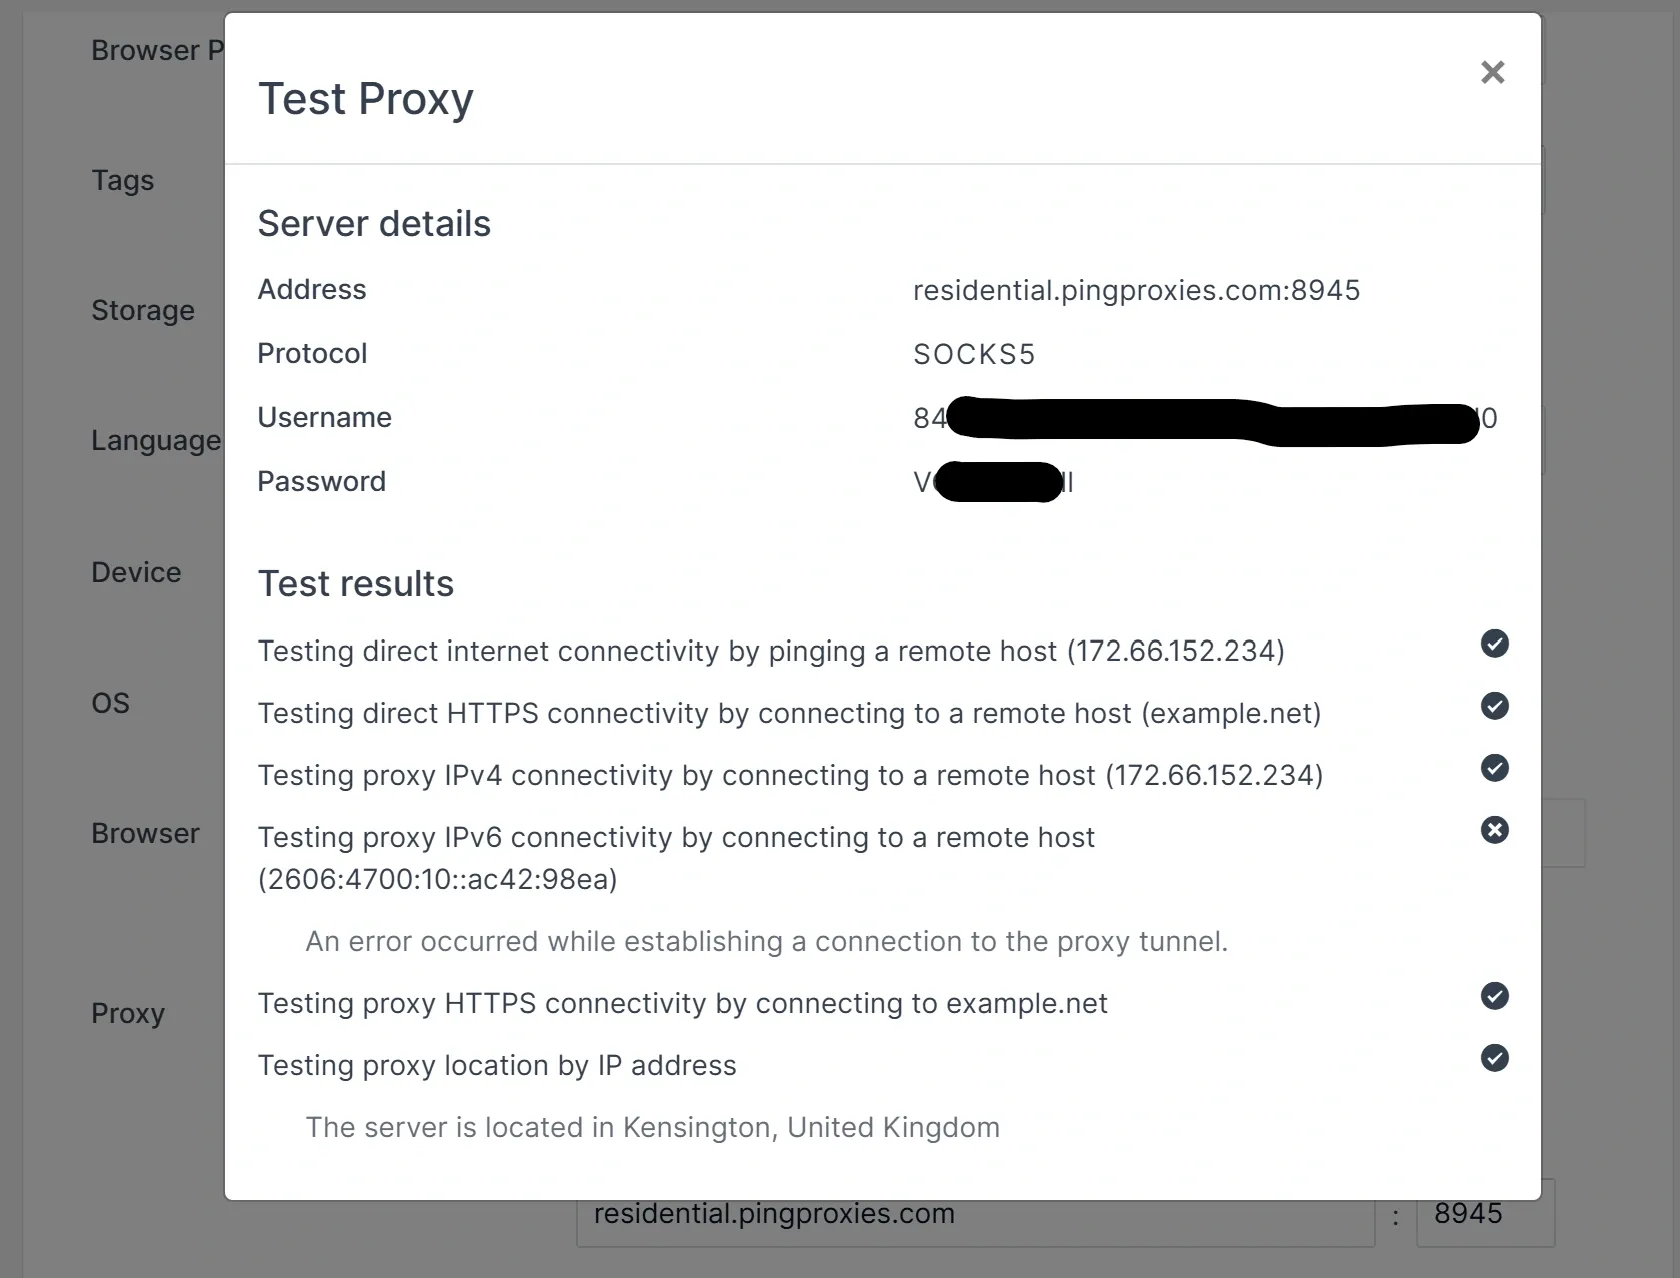
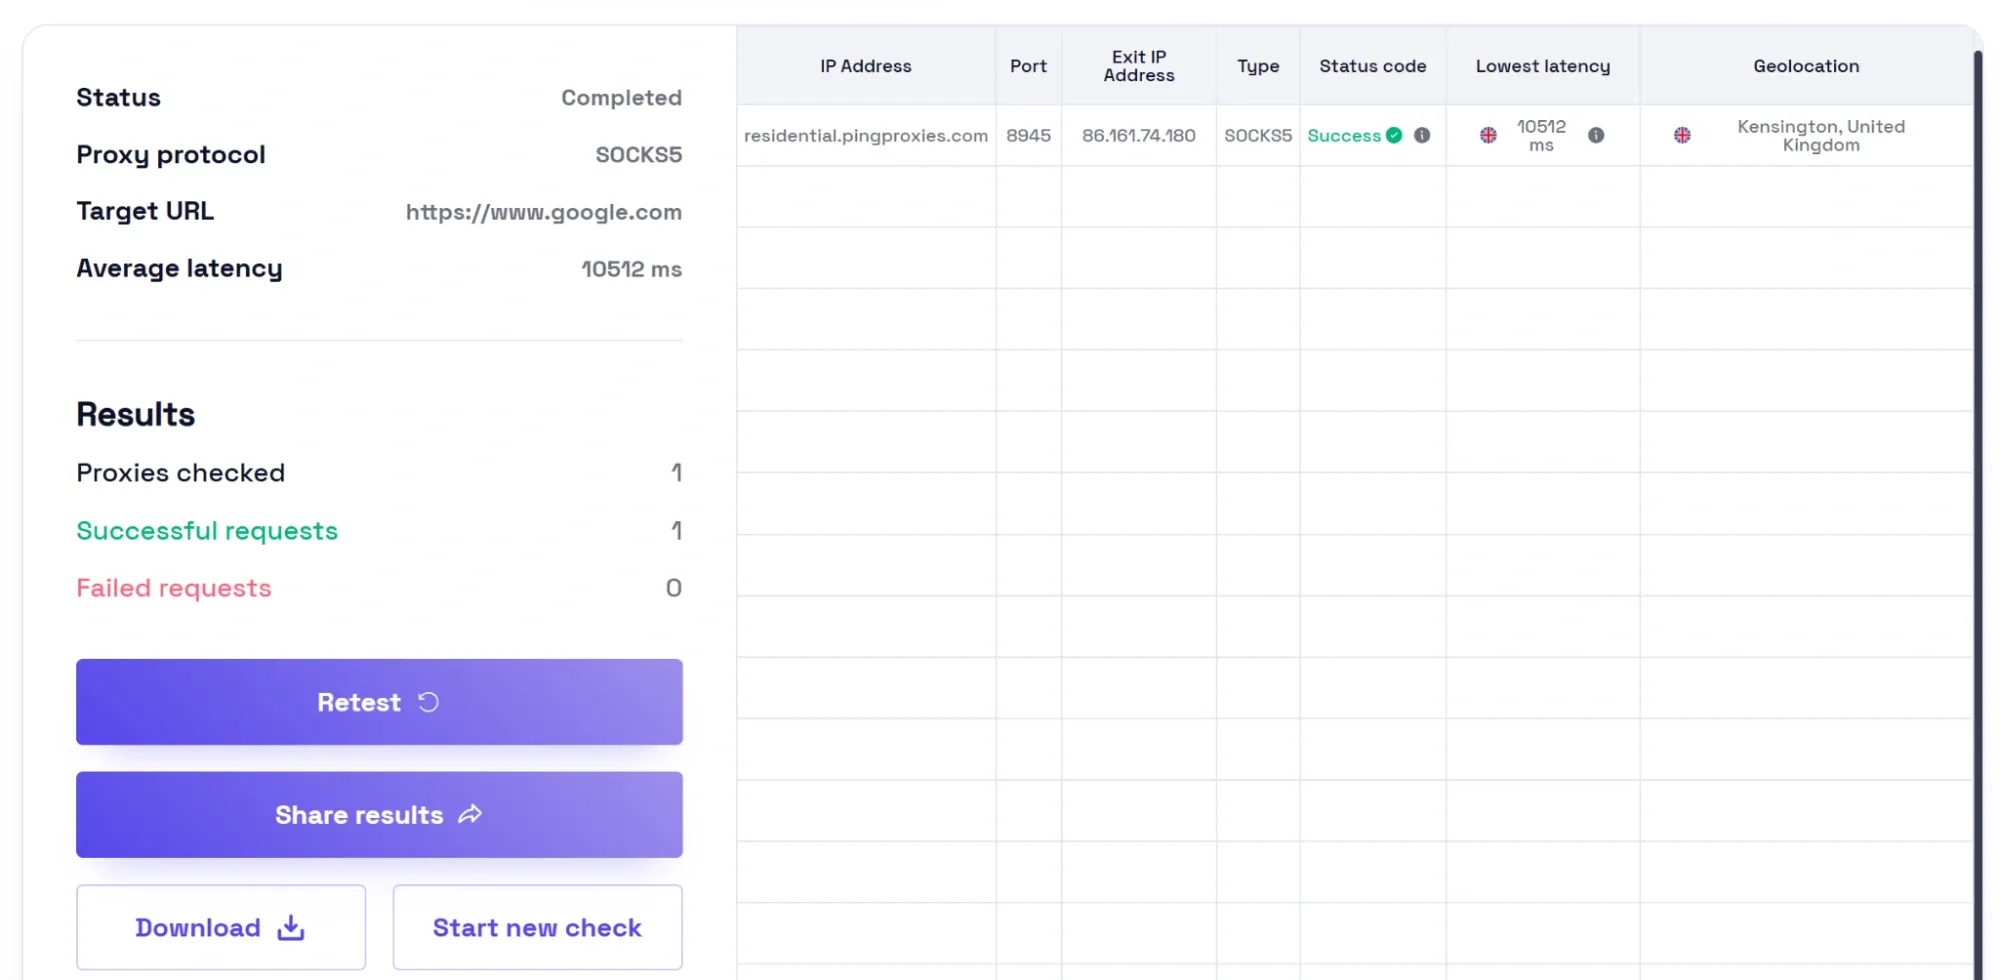
If you’d like to check whether the proxy is working fine before adding it to Kameleo or using it in any other application, you can use our Proxy tester.
It’s a free tool that verifies proxy connectivity and provides information about uptime, speed, and regional performance. All you have to do is give the list of proxies you want to check, add a target URL that you want to test access to through the proxy, and hit test. You’ll get the test results and can decide which proxy to use. You can also share or export the results of your test.
4. You can also set a default proxy from the settings section on the left. This proxy will be used for any new profile created, and you can explicitly override it within a specific profile if needed.
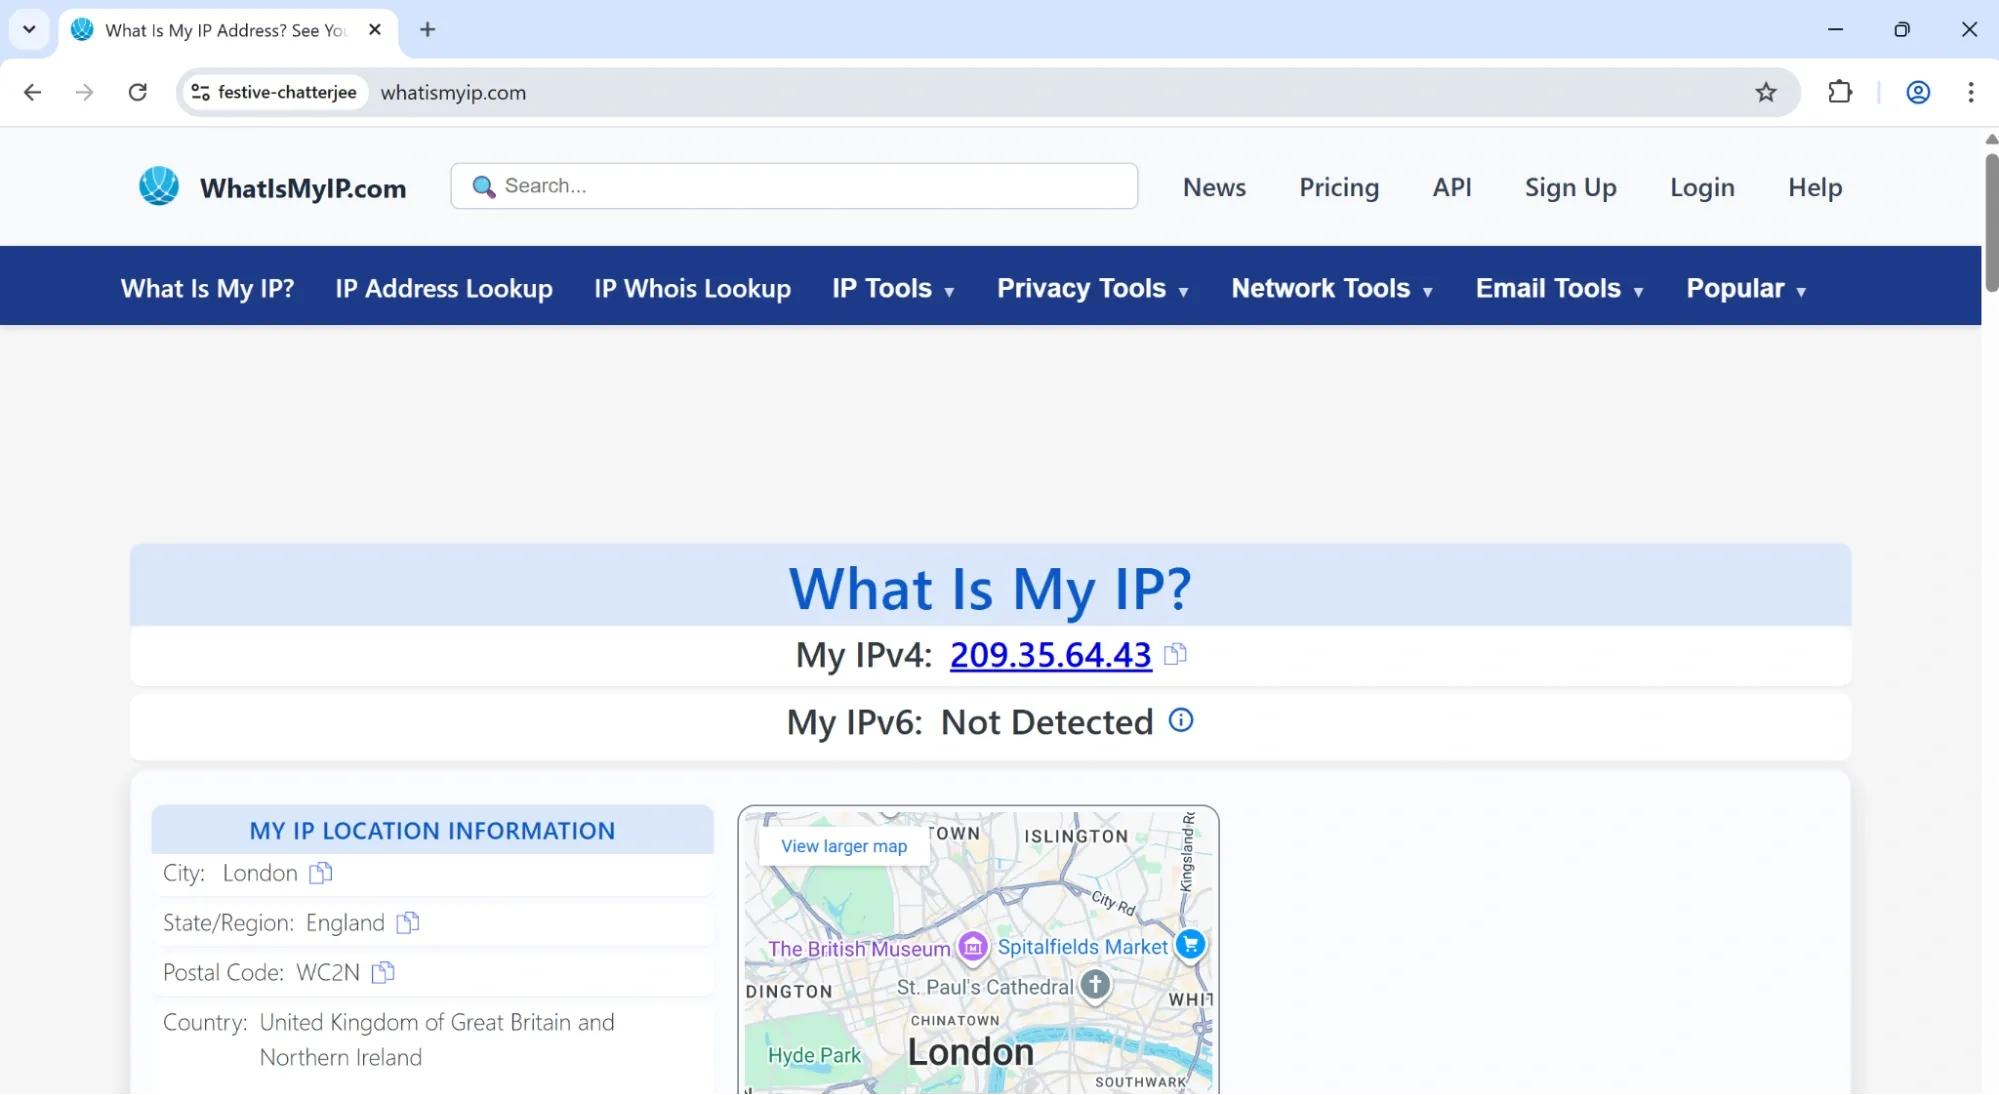
5. Once the proxy settings are set, you can test that it’s working successfully by checking your IP address from the browser profile created.
Conclusion
Anti-detect browsers enable users to create multiple profiles that simulate real online identities, allowing them to conduct concurrent web activities without being detected or banned. Adding a proxy service to an anti-detect browser takes this a step further by providing geo-location freedom and bypassing regional restrictions.
In this guide, we’ve covered the steps for using an anti-detect browser called Kameleo. We’ve explained how to create profiles and configure their different attributes. We’ve also further improved the security and privacy of our profile by integrating it with Ping Proxies.