How to Manage Proxies in Dolphin Anty Antidetect Browser

In affiliate marketing, you simply can’t succeed without two essential components: proxies and an anti-detect browser. Proxies help you bypass regional restrictions and appear online from the right geo. At the same time, an anti-detect browser allows you to safely create and manage multiple accounts without linking them to each other. It means that banning one profile won’t affect others.
In this guide, we’ll see how to integrate proxies with Dolphin Anty and use them effectively inside the browser.
What Is Dolphin Anty?
Dolphin Anty is an anti-detect browser designed to help users create isolated browser profiles. Each of them gets its own unique digital fingerprint, environment, and browsing history. This setup is essential for multiaccounting in affiliate marketing, e-commerce, SMM, crypto, and similar fields where you need multiple independent identities.
Each profile receives its own fingerprint (user agent, timezone, WebRTC, canvas, WebGL, fonts, device names, etc.) and does not share data with other profiles. However, a fingerprint alone is not enough.
To maintain consistency and avoid detection, every profile needs a unique and stable IP address. That’s where proxies come in. They act as the network layer for each profile and make the fingerprint look more realistic.
How to Integrate Proxies in Dolphin Anty?
The steps below might vary depending on the proxy provider. Hence, our goal is to guide you through the process and demonstrate it using Ping Proxies, so you get a general idea of how to proceed, regardless of the proxy provider.
Generate Proxies
With Ping Proxies, generating proxies is a matter of just a few clicks. There is no need for CLI or complex manual inputs. We offer residential, ISP, and datacenter proxies. All you need to do is simply sign in and generate the proxy through the dashboard.
Not sure which proxy to choose? Here is a detailed comparison between datacenter and residential proxies. Find what best fits your needs.
Generate Static Proxies (Datacenter & ISP Proxies)
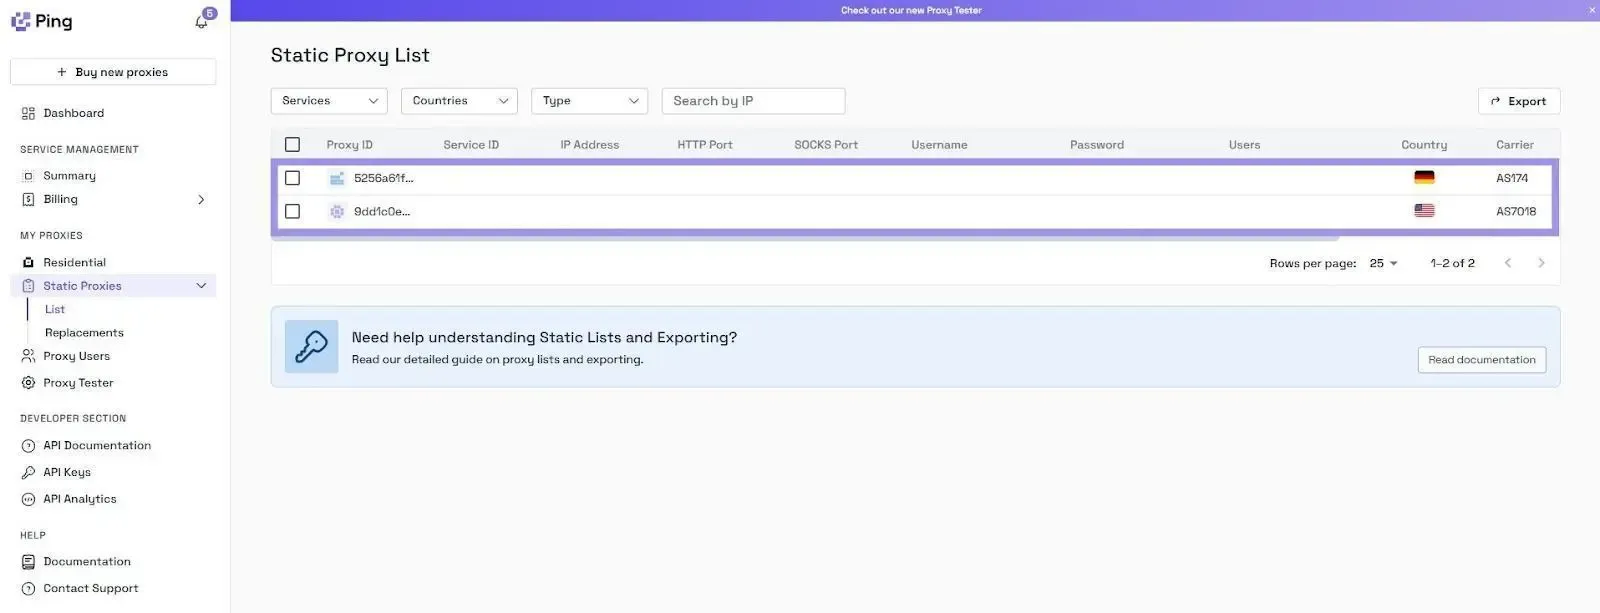
If you’ve purchased static proxies from us, click on the “Static Proxies” option under the “My Proxies” section on the left in the dashboard.
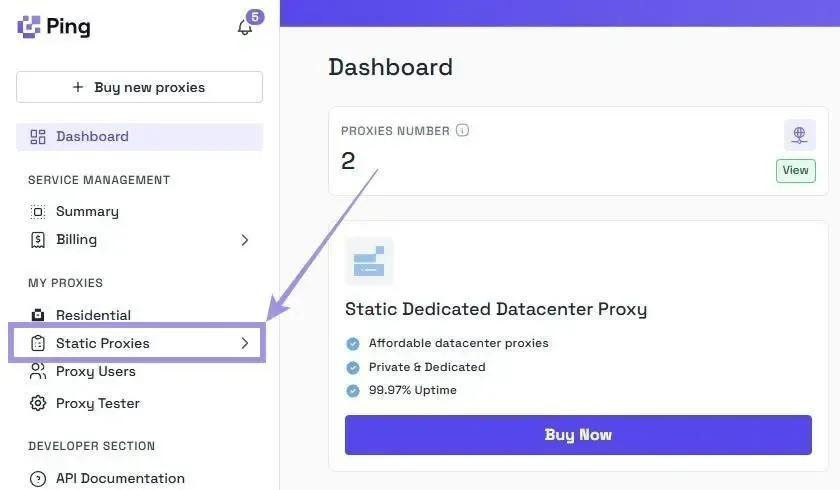
Your proxy list will be displayed with the IP address (hostname), port, username, and password. No generation is needed, just copy the credentials and you’re ready.
Generate Residential Proxies
Unlike static proxies, residential proxies involve a few more steps, primarily selecting the options to generate proxies that meet your needs. Here’s how our residential configurator makes it easier for you.
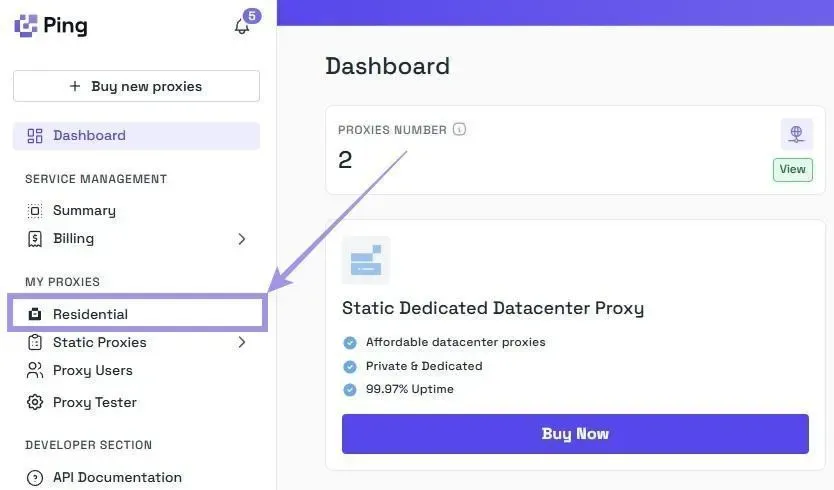
1. On the dashboard, navigate to the “My Proxies” section on the left and select the “Residential” option.
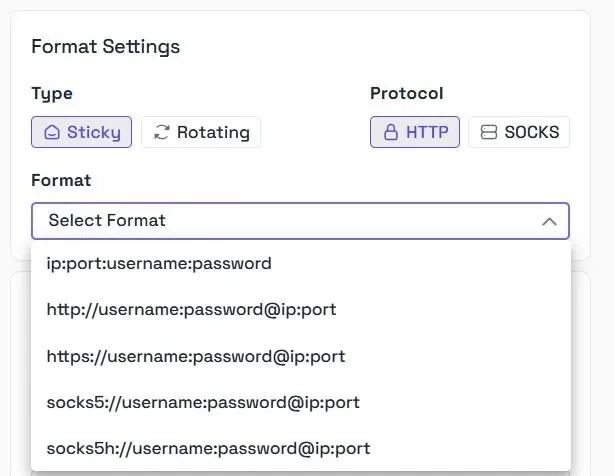
2. Start with these format settings. We offer both rotating and sticky residential proxies and support HTTP and SOCKS5 protocols. The best part is that you can choose from different formats without needing to modify them later.
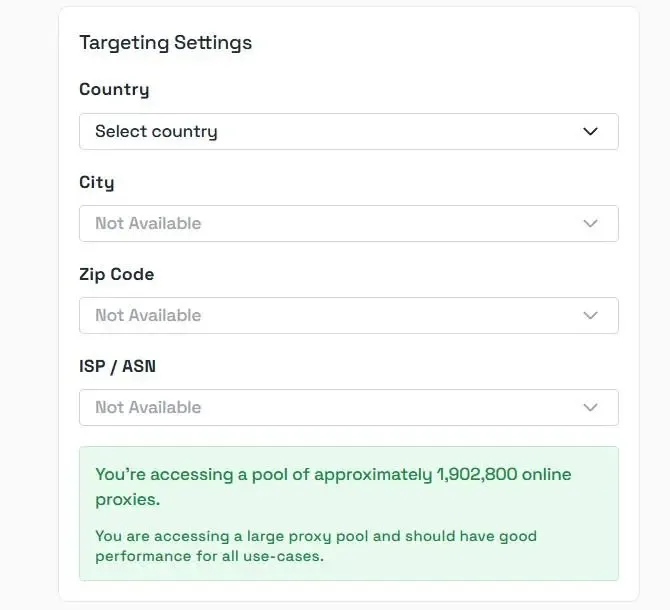
3. We offer the best advanced targeting settings, along with complete transparency regarding proxy availability in real time. You can select the country, city, zip code, and even ISP/ASN, if necessary.
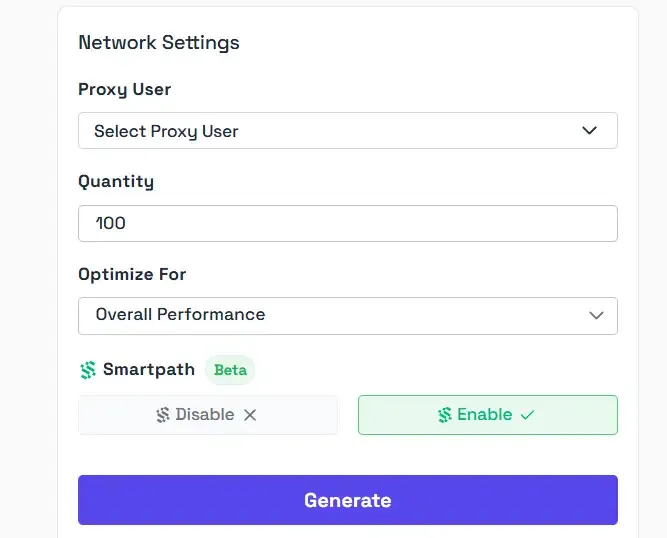
4. Once you have selected all options, add the quantity and click on “Generate.” Your proxy list will appear in the format you selected. If you’re wondering what Smartpath is, it is a free in-house AI routing system that sends non-essential traffic via datacenter IPs. Enable it to reduce residential bandwidth and costs.
Now that the proxy is generated, understanding it is crucial to enter the details into Dolphin Anty
Example: residential.pingproxies.com:8523:123_xyz_c_us_s_NOTKR0UOC65RI6H5:abc123
All proxies generated follow the structure - (hostname:port_number:username_location:password)
Find it confusing? Here’s the breakdown of the example relating to the structure.
- Hostname: residential.pingproxies.com
- Port number: 8234
- Username & Location: 123_xyz_c_us_s_NOTKR0UOC65RI6H5
- Password: abc123
Note: Always add the location to the username for the sticky proxies. Failing to do so routes you to the incorrect location. Also, remember that broader targeting gives you a larger proxy pool.
Adding Proxies to Dolphin Anty
Dolphin Anty lets you add proxies in two different ways: directly while creating a new profile or through the dedicated Proxies menu. Here’s how each method works.
Adding a Proxy During Profile Creation
This method is convenient when you're setting up new profiles.
- Click “Create profile" in the Browser Profiles tab.
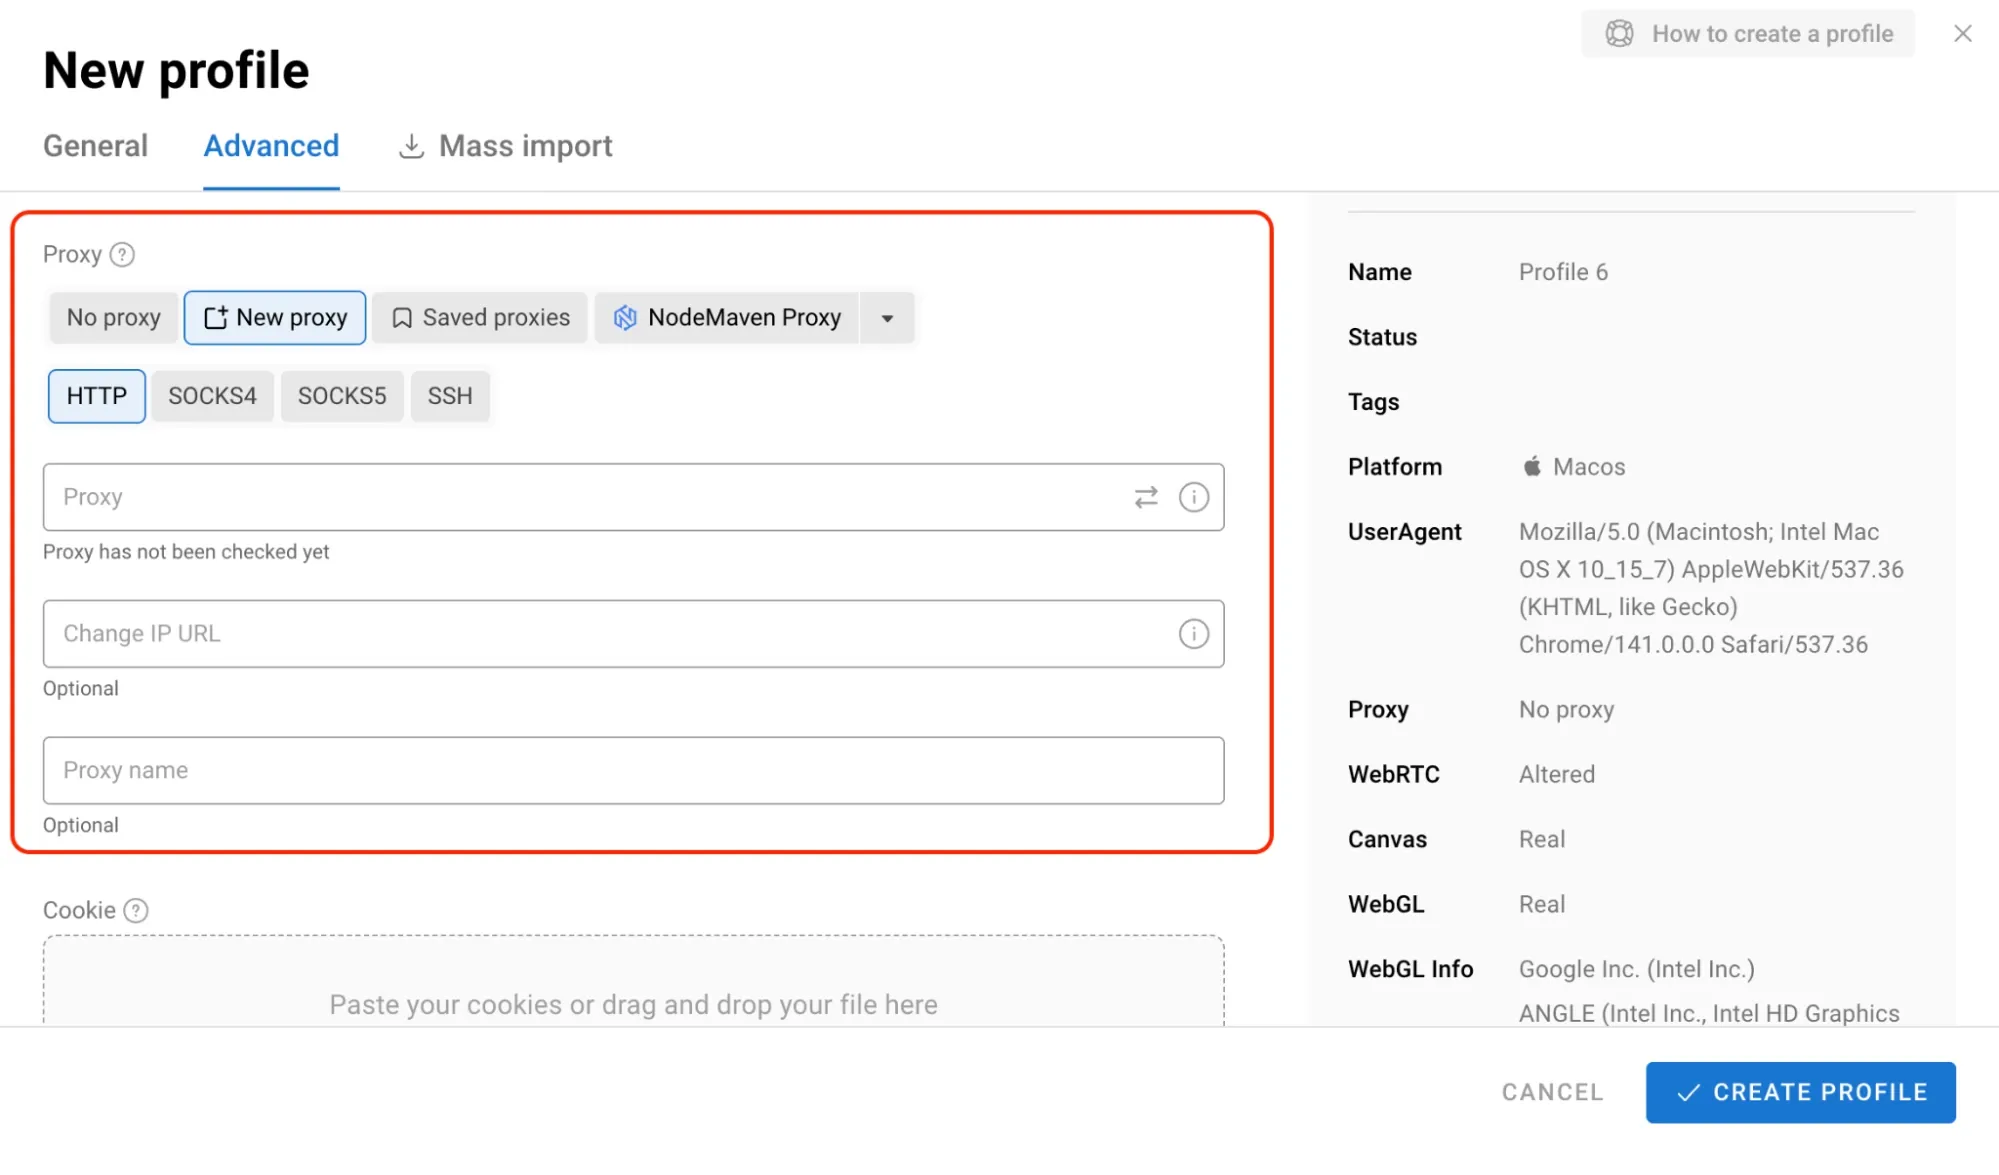
- Scroll to the Proxy section.
- Paste your proxy via “New proxy” in any supported format .
- Click Check connection (two opposite directed arrows) to verify that it connects successfully.
- Finish customizing the fingerprint and create the profile.
If the proxy connects properly, the region and IP details will appear in the profile list. If not — you'll see an error that helps you troubleshoot.
Adding Proxies in the Proxies Menu
If you’re working with multiple proxies or want to keep them organized in one place:
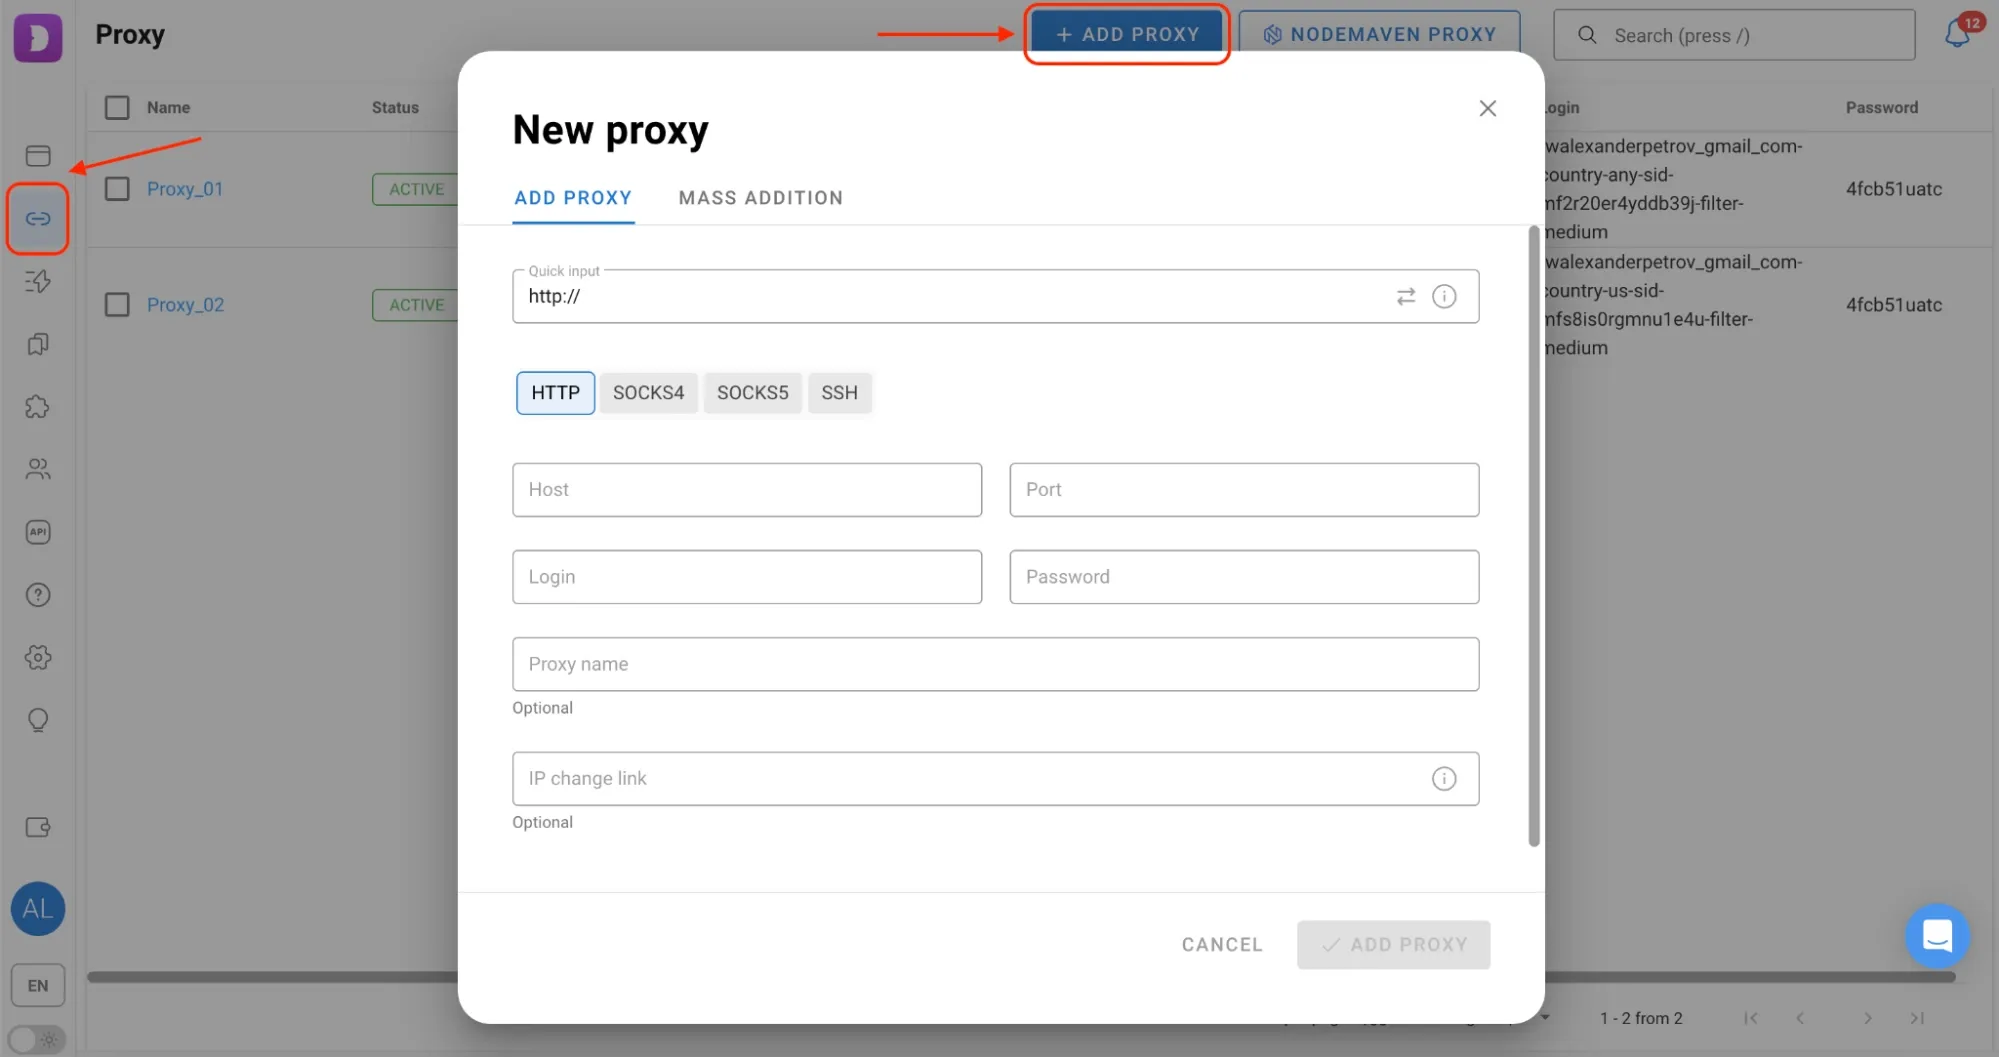
- Open Dolphin Anty and go to the Proxies tab in the sidebar.
- Click Add proxy.
- Enter the proxy name, type (HTTP/SOCKS5) and credentials in the “Quick input” field to distribute the credentials automatically.
- Use Check proxy to confirm the connection.
- Save the proxy. When creating or editing a profile, simply choose it from the dropdown list.
This approach helps maintain a clean structure and reuse the same proxy across multiple profiles if needed.
What Else Can You Do With Proxies in Dolphin Anty?
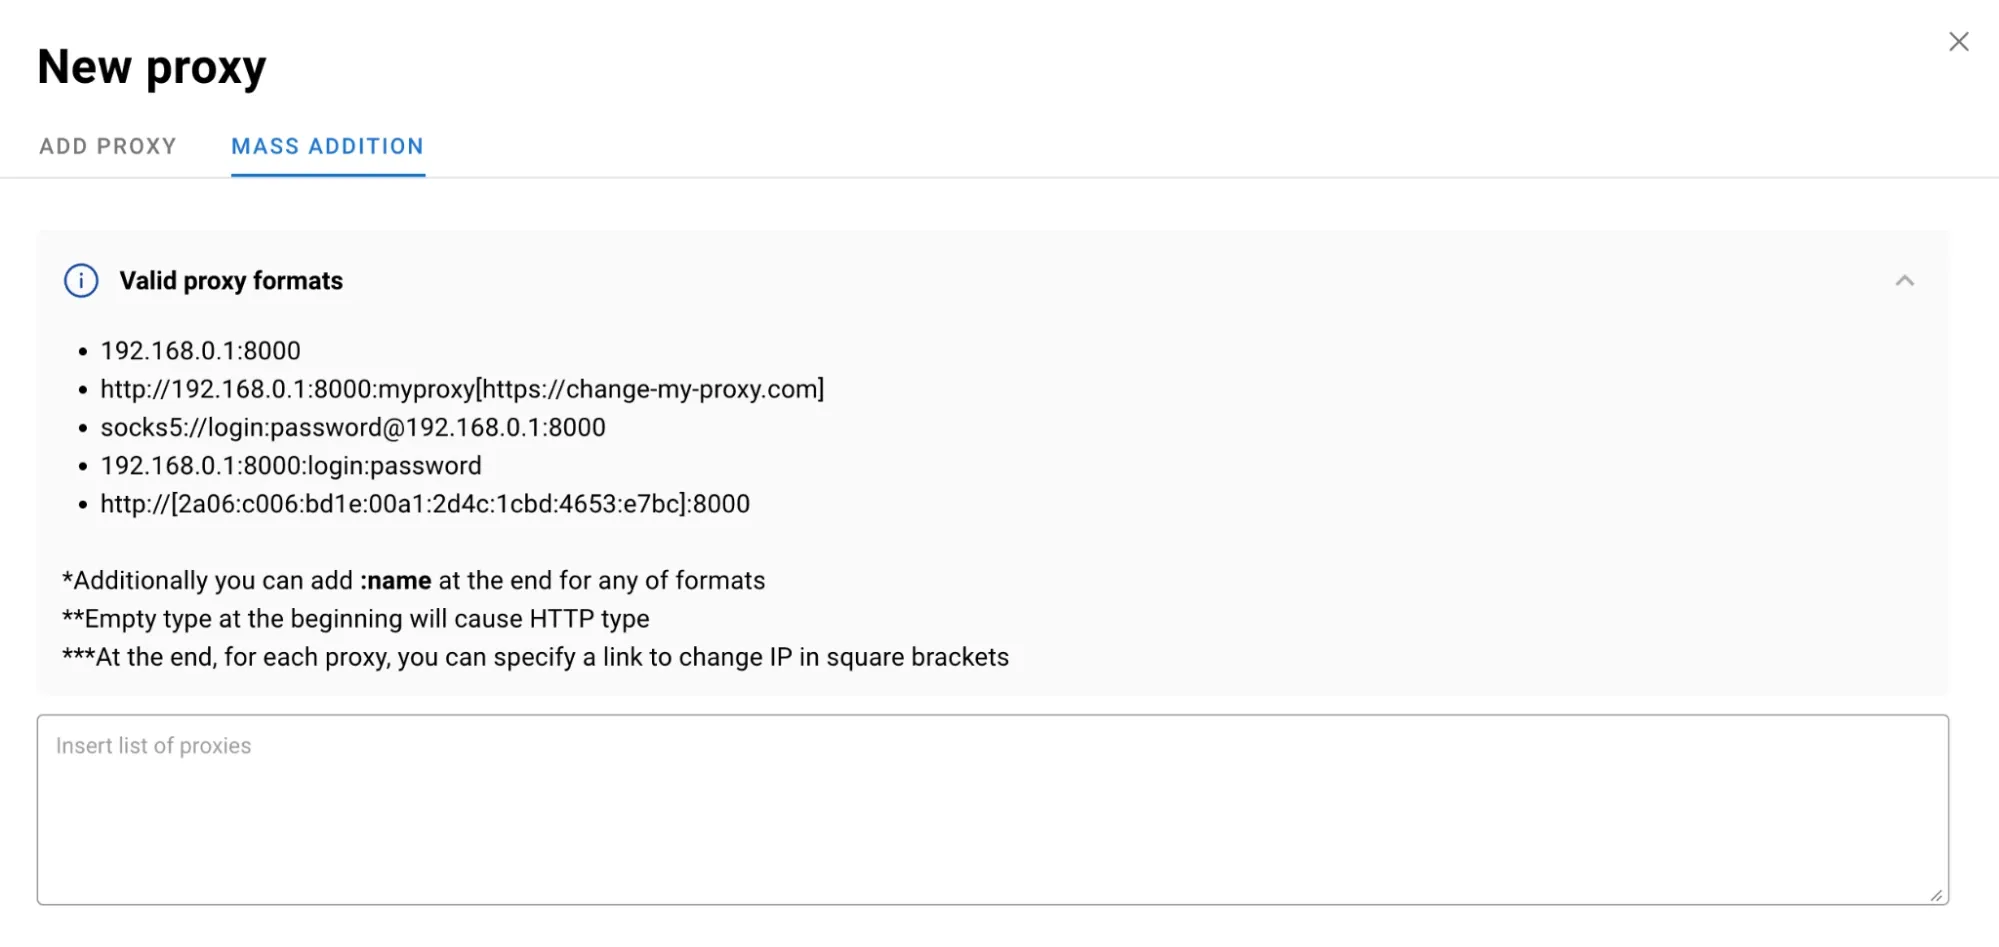
Mass Addition and Assignment
Dolphin Anty allows you to bulk-add proxies, which is especially useful when you're working with dozens or hundreds of accounts. You can paste multiple proxy strings at once and assign them instantly. All the supported formats are right in the menu.
Automatic Distribution
When creating or importing multiple profiles, Dolphin Anty can automatically assign proxies according to your preferred pattern — for example, sequentially, randomly, or using custom rules.
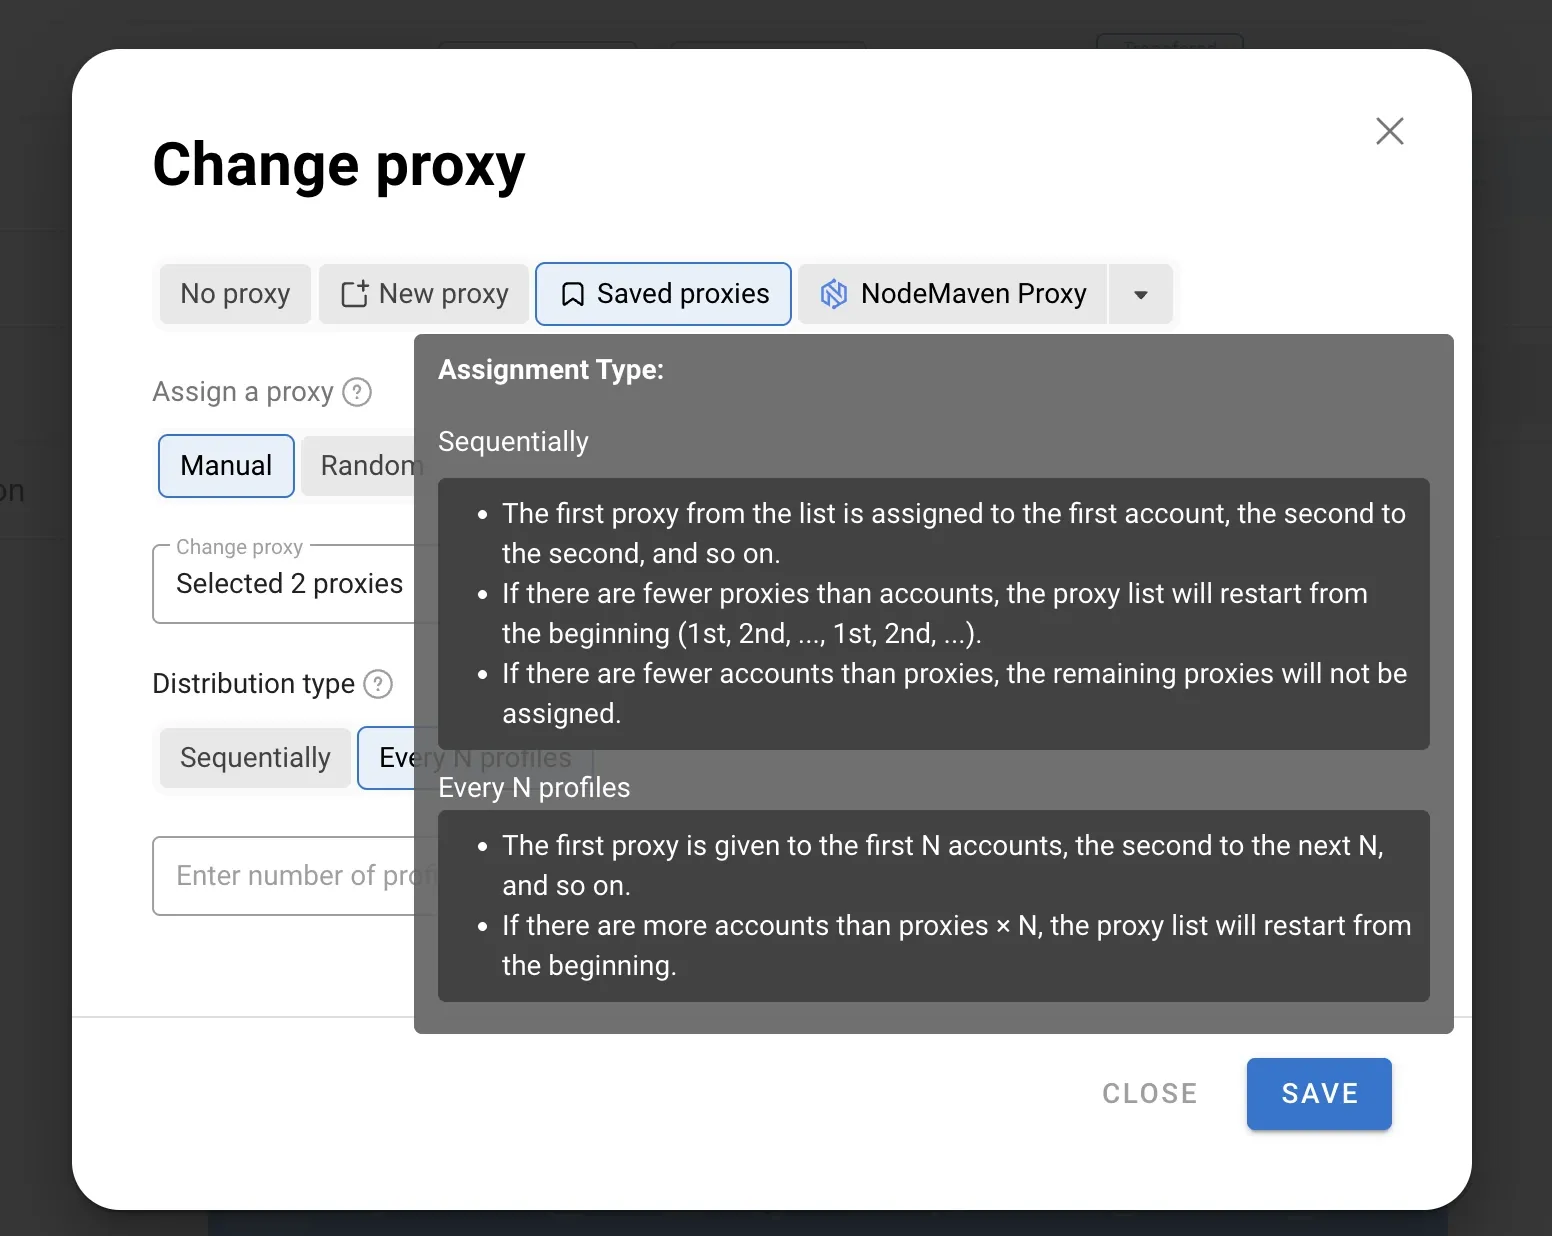
This saves time and reduces human error when scaling operations.
Why Dolphin Anty and Ping Proxies Work Well for Affiliate Marketing
The combination of Dolphin Anty and Ping Proxies is strong for several reasons:
- Consistency between fingerprint and IP: clean, geo-accurate proxies help your profiles look like real users.
- Stable sessions: sticky residential or static proxies ensure fewer logouts, blocks and CAPTCHA loops.
- Scalability: mass proxy generation combined with mass profile management is ideal for teams and large campaigns.
- Reliable geo targeting: you can run offers in specific regions without random IP changes or mismatched signals.
- Fewer bans and flags: high-quality proxies paired with isolated fingerprints reduce the chance of linked accounts.
- For affiliates, this means safer farming, smoother launching, and more predictable performance.
Conclusion
Managing proxies inside Dolphin Anty is straightforward, whether you're adding them manually, during profile creation, or in bulk. With a reliable proxy provider like Ping Proxies, you ensure clean IPs, stable sessions, and consistent fingerprints, which are crucial for safe and scalable multiaccounting.