How to Integrate Proxies and Automate on AdsPower?

AdsPower stands out as one of the best anti-detect browsers, offering curated features built for managing multiple online identities. If you’re using it for the first time and want to be all prepared when adding profiles, integrating proxies, testing proxy setup, and automating tasks, this guide has you covered.
How to Add Profiles in AdsPower?
We assume that you have finished the AdsPower sign-up process. If you haven’t, create an account and proceed to the AdsPower download page. Choose the desired operating system, download the setup file, and install AdsPower browser on your device.
Once done, follow the steps below to add profiles in AdsPower
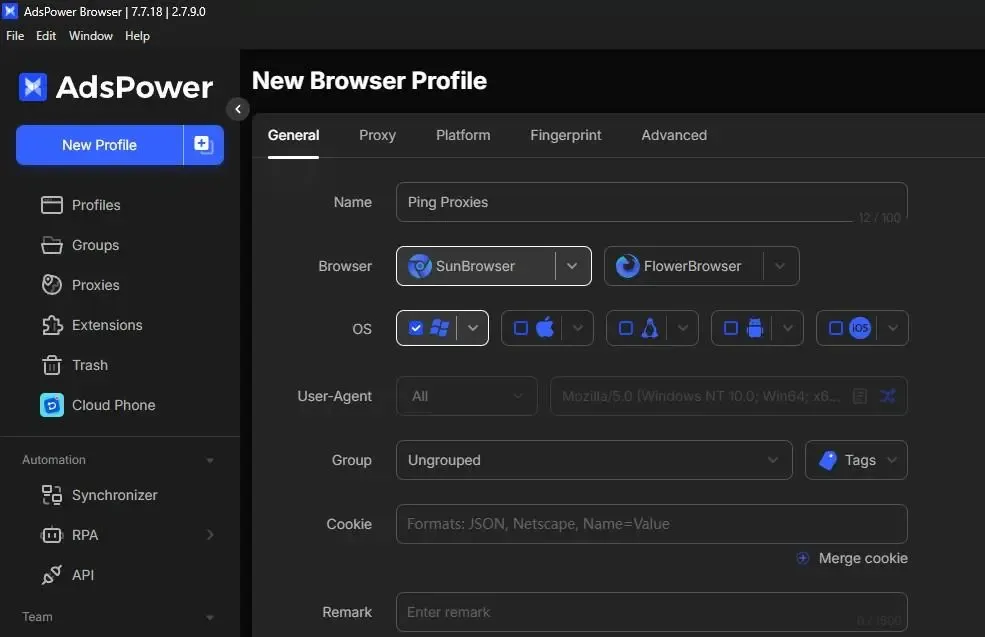
1. Open AdsPower, and by default, you will find the New Browser Profile loaded. If not, find the New Profile button and click on it to get started.
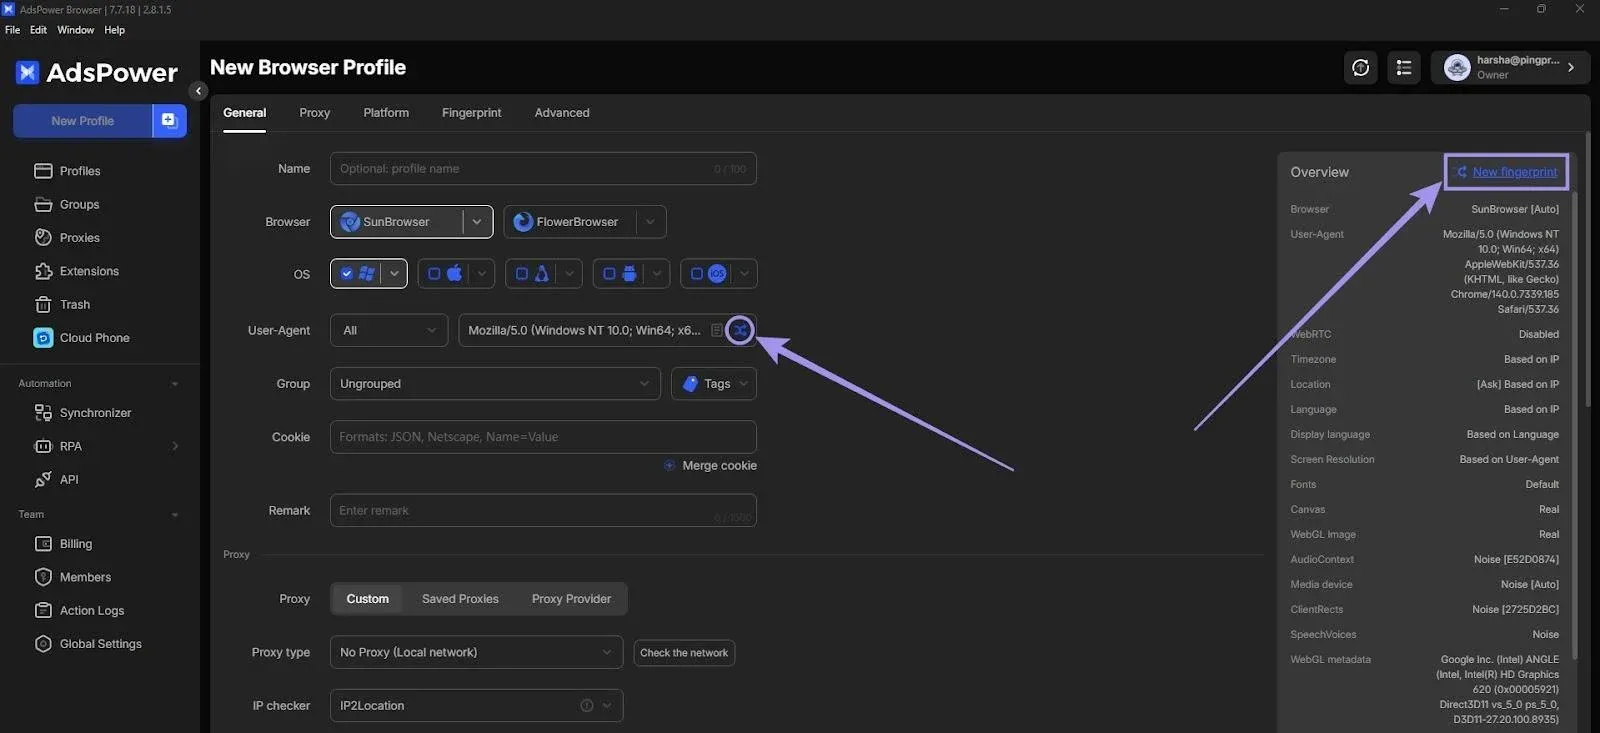
2. Start by naming your profile, then select Browser and OS. These three are enough to create a profile, but you may need to modify it later if the default options are not suited for your task.
3. AdsPower offers different user agents. To make it easier, there’s a "New Fingerprint" option to randomize the user agent without any hassle.
4. While you might not immediately use Group, they come in handy if you want to quickly reach a set of browser profiles all at once. Also, you can add Cookies and set Remarks.
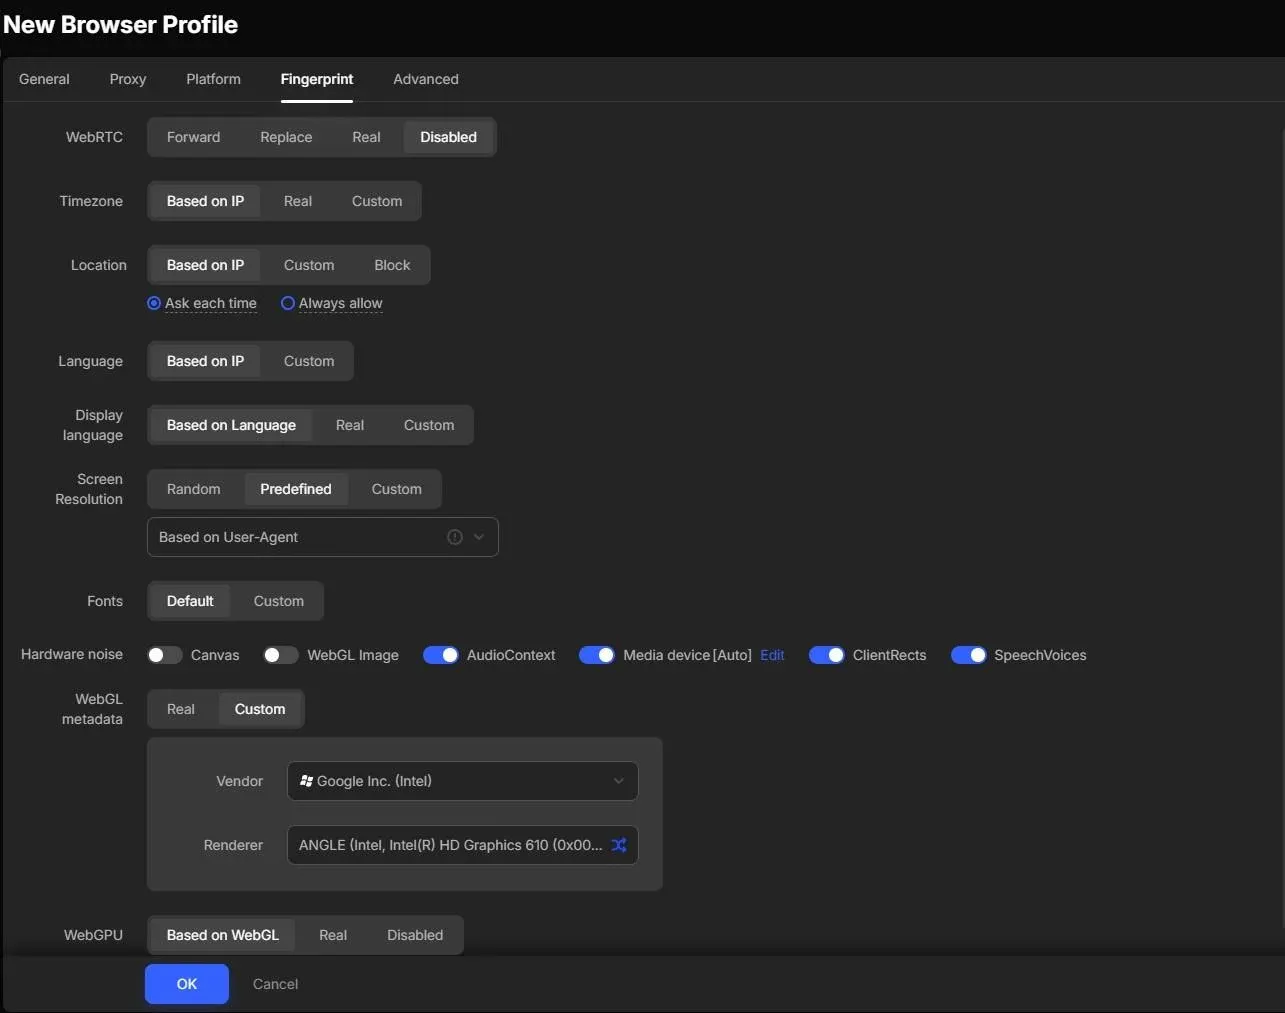
5. There’s also a dedicated Fingerprint section, where you can adjust different key factors such as WebRTC, Timezone, Location, WebGL metadata, WebGPU, Hardware acceleration, and more.
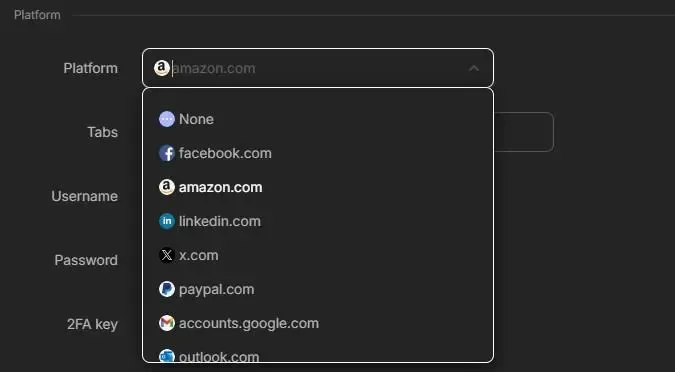
6. If you want a specific website with AdsPower, choose from the Platform dropdown or enter a custom URL. Also, you can save login details for easier access to that platform within the profile.
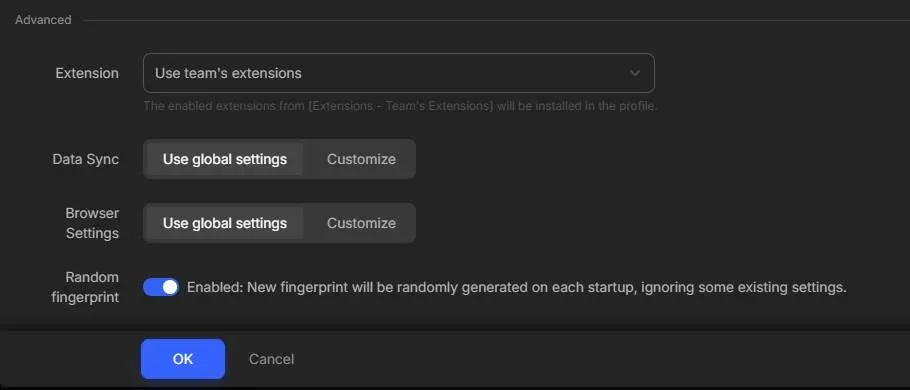
7. The final step left is to deal with the options under the Advanced tab. You can choose extensions, customize data sync, and browser settings while also having the ability to randomly generate a fingerprint on each startup by enabling Random fingerprint (great for the one-time profile).
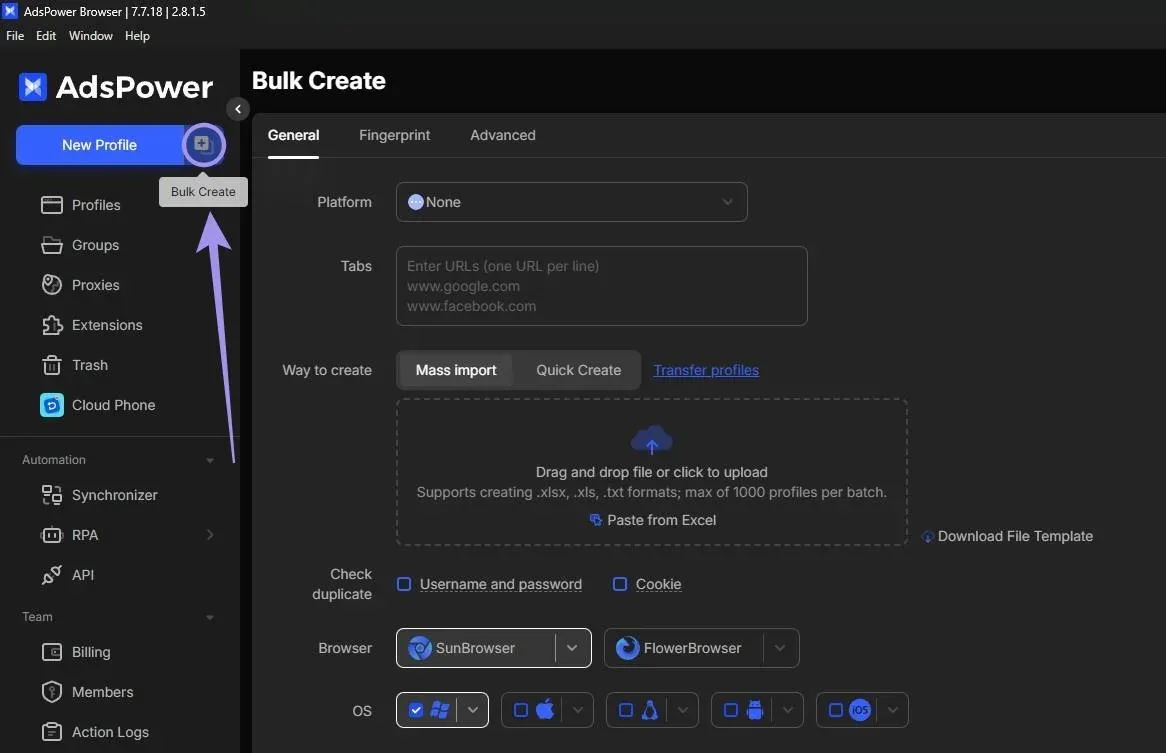
You can also bulk-create profiles with AdsPower. To create multiple items, simply click the Bulk Create button and enter the necessary details.
How to Integrate Proxies in AdsPower?
We have covered all sections under the New Browser Profile, except for the Proxy tab. Let's learn how to add proxies and put profiles to use.
Note: The steps below might vary depending on the proxy provider. Hence, our goal is to guide you through the process and demonstrate it using Ping Proxies, so you get a general idea of how to proceed, regardless of the proxy provider.
Generate Proxies with Ping Proxies
With Ping Proxies, generating proxies is a matter of just a few clicks. There is no need for CLI or complex manual inputs. We offer residential, ISP, and datacenter proxies. All you need to do is simply sign in and generate the proxy through the dashboard.
Not sure which proxy to choose? Here is a detailed comparison between datacenter and residential proxies. Find what best fits your needs.
Generate Static Proxies (Datacenter & ISP Proxies)
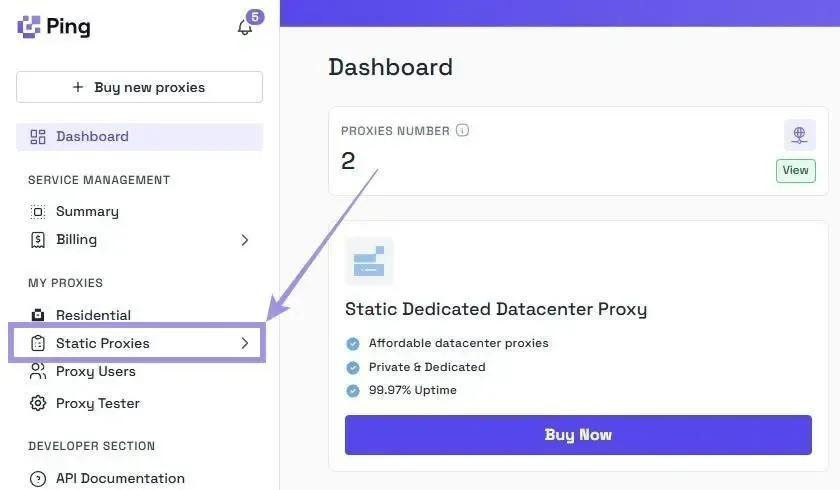
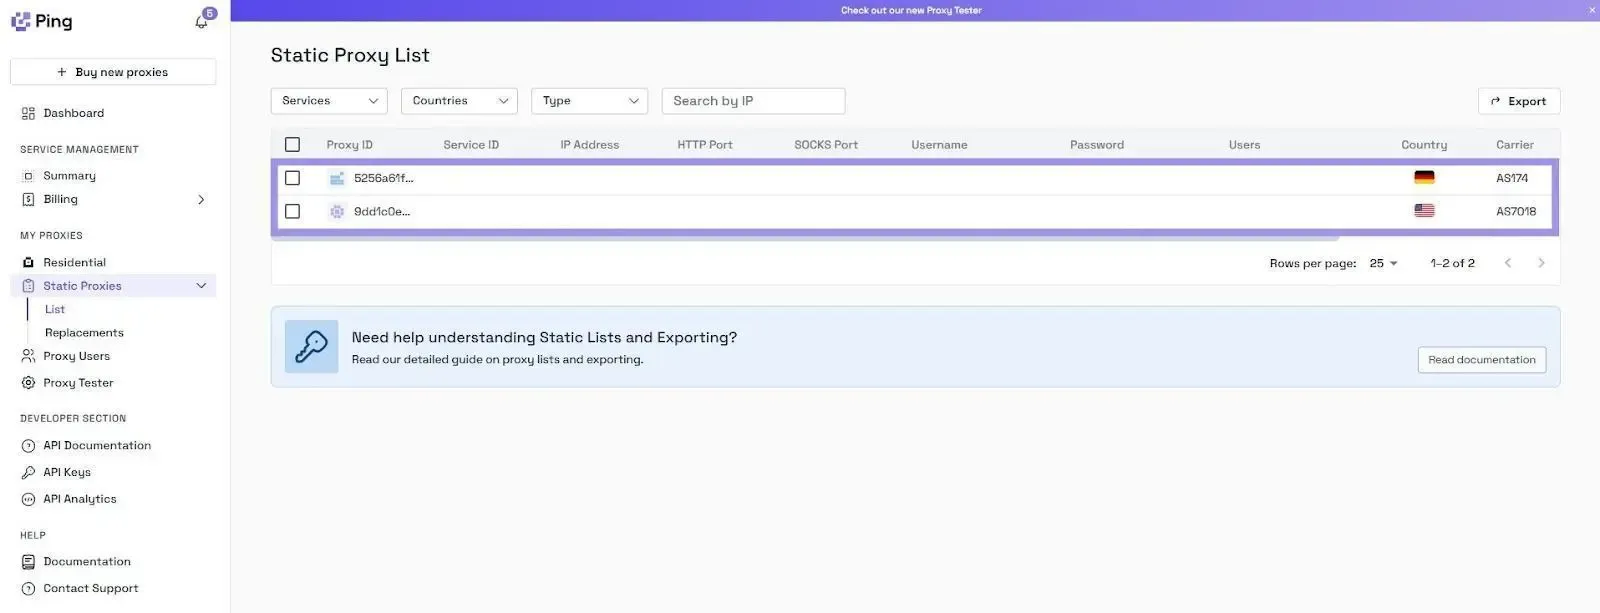
If you’ve purchased static proxies from us, click on the “Static Proxies” option under the “My Proxies” section on the left in the dashboard.
Your proxy list will be displayed with the IP address (hostname), port, username, and password. No generation is needed, just copy the credentials and you’re ready.
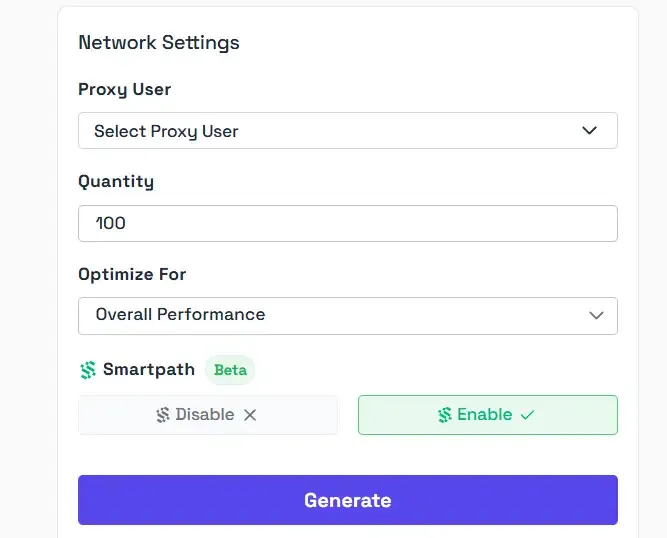
Generate Residential Proxies
Unlike static proxies, residential proxies involve a few more steps, primarily selecting the options to generate proxies that meet your needs. Here’s how our residential configurator makes it easier for you.
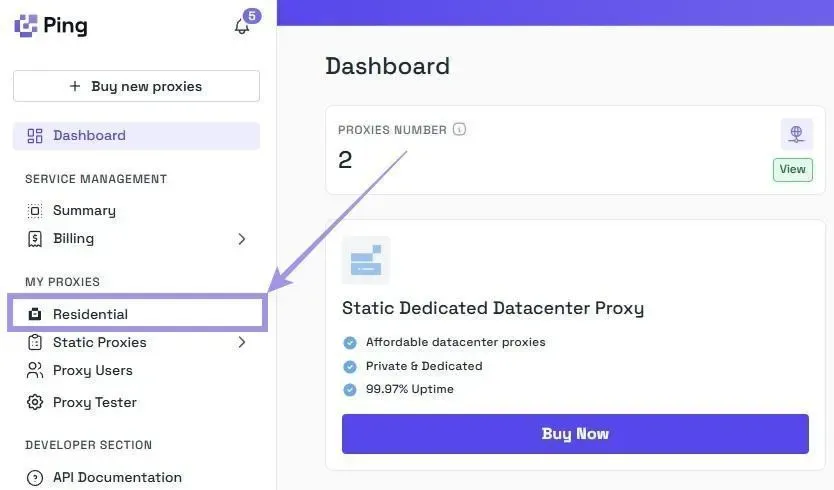
1. On the dashboard, navigate to the “My Proxies” section on the left and select the “Residential” option.
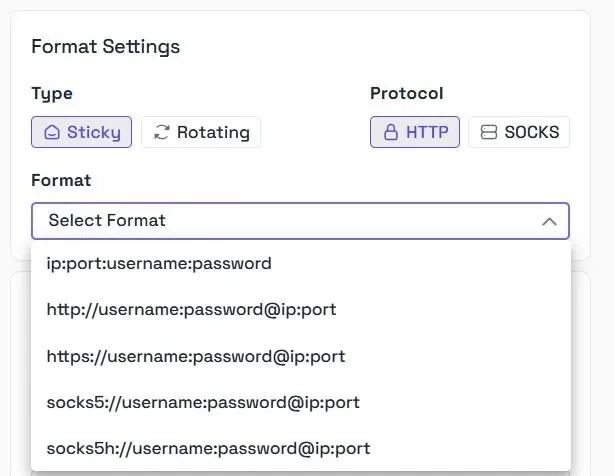
2. Start with these format settings. We offer both rotating and sticky residential proxies and support HTTP and SOCKS5 protocols. The best part is that you can choose from different formats without needing to modify them later.
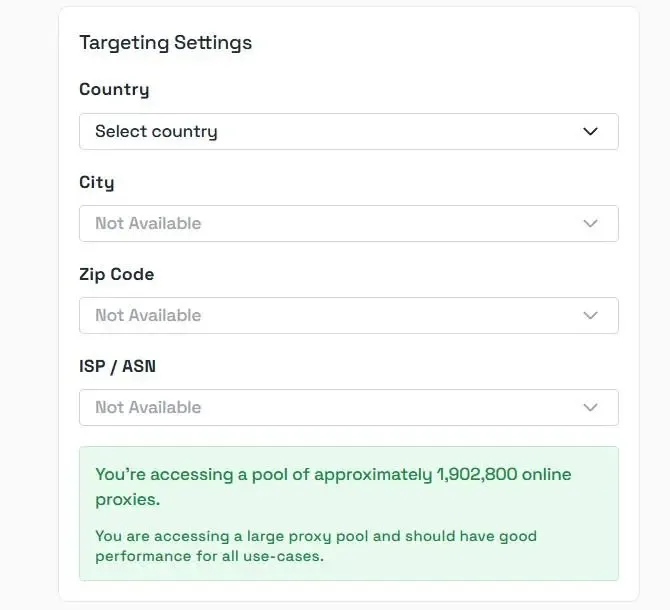
3. We offer the best advanced targeting settings, along with complete transparency regarding proxy availability in real time. You can select the country, city, zip code, and even ISP/ASN, if necessary.
4. Once you have selected all options, add the quantity and click on “Generate.” Your proxy list will appear in the format you selected. If you’re wondering what Smartpath is, it is a free in-house AI routing system that sends non-essential traffic via datacenter IPs. Enable it to reduce residential bandwidth and costs.
Now that the proxy is generated, understanding it is crucial to enter the details into AdsPower.
Example: residential.pingproxies.com:8523:123_xyz_c_us_s_NOTKR0UOC65RI6H5:abc123
All proxies generated follow the structure - (hostname:port_number:username_location:password)
Find it confusing? Here’s the breakdown of the example relating to the structure.
- Hostname: residential.pingproxies.com
- Port number: 8234
- Username & Location: 123_xyz_c_us_s_NOTKR0UOC65RI6H5
- Password: abc123
Note: Always add the location to the username for the sticky proxies. Failing to do so routes you to the incorrect location. Also, remember that broader targeting gives you a larger proxy pool.
Add and Test Proxies on AdsPower
Now that proxies are generated, all that is left is to add them to AdsPower and test them. Here are the steps for both.
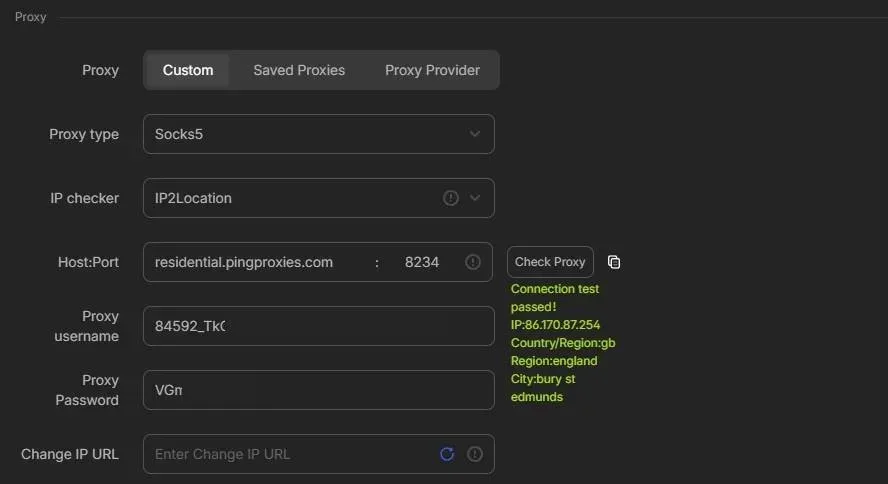
1. Navigate to the Proxy section in the New Browser Profile and fill in the proxy details in the respective fields as explained before.
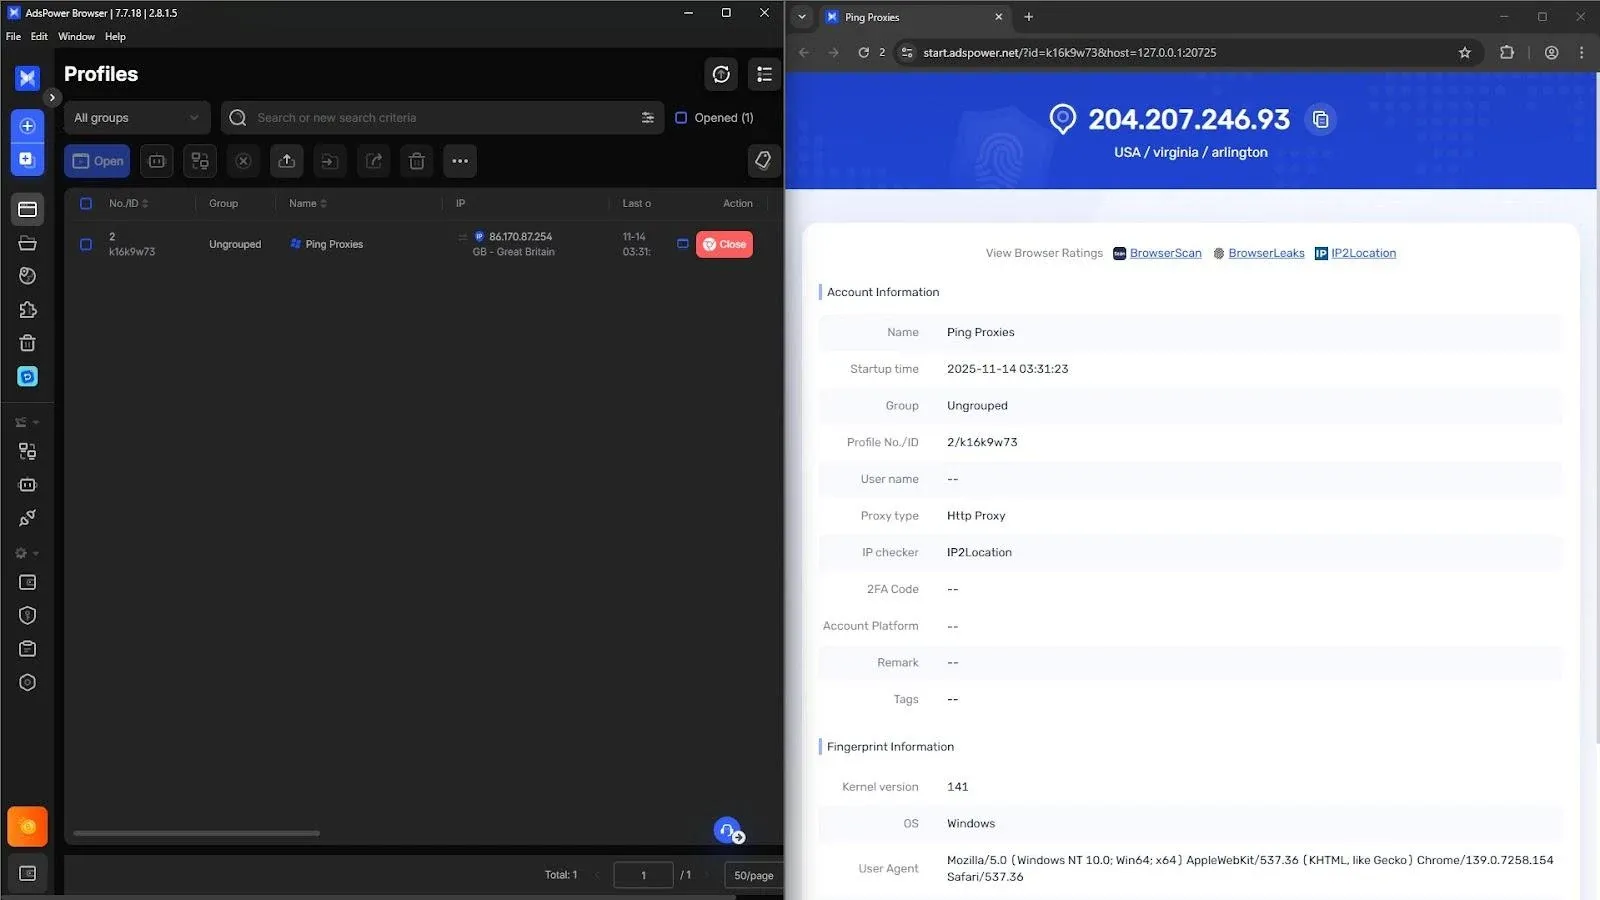
2. Once filled in, click Check Proxy. AdsPower will test the connection and display the IP and location if everything is correct
Pro Tip: If you’re worried about proxy generation, you can use our Proxy tester and test them before adding them to AdsPower.
3. Alternatively, you can add proxies from the Proxies option present in the left menu. Click the Add Proxy button.
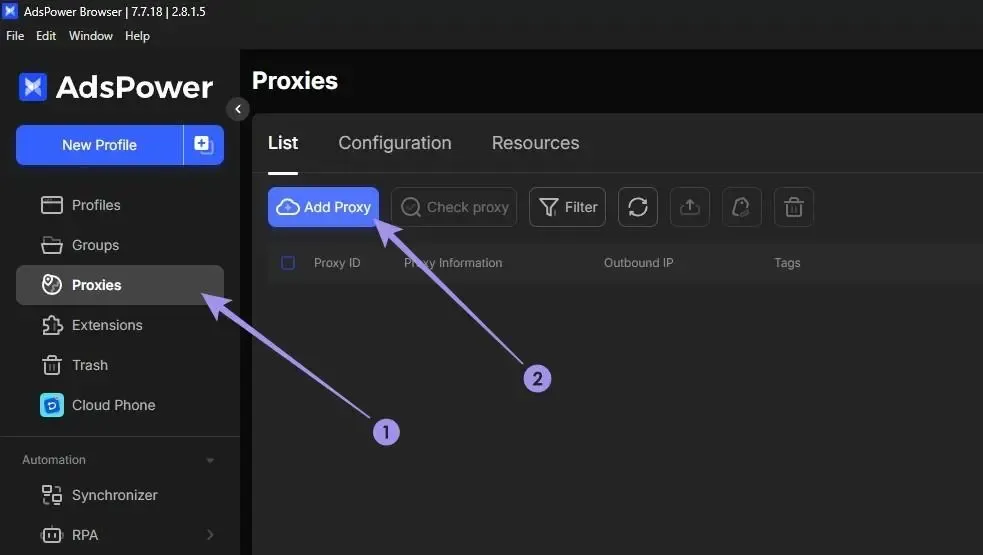
4. We recommend adding proxies this way, as AdsPower auto-detects the type, host, username, port, and password for you. Additionally, you can copy and paste multiple proxies and also test all at once (bulk proxy integration).
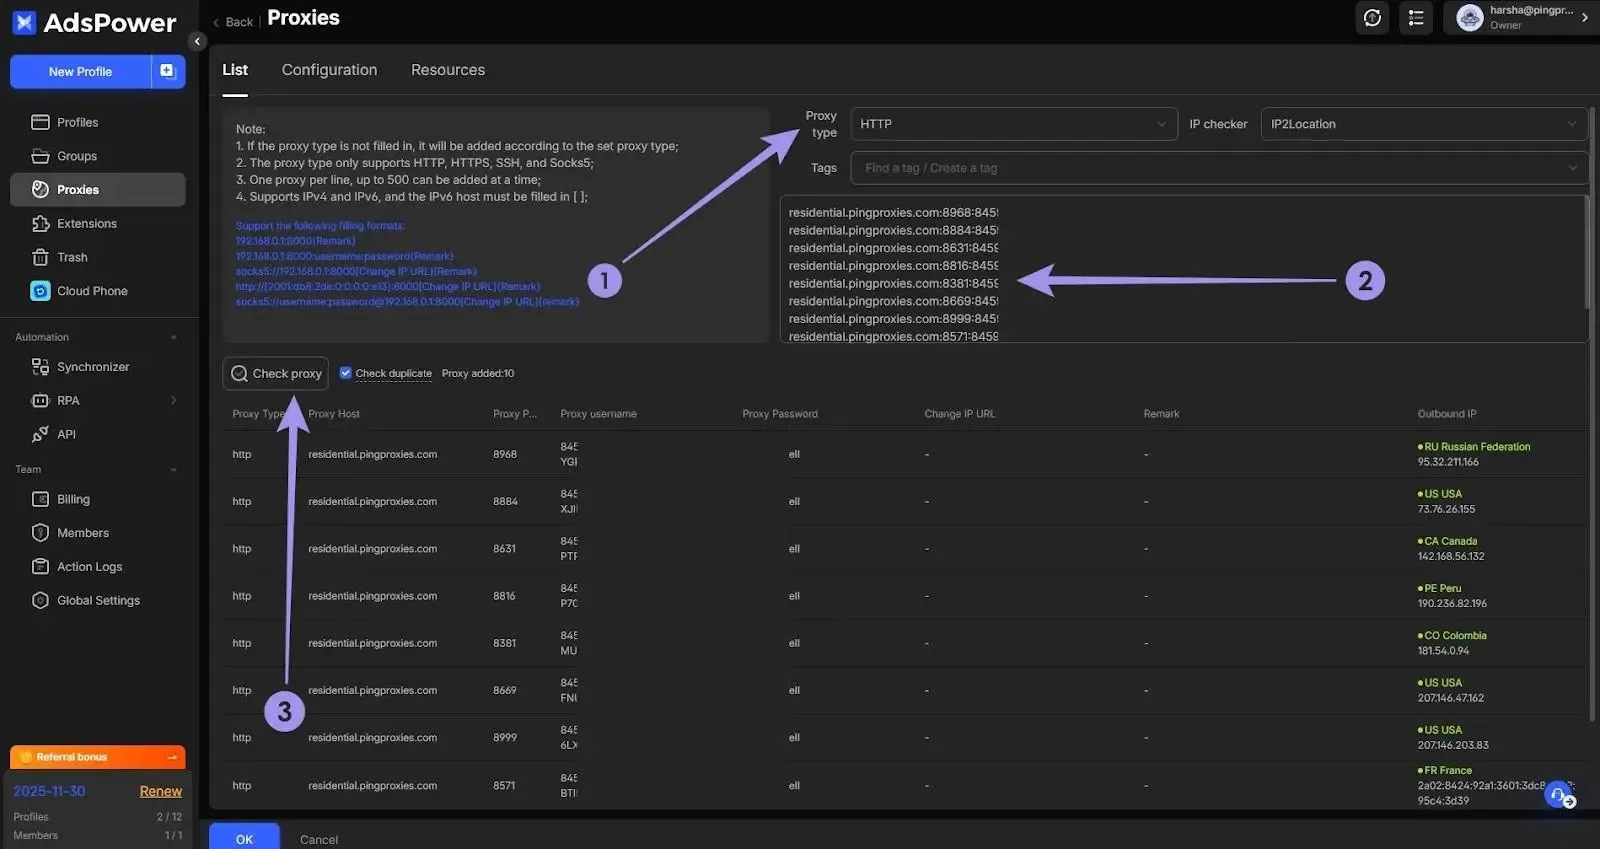
5. However, you may need to assign the proxy manually to the profile in the Profiles section. Once done, click Open, and you can see that AdsPower loads the profile and displays the set details. If done right, you will find the selected options and proxy.
How to Automate Tasks With AdsPower?
With the profiles ready and proxies set up, you can start using AdsPower’s automation tools. You can perform various tasks, such as managing large sets of accounts, running bulk actions, keeping your workflow organized, and more.
Let’s quickly walk through each and how they can speed up your repetitive tasks.
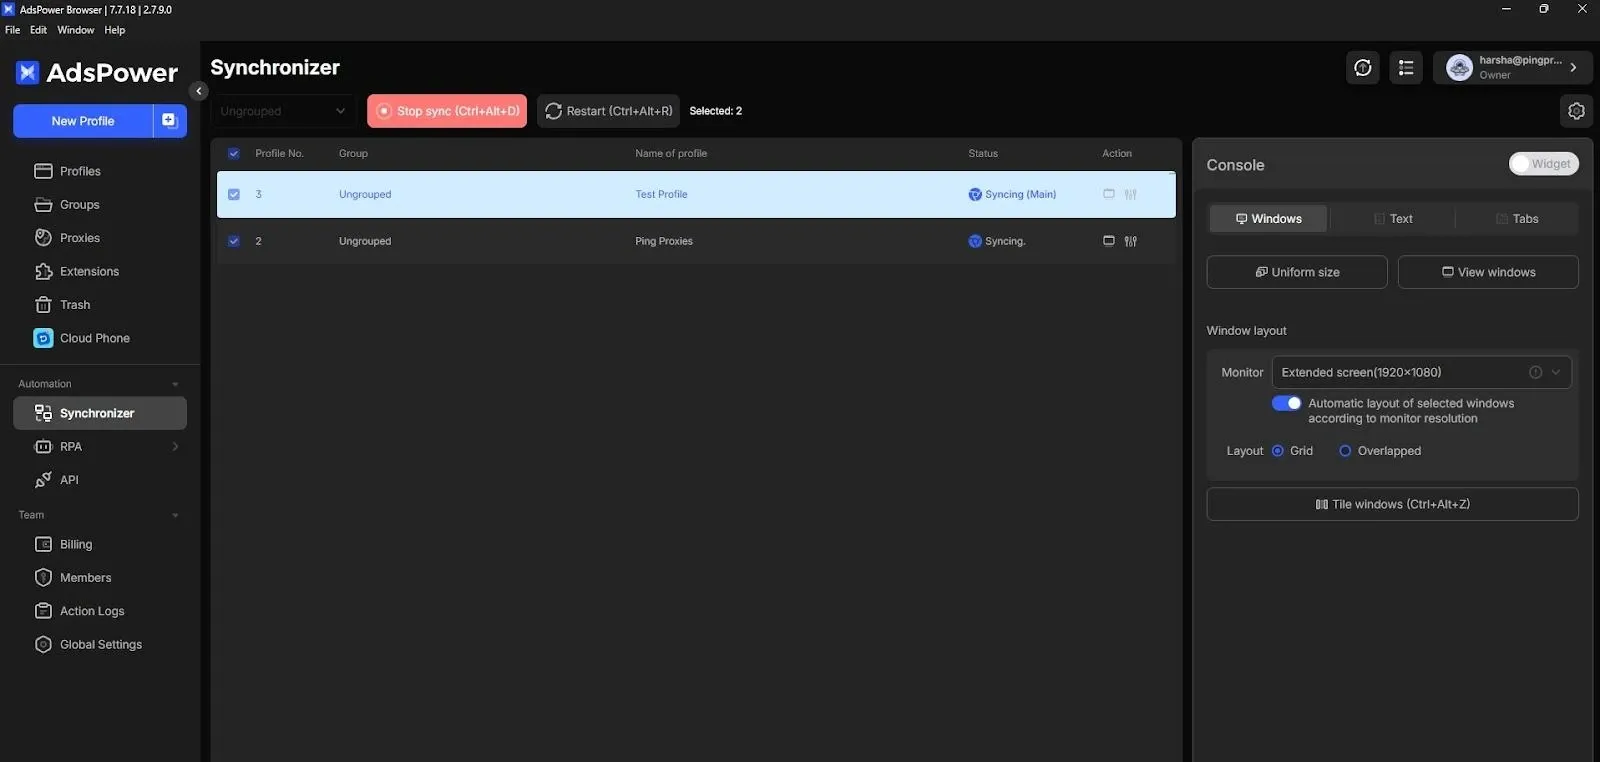
Synchronizer
The Synchronizer helps you control multiple browser windows simultaneously. When you click or scroll in one window, AdsPower repeats the same action across all selected profiles. This saves time when working with multiple accounts and requires them to follow the same steps.
You simply select the profiles you want to sync, open the Synchronizer panel, choose the actions you want to mirror, and start the sync. AdsPower will repeat your movements across each selected window.
RPA (Robotic Process Automation)
RPA lets you record actions and replay them automatically. You can automate logins, posts, clicks, and other routines without doing them one by one. It is helpful when you manage multiple accounts or want to reduce the time spent on repetitive tasks.
You can open the RPA panel, record your actions inside a profile, save the script, and run it on one or many profiles.
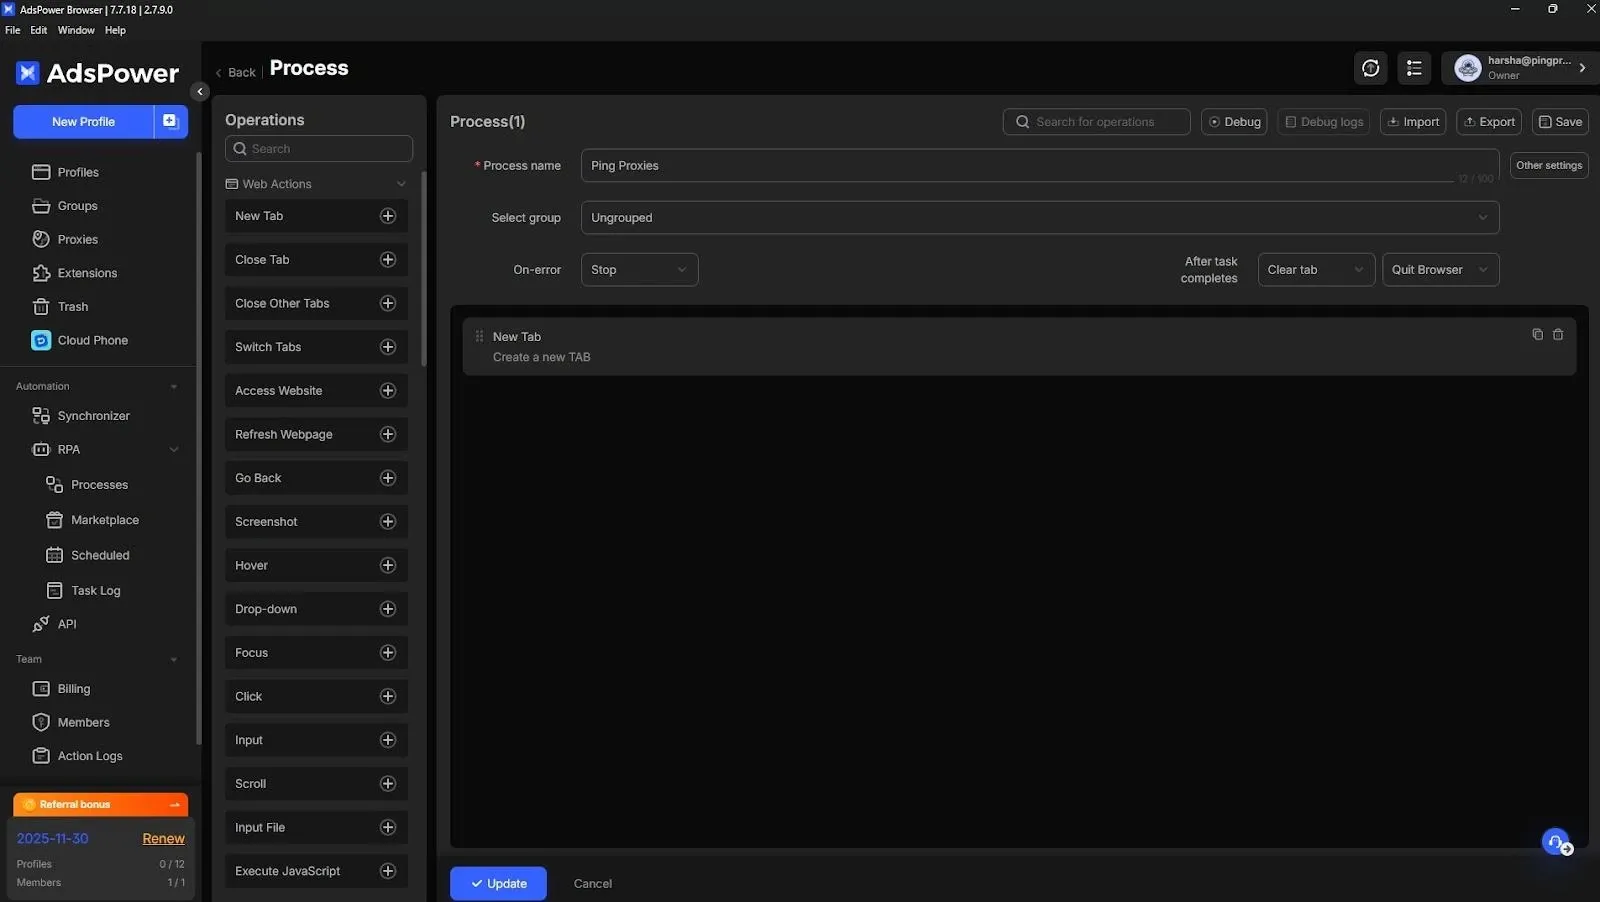
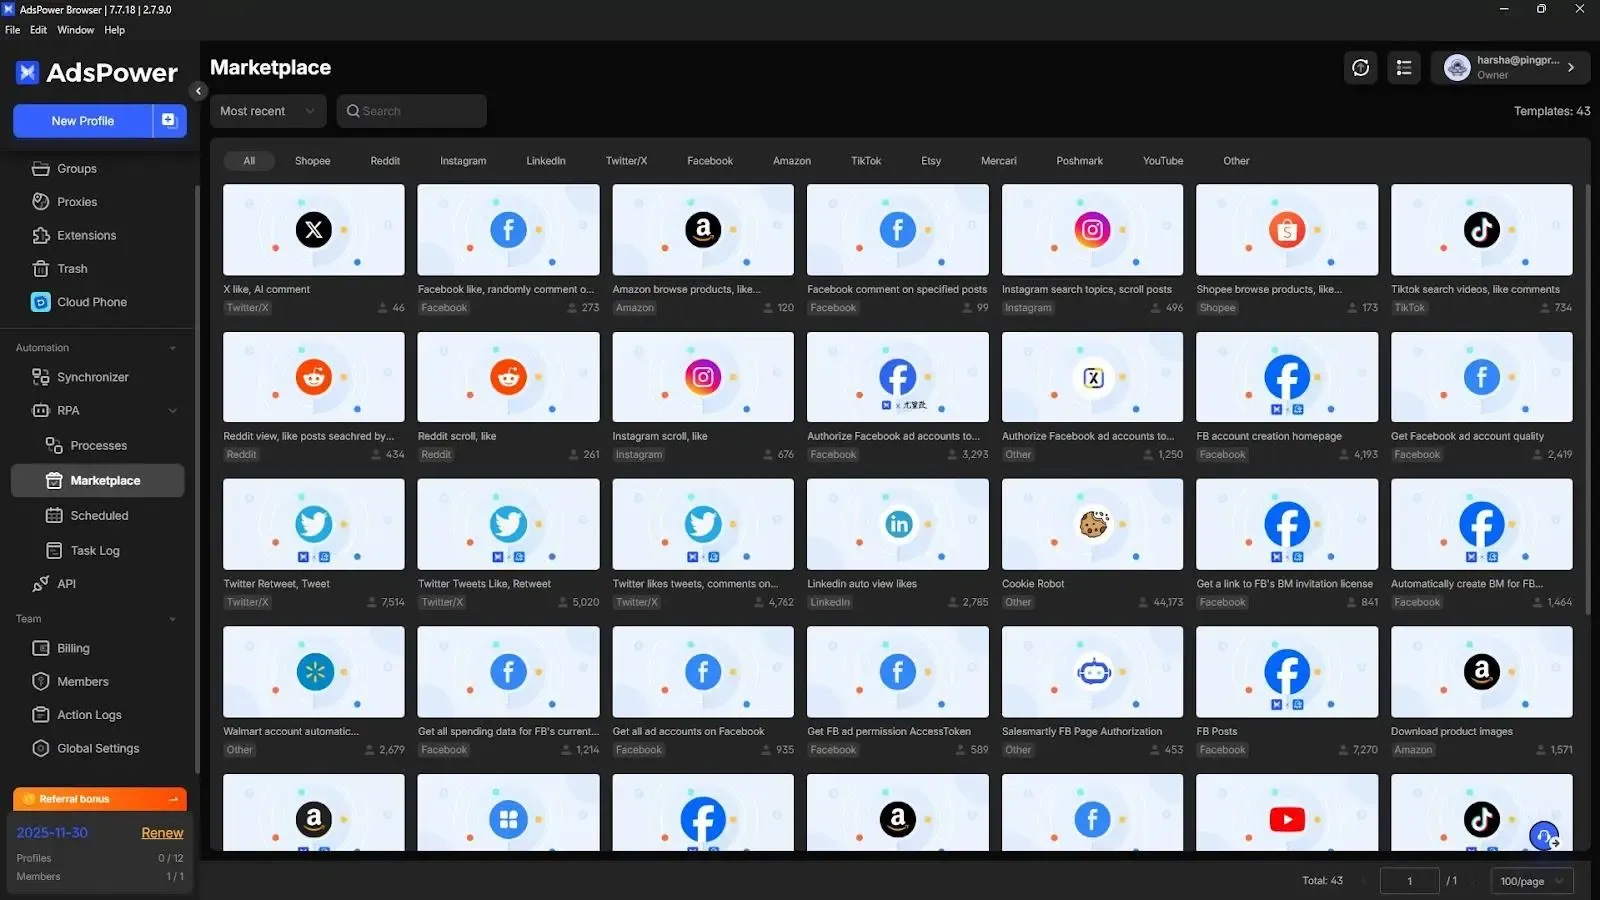
Considering the complexity that might come with creating custom RPA templates, AdsPower also offers presets to choose from. While you may need to make a few adjustments, most of the complex part is already taken care of.
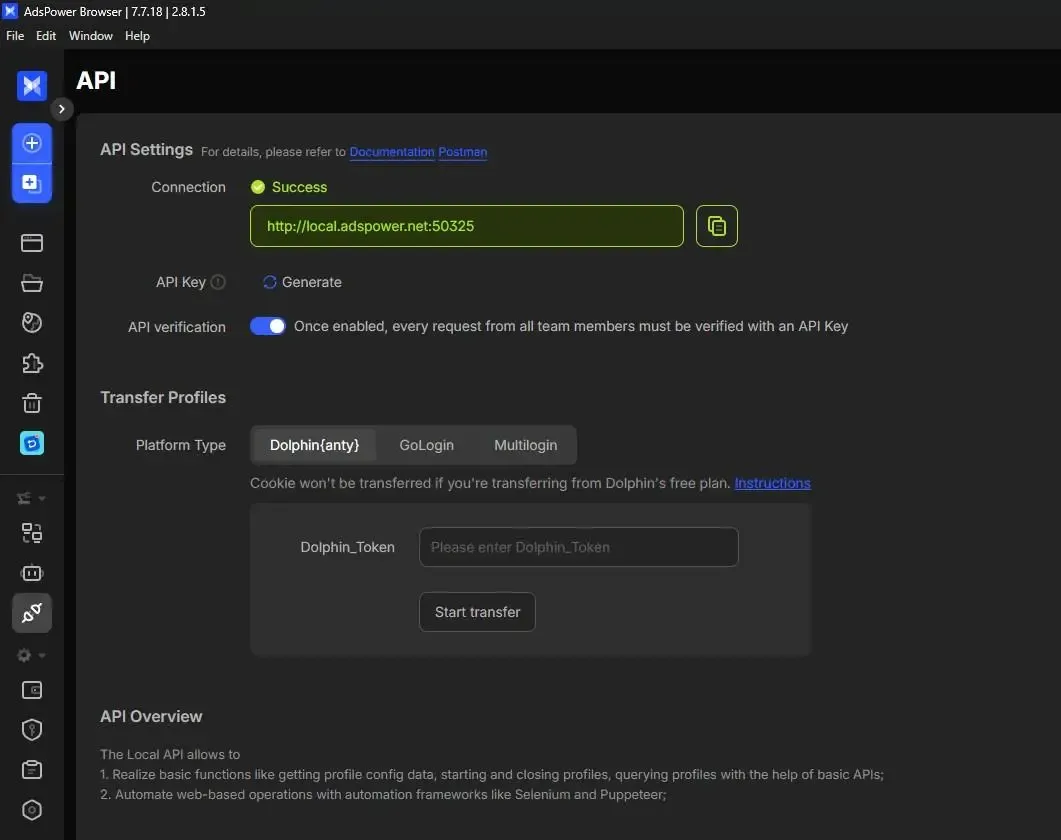
Local API
The Local API provides a way to manage AdsPower through scripts, allowing you to automate work at scale. To get started, simply open the Local API page, copy your local endpoint, and use it within your script or tool to send commands to create profiles, assign proxies, or launch sessions programmatically.
AdsPower Teams
AdsPower also offers Team options through which you can organise shared work by controlling permissions and default rules. Open the Global Settings panel, add team members, adjust access levels, set your default fingerprint or browser rules, and save them so every new profile follows the same layout.

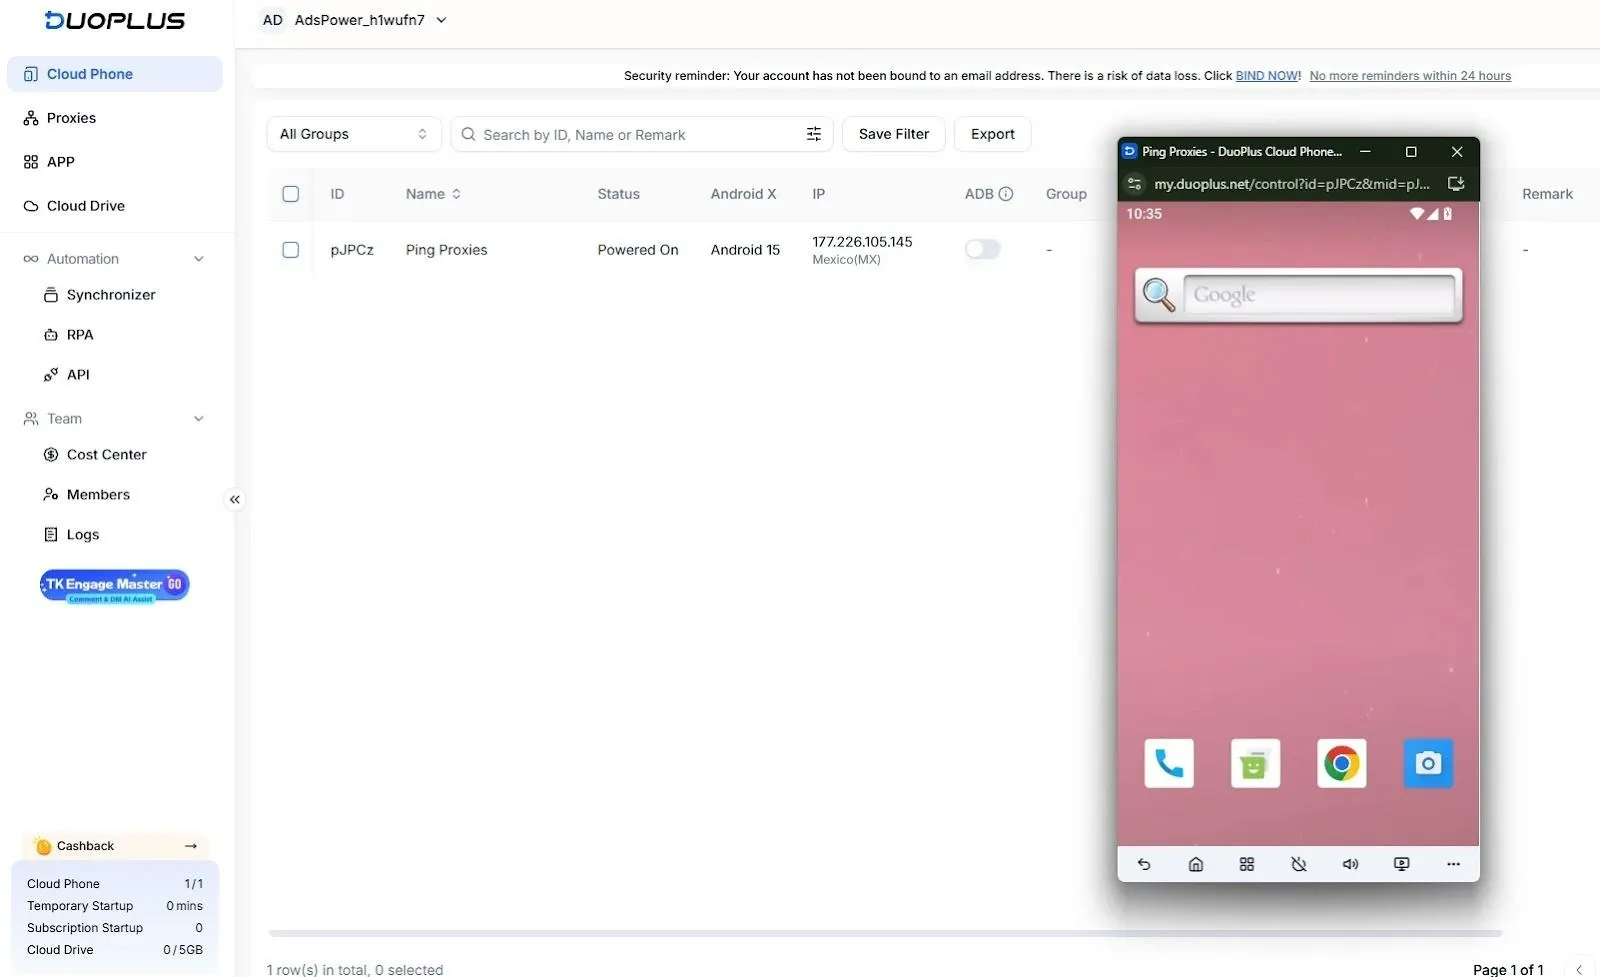
What is AdsPower Cloud Phone (DuoPlus)?
AdsPower has introduced Cloud Phone (DuoPlus) as another helpful option for users who work with mobile-based platforms. It provides access to real ARM mobile devices that run in the cloud, complete with GPS and SIM data from various regions.
Let us say you use the anti-detect browser for web accounts, but you also need to run mobile apps like TikTok, WhatsApp, or other tools that depend on a mobile environment.
Cloud Phone allows you to do that without purchasing physical devices. You can open multiple phones at once, install apps, switch locations, and manage mobile accounts the same way you work with browser profiles.